Angular techniques: Improve submit button’s UX by NOT disabling it.
Angular makes working with forms a blast, but it also promotes one unfortunate form behaviour that is not the most user friendly. Thankfully it is also really easy to fix. Let’s see what is the issue, shall we?
1. The problem:
The thirst thing I have learnt when building Angular forms is that I can track their validation states very easily:

So I’ve quickly implemented my first form and ended up with something like the one you can see in the screenshot below:

What is wrong with this picture?
It shows the initial state of the form — right after a user navigates into the view… full of validation errors. We can’t have our forms screaming errors at users when they haven’t even started interacting with them, right?
2. The (imperfect) typical solution:
So I thought: Ooh, now I know what these other form controls properties that Angular gives us are for! Let’s use .dirty or .touched state to only display fields’ validations when user interacted with them:

After adding .dirty state check the form is slightly better…
Let’s try this out:

This behaviour seems to be better — initially, when the form loads, the user sees no errors and only after he started interacting with a field the message will appear.
Still, there is one last problem, and that’s the one many developers miss: the submit button.
A very simple and common solution in Angular forms is to make the button disabled based on the form’s validity:
<button [disabled]="formRef.invalid"></button>
When you make the submit button disabled and there are no errors displayed, users won’t know why they can’t click the button!
Sure, with small forms it’s easy to figure out. But take a more complex one, possibly with some data preloaded, where usually not all fields are required… it can stop being obvious for the user what specifically is wrong when the only indication is the submit button’s state.
3. The final solution:
So in the olden days, in the “classic” web applications, servers were often the only places for validation logic. Nothing on the frontend was preventing user form submitting the form to the backend, and the backend would return a page will all validation messages that described which fields were missing.
Now, I’m not advocating that we should remove the frontend validation — having an instant feedback instead of doing a roundtrip to a server is definitely a great thing. So what’s solution we’ll strive for?

- Initially we don’t show user any errors (a.k.a. “innocent until proven guilty😉 )
- We allow user to click the submit button, and when he does this when not all validation rules are being met, only then we will show the errors.
Implementation:
This is a behaviour that we will likely want to use throughout our application so we will implement it as a directive :
- we will want to add it on submit buttons and use instead of
(click)events for saving forms - the directive needs to know about the form we are working with — the obvious way (but not the only one, read on) is to pass it as an
@Input() - the directive will listen for a click on the button element via
@HostListener('click') - when a click happens the directive will loop through all controls of the form and run
markAsDirty()ormarkAsTouched()so that the validation messages displaying logic will be triggered - if the form is valid the click will also make the directive emit the event so that we know we can send the form
The code:

The usage:

So whenever we want to use this directive we now need to pass a reference to the form and set a success callback.
Not that bad. If we could only make it even better…
Improved solution:
We can actually make the directive figure out the form it’s in from Angular’s dependency injection mechanism and skip having to define the input altogether! Look at what’s happening in the constructor:

The form our directive is placed in is now injected instead passing via @Input()
Now our html code gets down to this:

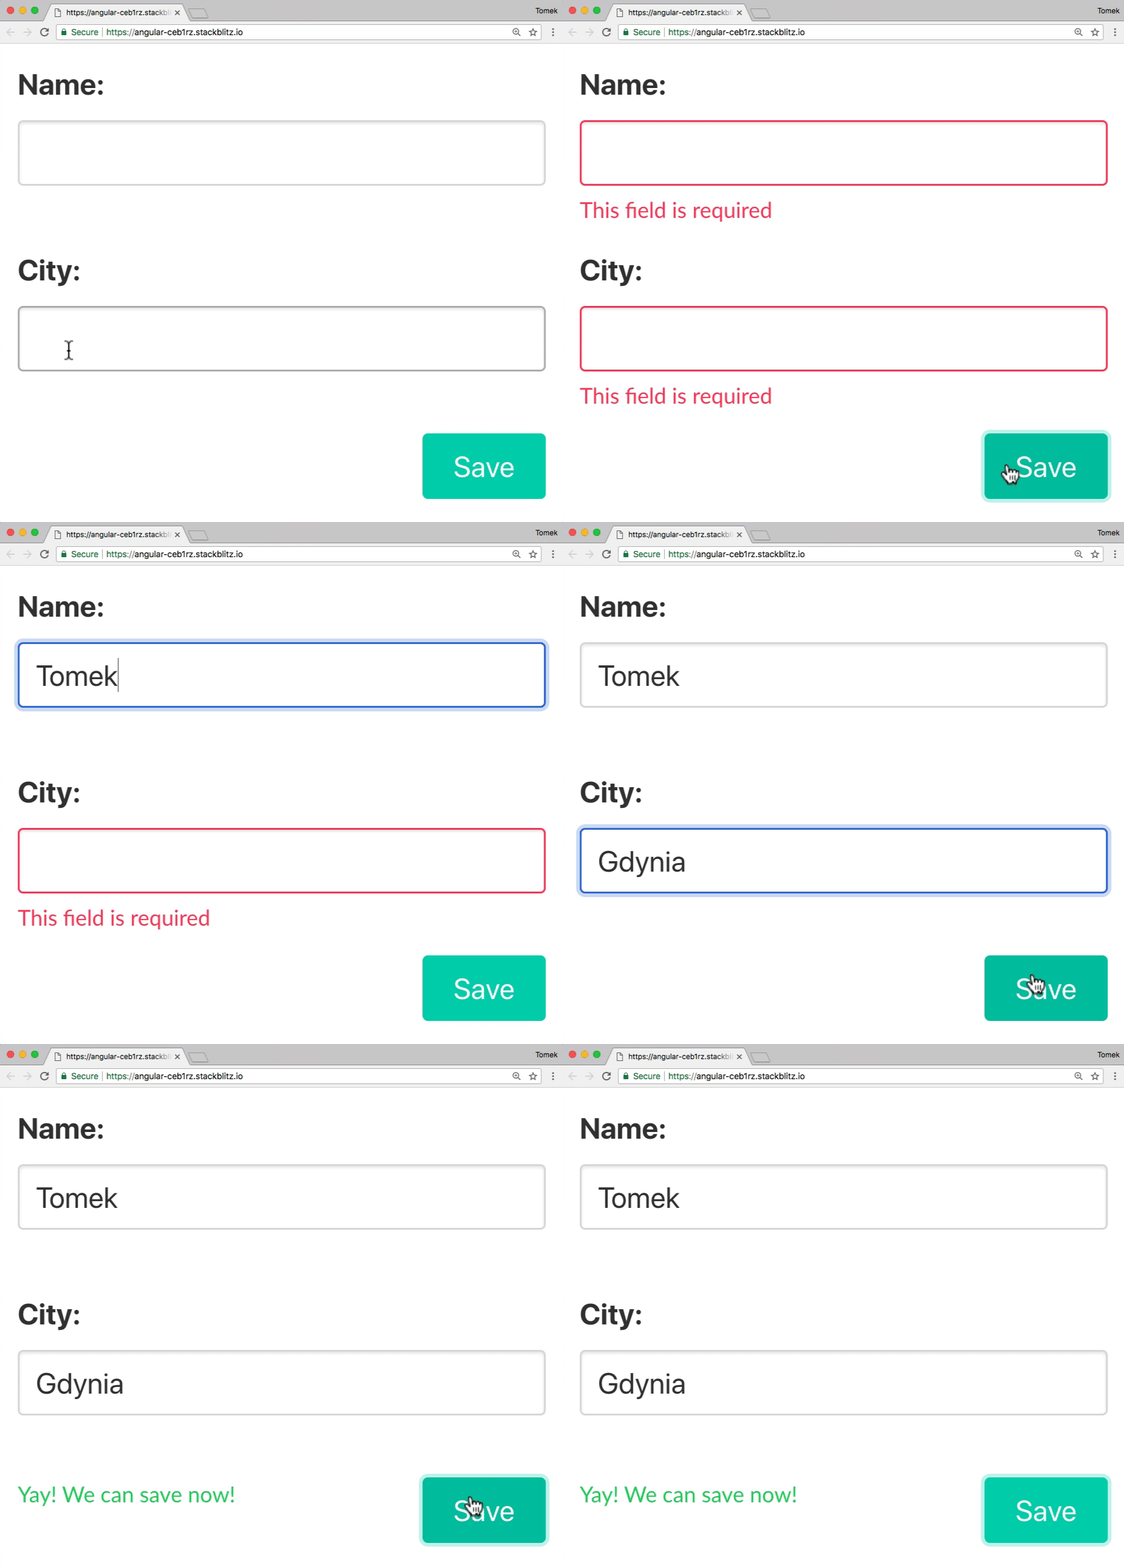
This is literally as simple as it can be. And this is the form in action:

See the full code and the working example in the StackBlitz sandbox.
Have you learned something new?
If so, you can follow me on Twitter (@sulco) so you won’t miss future posts!
