
How to build an Electron app using Create React App and Electron Builder
I recently decided to build a desktop app to download and archive all my Google Photos. I'm really paranoid about loosing all my pics. Google had a few options but they all had their problems.
If you want to use the app to download and archive all your Google Photos you can download it here OSX and here WIN.
I decided to use Electron and React. This stack was really fun to work on and the application turned out nice.
In this blog I'll share my setup and discuss a few gotchas I ran into.
I leveraged these blogs when doing my initial development, 1 & 2 (thanks guys).
OK, lets learn how to build an Electron app using Create React App, and package it for distribution using Electron Builder.
Lets take a look at the entire stack and then get started. If you want to skip right to the sample app, feel free.
The stack
Electron is a framework for creating native applications with web technologies like JavaScript, HTML, and CSS. In our case we'll be using React.
React is JavaScript library for building user interfaces... and so much more.
To make the React setup easier we're going to use Create React App. Create React App (CRA) is awesome because it saves buckets-of-time and eliminates config hell.
Create React App is a tool (built by developers at Facebook) that gives you a massive head start when building React apps. It saves you from time-consuming setup and configuration. You simply run one command and Create React App sets up the tools you need to start your React project.
Rescripts allows us to customize the CRA setup without ejecting.
Ejecting CRA is something you really want to avoid, because you will no longer benefit from the future improvements to CRA.
Electron Builder is used to package our desktop app for distribution.
Dev Setup
Create our new app using Create React App.
npx create-react-app my-app
cd my-app
Add Electron.
yarn add electron electron-builder --dev
Add some dev tools we'll need.
yarn add wait-on concurrently --dev
yarn add electron-is-dev
Create a new file, public/electron.js, with the following contents.
const electron = require('electron');
const app = electron.app;
const BrowserWindow = electron.BrowserWindow;

const path = require('path');
const isDev = require('electron-is-dev');

let mainWindow;

function createWindow() {
  mainWindow = new BrowserWindow({width: 900, height: 680});
  mainWindow.loadURL(isDev ? 'http://localhost:3000' : `file://${path.join(__dirname, '../build/index.html')}`);
  if (isDev) {
    // Open the DevTools.
    //BrowserWindow.addDevToolsExtension('<location to your react chrome extension>');
    mainWindow.webContents.openDevTools();
  }
  mainWindow.on('closed', () => mainWindow = null);
}

app.on('ready', createWindow);

app.on('window-all-closed', () => {
  if (process.platform !== 'darwin') {
    app.quit();
  }
});

app.on('activate', () => {
  if (mainWindow === null) {
    createWindow();
  }
});
Add the following command to the package.json scripts tag.
"electron-dev": "concurrently \"BROWSER=none yarn start\" \"wait-on http://localhost:3000 && electron .\""
This script will just wait until CRA runs the React app on localhost:3000 before starting Electron.
Add the following main tag to package.json.
"main": "public/electron.js",
Right now your package.json should look something like this.
{
  "name": "my-app",
  "version": "0.1.0",
  "private": true,
  "dependencies": {
    "electron-is-dev": "^1.0.1",
    "react": "^16.8.3",
    "react-dom": "^16.8.3",
    "react-scripts": "2.1.5"
  },
  "main": "public/electron.js",
  "scripts": {
    "start": "react-scripts start",
    "build": "react-scripts build",
    "test": "react-scripts test",
    "eject": "react-scripts eject",
    "electron-dev": "concurrently \"BROWSER=none yarn start\" \"wait-on http://localhost:3000 && electron .\""
  },
  "eslintConfig": {
    "extends": "react-app"
  },
  "browserslist": [
    ">0.2%",
    "not dead",
    "not ie <= 11",
    "not op_mini all"
  ],
  "devDependencies": {
    "concurrently": "^4.1.0",
    "electron": "^4.0.6",
    "electron-builder": "^20.38.5",
    "wait-on": "^3.2.0"
  }
}
At this point you can run your new app in development mode via:
yarn electron-dev
You should see something like this:
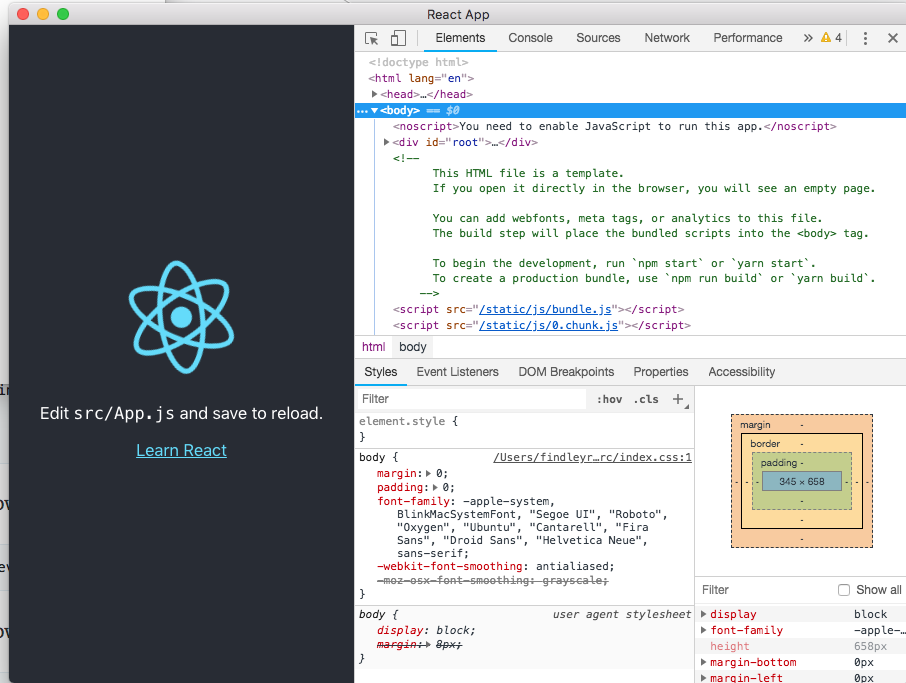
If you see that image, congratulations you're ready to develop your app. Yay!
Now, if you need to access the fs module like I did, you'll quickly hit the Module not found error. See here.
To solve this we need to use the electron-renderer as the Webpack target... but we don't want to eject CRA to do it. So we use Rescripts. Let me show you.
First, install Rescripts.
yarn add @rescripts/cli @rescripts/rescript-env --dev
Then, change the scripts tags in package.json from this...
"start": "react-scripts start",
"build": "react-scripts build",
"test": "react-scripts test",
to this.
"start": "rescripts start",
"build": "rescripts build",
"test": "rescripts test",
Now add a new file called .rescriptsrc.js with the following contents:
module.exports = [require.resolve('./.webpack.config.js')]
Finally add another new file called .webpack.config.js with the following contents:
// define child rescript
module.exports = config => {
  config.target = 'electron-renderer';
  return config;
}
Now you can use the fs module, no worries.
Package Setup
Awesome, now we're ready to package our app.
First, add Electron Builder & Typescript:
yarn add electron-builder typescript --dev
CRA, by default, builds an index.html that uses absolute paths. This will fail when loading it in Electron. There is a config option to change this.
Set the homepage property in package.json.
"homepage": "./",
Next lets add the new electron-pack command which will package the builds.
Add the following to the scripts tag in package.json.
"postinstall": "electron-builder install-app-deps",
"preelectron-pack": "yarn build",
"electron-pack": "build -mw"
"postinstall": "electron-builder install-app-deps" will ensure that your native dependencies always match the electron version.
"preelectron-pack": "yarn build" will build the CRA.
"electron-pack": "build -mw" packages the app for Mac (m) and Windows (w).
Before we can run this command we have to configure Electron Builder.
Add the following to package.json.
"author": {
  "name": "Your Name",
  "email": "your.email@domain.com",
  "url": "https://your-website.com"
},
"build": {
  "appId": "com.my-website.my-app",
  "productName": "MyApp",
  "copyright": "Copyright © 2019 ${author}",
  "mac": {
    "category": "public.app-category.utilities"
  },
  "files": [
    "build/**/*",
    "node_modules/**/*"
  ],
  "directories": {
    "buildResources": "assets"
  }
}
You can see all the Electron Builder options here.
You will also want to create a directory called assets where you will add your app icons. Check here to see the formats for these icons.
Here is what the entire package.json looks like.
{
  "name": "my-app",
  "description": "Electron + Create React App + Electron Builder",
  "version": "0.1.0",
  "private": true,
  "author": {
    "name": "Your Name",
    "email": "your.email@domain.com",
    "url": "https://your-website.com"
  },
  "build": {
    "appId": "com.my-website.my-app",
    "productName": "MyApp",
    "copyright": "Copyright © 2019 ${author}",
    "mac": {
      "category": "public.app-category.utilities"
    },
    "files": [
      "build/**/*",
      "node_modules/**/*"
    ],
    "directories": {
      "buildResources": "assets"
    }
  },
  "dependencies": {
    "electron-is-dev": "^1.0.1",
    "react": "^16.8.3",
    "react-dom": "^16.8.3",
    "react-scripts": "2.1.5"
  },
  "homepage": "./",
  "main": "public/electron.js",
  "scripts": {
    "start": "rescripts start",
    "build": "rescripts build",
    "test": "rescripts test",
    "eject": "react-scripts eject",
    "electron-dev": "concurrently \"BROWSER=none yarn start\" \"wait-on http://localhost:3000 && electron .\"",
    "postinstall": "electron-builder install-app-deps",
    "preelectron-pack": "yarn build",
    "electron-pack": "build -mw"
  },
  "eslintConfig": {
    "extends": "react-app"
  },
  "browserslist": [
    ">0.2%",
    "not dead",
    "not ie <= 11",
    "not op_mini all"
  ],
  "devDependencies": {
    "@rescripts/cli": "^0.0.10",
    "@rescripts/rescript-env": "^0.0.5",
    "concurrently": "^4.1.0",
    "electron": "^4.0.6",
    "electron-builder": "^20.38.5",
    "typescript": "^3.3.3333",
    "wait-on": "^3.2.0"
  }
}
Now we're ready to package the app. Run this command to package the app.
yarn electron-pack
You will see the packaged artifacts under the dist directory.
That's it. Time to code your app and build something amazing.
Here is the sample app.
I hoped this blog helped. See you next time.
When I run
electron-packI get/bin/sh: build: command not found error Command failed with exit code 127.When I run electron-dev the app works ok, but after the package, when I click on the .exe file, the app open a blank window. Someone got this problem?
If someone using BrowserRouter in a react app, change to HashRouter, it’s work fine.
“postinstall”: “electron-builder install-app-deps”,
“preelectron-pack”: “yarn build”,
“electron-pack”: “build -mw”
does this work for Linux operating system also