
Build A Paper Plane with Phaser 3 and Arcade Physics
Introduction
Game development often involves simulating real life scenarios: whether it's running and jumping, rolling rocks on a slope or shooting projectiles from a slingshot, the developer has to find a way to show it on a 2D or 3D scene in a way that is believable enough to engage the player.
During the course of developing a new game, I had a need for a specific motion of a character that involved air gliding and riding on air currents. The main issue was to imitate the motion of a glider like object in a way that would look reasonably realistic.
Since there are many possible approaches to consider, I would like a convenient environment that enables us to quickly to scaffold and test various solutions.
The Basics
Phaser Setup
Since the intended platform is Web, I elected to use the popular Phaser 3 game engine that works with HTML5 and JavaScript. For convenience, I started from a Phaser boilerplate / starter kit. However, note that it's perfectly fine to start from scratch if preferred.
For reference, I used the Phaser 3 ES6 Starter Template for this project.
For simplicity the project is setup with a main scene and loader (splash screen) scene. This follows the common practice of loading the assets in the loader scene and then switching to the main scene.
The Game Scene
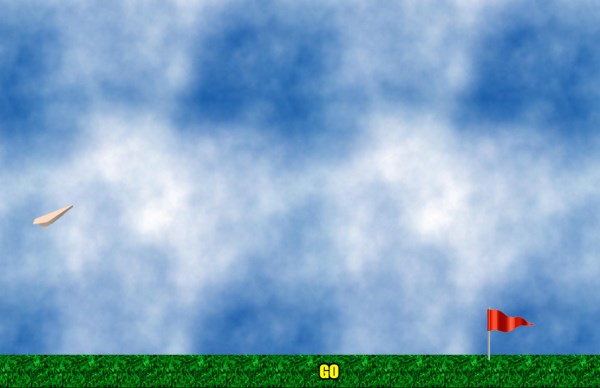
The game scene (game-scene.js) is a very simple ground / sky setup with a few object on the ground for orientation. We use the create() function to create and populate all the objects and set the camera and world sizes. In this case, the world is twice the width of the screen, so we can scroll to view any part of it.
class GameScene extends Phaser.Scene {
  constructor() {
    super({key: 'Game'});
  }

  /**
   *  Called when a scene is initialized. Method responsible for setting up
   *  the game objects of the scene.
   */
  create(/* data */) {

      let gameW= this.sys.game.config.width;
      let gameH= this.sys.game.config.height;
      let worldSizeW = gameW*2;

      // Sky Background
      let skyBg = this.add.tileSprite(0, 0, worldSizeW, gameH, 'skyTile');
      skyBg.setOrigin(0, 0);

      let platforms = this.physics.add.staticGroup();

      // Ground
      let ground= this.add.tileSprite(0,0, worldSizeW, 64, 'grass');
      ground.setOrigin(0,0);
      ground.setPosition(0, gameH-60);
      platforms.add(ground);

      this.add.image(gameW-200, gameH-100, 'redFlag');
      this.add.image(worldSizeW*0.8, gameH-100, 'greenFlag');

      this.glider = new Glider(this);

      // Set a collision check for the ground
      this.physics.add.collider(this.glider, platforms);

      // Camera scroll and follow
      this.cameras.main.setBounds(0, 0, worldSizeW, gameH);
      this.cameras.main.startFollow(this.glider, true, 0.5, 0.5 );

    }
}
The last two lines sets the built in camera to scroll within the world bounds and follow the glider object so it remains in view as it moves.
The Glider
To achieve a nice and clean implementation, I chose to encapsulate most of the functionality in one component - the glider object. This is straight up a Phaser sprite: a display object that holds an image, with the addition of a physics body. Extending Sprite and adding the custom code is the way to go.
I used an image of a paper plane (on the right) and loaded it as 'glider'.
As any object in Phaser, we can hook into the object lifecycle methods: namely create and update. While create is called once on initialize, update is called on every frame. In the Sprite, we can also use the constructor for create.

Following is the initial Glider class, which is initialized with the glider image that was loaded earlier.
The sprite pivot point is set to center, the physics body is enabled, and the sprite adds itself to the parent scene.
class Glider extends Phaser.GameObjects.Sprite {
  /**
   * Glider class
   *
   *  @extends Phaser.GameObjects.Sprite
   */
  constructor(scene) {
    super(scene, 0, 0, 'glider');

    this.setOrigin(0.5);

    // Physics
    scene.physics.world.enable(this);
    scene.add.existing(this);
    this.body.setGravityY(0);
    this.body.setBounceY(0.2);
  }

  update(t, td) {
    // Place frame uptade code here
  }
}
Deep Dive: Glider Physics
The Physics Model
A Glider does not have any motors to propel it, and it relies on external forces to keep it in air. The actual physics model is a bit complicated and not in the scope of this article, but it mainly boils down to these forces:

To summarize: gravity pushes the glider down while lift pushes perpendicular to the glider plane. In addition there is the (much smaller) drag force, or air friction, pushing opposite the direction of movement.
The main goal is to achieve a cyclic motion, where the gliding object cycles between descent and similar to this:
In real life there is a measure of control over the glider by tilting the plane, but in our case we are more interested in replicating the motion with simple activation. For that reason, I chose to simulate a paper plane instead, since it uses the same model.
Fake it with a Simplified Model
Implementing such a model as is can be difficult and time consuming, and is not in the scope of this article. Instead we want to simplify it to achieve close enough results with much less effort.
To do that, we would want to take advantage of Phaser's own Arcade Physics system to handle the physics simulation, and avoid doing manual calculations.
Limitations of Arcade Physics
Arcade physics by itself is a simplified physics system that is designed to perform common tasks with minimal setup. It is important to understand that it is limited by a simple API that omits some of the more complex factors and does not handle applying forces directly or proper friction.
It does, however, allow to set acceleration - which is proportional to force. If we neglect the mass of the object, acceleration would be equivalent to force. Note that we are mostly talking about constant acceleration, as opposed to force over time.
Friction in Arcade only works when the body has zero acceleration (no forces applied), so it's not very useful.
Another limitation worth mentioning has to do with collisions: Arcade can only handle rectangular bodies with AABB (Axis aligned bounding box), which means the collision box cannot rotate with the body. Fortunately it does not pose any issues in our case.
How to handle forces in Arcade
Since we have to deal with applying forces there are two cases:
- Constant force - Achieved by setting the acceleration and leaving it as is
- Impulse (momentary) force - Same but for a fixed time (e.g. 1 second)
For impulse, we use a trick of resetting the acceleration after the time delay. This way the physics system will just use the momentum of the object until the it starts to fall - which is equivalent to zeroing out the forces.
We add the following function to the Glider class:
// Apply a momentary force to simulate impluse
  applyImpulseForce(forceVec, duration=1) {
    this.body.setAcceleration(forceVec.x, forceVec.y);
    this.scene.time.delayedCall(duration*1000,
              () => this.body.setAcceleration(0,0));
  }
Hands on: Putting the code together
Start the Simulation
We start with a very simple launch of the paper plane into the air. The physics is similar to shooting a projectile from a cannon: one time force is applied on the
Adding a Launch function that takes a force vector like this:
  launch(force, dir) {
    this.curState= GlideStates.LAUNCH;
    this.body.setGravityY(200);

    let forceVec = new Phaser.Math.Vector2(dir); // Clone it
    forceVec.scale(force); // Multiply direction with force

    this.applyImpulseForce(forceVec, 1.1);
  }
This way we can pass any force and direction to use in launch, with the option for the player to set it from the scene.
Update over time: Handling Plane Rotation
For the update function we need to make use of the delta time parameter - dt, that holds the elapsed time in milliseconds since the last frame.
 update(t, dt) {

    this.updateRotation(dt);
  }
So now we have the basic movement, but something is missing: the plane does not change pitch (rotate) as expected from a real life plane.
To make the plane point in the local 'forward' direction, we need something like this function, that calculates the angle from the velocity vector:
  updateRotation(dt) {
    const dir= this.body.velocity;

    // Update the rotation
    if (dir.x > 0.05) {
      this.rotation = dir.angle();
    }
  }
This mostly works, but has a couple of issues. First, the pitch angle sometimes fluctuates erratically. The reason for that is that the angle goes from near zero to over 2PI, so we need to normalize it. The Phaser math class has a function just for that: Math.Angle.Wrap().
      // Update the rotation
      if (dir.x > 0.05) {
        this.rotation = Phaser.Math.Angle.Wrap( dir.angle());
      }
Finishing touches: Smoother Rotation
That fixes it, but the rotation looks very jittery and does not feel natural. We'll handle that by adding a step rotation with linear interpolation, using the Math.Linear function.
Linear interpolation, or Lerp for short, is a common method to change a value over time which creates a nice smooth rotation by gradually incrementing the interpolated value on every frame. The step parameter controls the speed of rotation, or the fraction per frame. By multiplying this by (dt/1000) we normalize the time to use seconds.
Note that we can make the rotation tight or loose by changing the step size.
A good metric is dt/1000 for 1 second, 2 * dt/1000 for half a second and so on.
    updateRotation(dt) {
      const dir= this.body.velocity;
      const step = dt * 0.001 * 2; // convert to sec
      const targetRot = Phaser.Math.Angle.Wrap( dir.angle());

      // Update the rotation smoothly.
      if (dir.x > 0.05) {
        this.rotation = Phaser.Math.Linear(this.rotation, targetRot, step);
      }
    }
The final result can be seen here:
Beyond Basic Movement
The current code only shows the initial launch, but can be expanded further.
We could, for example, make use of applyImpulseForce function and invoke it with varying force and direction.
Few possible ideas for expansion come to mind, including:
- Add aim to the launch, so player can set direction and force
- Additional pull cycles based on player input
- Detect when the plane is peaking and about to dive down
- Measure max distance the the plane flew until hitting the ground
These, however are too long to cover here, and the actual details for them may be covered in a separate post.
Wrapping up
The full project code is available on Github: github.com/amosl/PaperPlane
The result is a simple demo that packs a lot of features with very few lines of code. This goes to show that by using the right tools and techniques, a lot can be achieved in a short time.
With the newly released version 3, Phaser is a very powerful game engine that offers many nice feature, but it required some tinkering to figure out how to use it effectively.
The simple mechanic can be further expanded and form a base to full game.