
Build and Deploy a secure REST API with Go, Postgresql, JWT and GORM

Adigun Hammed OlalekanBlockedUnblockFollowFollowing
May 4
In this tutorial, we are going to learn how to develop and deploy a secure REST api using Go Programming language.
Why Go?
Go is a very interesting programming language, it is a strongly typed language which compiles very fast, it performance is likened to that of C++, go has goroutines — a much more efficient replacement for Threads, and also go give you the freedom to static type on the web — I understand this is not new, i just love Go’s way.
What are we building?
We are going to build a contact/phonebook manager App, our API will allow users to add contacts to their profiles, they will be able to retrieve it in case their phone got lost.
Prerequisites
This lesson assumed you already installed the following packages
- Go
- Postgresql
- GoLand IDE — optional(I am going to be using it for this tutorial)
I also assumed you have setup your GOPATH. Check this if you haven’t https://github.com/golang/go/wiki/SettingGOPATH
Let’s do it!
What is REST?
REST stands for Representational State Transfer, it is the mechanism used by modern client apps to communicate with databases and servers via http — https://en.wikipedia.org/wiki/Representational_state_transfer
So, you have a new startup idea or you want to build that awesome side project? REST protocol is mostly the way to go.
Building the App
We start by identifying the package dependencies we are going to need for this project, luckily for us, Go standard library is rich enough to build a complete website without using a third party framework(i hope i am right) — see net.http package, but to make our work easier, we are going to need the following packages,
- gorilla/mux — A powerful URL router and dispatcher. We use this package to match URL paths with their handlers.
- jinzhu/gorm — The fantastic ORM library for Golang, aims to be developer friendly. We use this ORM(Object relational mapper) package to interact smoothly with our database
- dgrijalva/jwt-go — Used to sign and verify JWT tokens
- joho/godotenv — Used to load .env files into the project
To install any of this package, open terminal and run
go get github.com/{package-name}
This command will install the packages into your GOPATH.
Project Structure

Check the left sidebar to see project structure
utils.go
utils.go contain handy utils functions to build json messages and return a json response. Note the two function Message() and Respond() before we proceed.
More about JWT
JSON Web Tokens are an open, industry standard RFC 7519 method for representing claims securely between two parties. It is easy to identify web application users through sessions, however, when your web apps API is interacting with say an Android or IOS client, sessions becomes unusable because of the stateless nature of the http request. With JWT, we can create a unique token for each authenticated user, this token would be included in the header of the subsequent request made to the API server, this method allow us to identify every users that make calls to our API. Lets see the implementation below
The comments inside the code explain everything there is to know, but basically, the code create a Middleware to intercept every requests, check for the presence of an authentication token (JWT token), verify if it is authentic and valid, then send error back to the client if we detect any deficiency in the token or proceed to serving the request otherwise(if the token is valid), you’ll see later, how we can access the user that is interacting with our API from the request.
Building the user registration and login system
We want our users to be able to register and login before backing up/storing their contacts on our system. The first thing we will need to do is connect to our database, we use a .env file to store our database credentials, my .env looks like this
db_name = gocontacts
db_pass = **** //This is default to the current user's password on windows for postgresql
db_user = postgres
db_type = postgres
db_host = localhost
db_port = 5434
token_password = thisIsTheJwtSecretPassword //Do not commit to git!
Then, we can connect to the database using the following snippets
The code does a very simple thing, on the file init() function — init() automatically get called by Go, the code retrieve connection information from .env file then build a connection string and use it to connect to the database.
Creating the application entry point
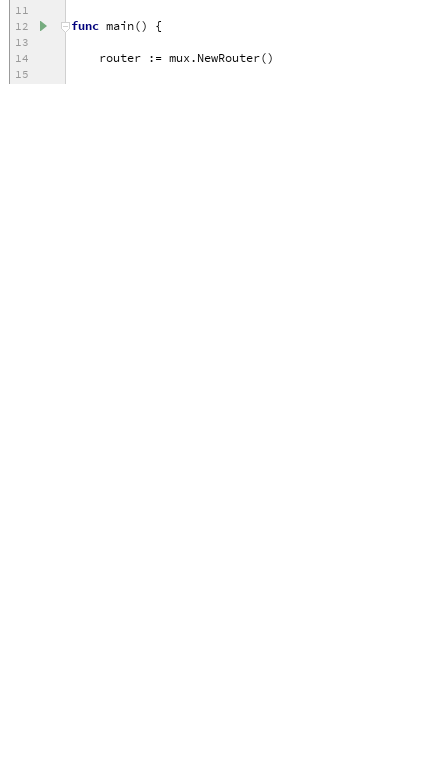
So far, we’ve been able to create the JWT middleware and connect to our database. The next thing is creating the application’s entry point, see the code snippet below
We create a new Router object — line 13, we attach our JWT auth middleware using router’s Use() function — line 14, and then we proceed to start listening for incoming requests.
Use the small media play button located left of func main() to compile and launch the app, if all is good, you should see no error in the console, in case there was an error, take a second look at your database connection parameters to see that they correlate.

Results. DB migrations has occurred, GORM converted go struct to database tables
Creating and authenticating Users
create a new file models/accounts.go,
There is a lot of puzzle inside accounts.go, lets break it down a little bit.
The first part create two structs Token and Account they represent a JWT token claim and a user account respectively. Function Validate() validates the data sent from clients and function Create() creates a new account and generate a JWT token that will be sent back to client that made the request. Function Login(username, password) authenticate an existing user, then generate a JWT token if authentication was successful.
authController.go
The content is very straightforward. It contains the handler for /user/new and /user/login endpoints.
Add the following snippet to main.go to register our new routes
router.HandleFunc("/api/user/new", controllers.CreateAccount).Methods("POST")

router.HandleFunc("/api/user/login", controllers.Authenticate).Methods("POST")
The above code register both /user/new and /user/login endpoints and pass their corresponding request handlers.
Now, recompile the code and visit localhost:8000/api/user/new using postman, set the request body to application/json as shown below

Response from /user/new
If you try to call /user/new twice with the same payload, you’ll receive a response that the email already exists, works according to our instructions.
Creating contacts
Part of our app’s functionality is letting our users create/store contacts. Contact will have name and phone , we will define these as struct properties. The following snippets belongs to models/contact.go
Same as in models/accounts.go we create a function Validate() to validate the passed inputs, we return an error with messages if anything we don’t want occur, then we wrote function Create() to insert this contact into the database.
The only part left is retrieving the contacts. Lets do it!
router.HandleFunc("/api/me/contacts", controllers.GetContactsFor).Methods("GET")
Add the above snippet to main.go to tell the router to register /me/contacts
endpoint. Lets create controllers.GetContactsFor handler to handle the API request.
contactsController.go
Bellow is the content of contactsController.go
What it does is pretty similar to authController.go's , but basically, it grabs the json body and decode it into Contact struct, if there was an error, return a response immediately or insert the contacts into the database if everything went well.
Fetching Contacts that belongs to a user
Now, our users have been able to store their contacts successfully, what if they want to retrieve the contact they stored, in case their phone is lost? Visiting /me/contacts should return a json structure for the contacts of the API caller(current user). Check the code snippet to have a clearer picture.
Normally, retrieving user’s contacts endpoint should look like /user/{userId}/contacts , specifying userId as a path parameter is very dangerous, because every authenticated user can craft a request to this path and contacts of another users would be returned without any problem, this can lead to a brutal attack by hackers — I am trying to point out the usefulness of JWT .
We can easily obtain the id of the API caller using r.Context().Value("user") , remember we set this value inside auth.go — Our authentication middleware

Response for /me/contacts
The code for this project is on github — https://github.com/adigunhammedolalekan/go-contacts
Deployment
We can easily deploy our app to heroku. Firstly, download godep . godep is a dependency manager for Golang, similar to npm for nodejs.
go get -u github.com/tools/godep
- Open
GoLand terminaland rungodep saveThis will create a folder callGodepsandvender. To learn more about godep, visit https://github.com/tools/godep - Create account on heroku.com and download
Heroku Clithen login with your credentials - Once done, run
heroku create gocontactsThis will create an app for you on your heroku dashboard and also a remote git repository. - run the following command to push your code to heroku
git add .git commit -m "First commit"git push heroku master

If everything went well, your screen should look like my own.
Voila! Your app has been deployed. The next thing is setting up a remote Postgresql database.
run heroku addons:create heroku-postgresql:hobby-dev to create the database. To learn more about this, visit https://devcenter.heroku.com/articles/heroku-postgresql
Great! We are almost there, next thing is to connect with our remote database.
Go to heroku.com and login with your credentials, you should find your newly created app on your dashboard, click on it. After that, click on settings, then click on Reveal Config Vars
Postgresql connection URI format postgres://username:password@host/dbName , There is a var named DATABASE_URL , this was automatically added to your .env file when you created the postgresql database (Note: Heroku automatically replace your local .envwhen you deploy your app), from this var, we will extract our database connection parameter.


I extracted database connection parameter from the auto generated DATABASE_URL vars
If all this went well, your API should be live now!

As you can see, the api is live!
I tried my best to make this lesson clear as much as possible. Please, bear with me for any error you might encountered. I am just trying to share my knowledge.
Project Repo — https://github.com/adigunhammedolalekan/go-contacts
If you have any question, or a correction, i will be glad to know.
Follow me on Twitter — www.twitter.com/L3kanAdigun
Hire me(I am available and actively looking for job, DM me on Twitter) —www.twitter.com/L3kanAdigun
You can mail me personally — adigunhammed.lekan@gmail.com
Its really a long article, Thanks for reading.