
How to set up PySpark for your Jupyter notebook

Apache Spark is one of the hottest frameworks in data science. It realizes the potential of bringing together both Big Data and machine learning. This is because:
- Spark is fast (up to 100x faster than traditional Hadoop MapReduce) due to in-memory operation.
- It offers robust, distributed, fault-tolerant data objects (called RDDs)
- It integrates beautifully with the world of machine learning and graph analytics through supplementary packages like MLlib and GraphX.
Spark is implemented on Hadoop/HDFS and written mostly in Scala, a functional programming language which runs on the JVM.
However, for most beginners, Scala is not a great first language to learn when venturing into the world of data science.
Fortunately, Spark provides a wonderful Python API called PySpark. This allows Python programmers to interface with the Spark framework — letting you manipulate data at scale and work with objects over a distributed file system.
Why use Jupyter Notebook?
Now, the promise of a Big Data framework like Spark is only truly realized when it is run on a cluster with a large number of nodes.
Unfortunately, to learn and practice that, you have to spend money. Some quick options are:
- Amazon Elastic MapReduce (EMR) cluster with S3 storage
- Databricks cluster(paid version, the free community version is rather limited in storage and clustering option)
The above options cost money just to even start learning (Amazon EMR is not included in the one-year Free Tier program unlike EC2 or S3 instances).
However, if you are proficient in Python/Jupyter and machine learning tasks, it makes perfect sense to start by spinning up a single cluster on your local machine. You could also run one on an Amazon EC2 if you want more storage and memory.
Remember, Spark is not a new programming language that you have to learn.
Instead, it is a framework working on top of HDFS. This presents new concepts like nodes, lazy evaluation, and the transformation-action (or ‘map and reduce’) paradigm of programming.
In fact, Spark is versatile enough to work with other file systems than Hadoop — like Amazon S3 or Databricks (DBFS).
But the idea is always the same. You are distributing (and replicating) your large dataset in small fixed chunks over many nodes. You then bring the compute engine close to them so that the whole operation is parallelized, fault-tolerant and scalable.
By working with PySpark and Jupyter notebook, you can learn all these concepts without spending anything. You can also easily interface with SparkSQL and MLlib for database manipulation and machine learning.
It will be much easier to start working with real-life large clusters if you have internalized these concepts beforehand!
However, unlike most Python libraries, starting with PySpark is not as straightforward as pip install ... and import ....
Most users with a Python background take this workflow as granted for all popular Python packages. However, the PySpark+Jupyter combo needs a little bit more love.
In this brief tutorial, we’ll go over step-by-step how to set up PySpark and all its dependencies on your system, and then how to integrate it with Jupyter notebook.
The tutorial will assume you are using a Linux OS. This is simply because, in real life, you will almost always run and use Spark on a cluster using some Cloud service like AWS or Azure. Those cluster nodes will most probably run Linux.
It is advisable to get comfortable with a Linux CLI based setup process for running and learning Spark. This is an excellent guide to set up a Ubuntu distro on a Windows machineusing Oracle Virtual Box.
Installation and setup process
Check you have Python 3.4+ installed, because this is a requirement of the latest version of PySpark. If you only have default Python 2.7 on your Linux system, please install Python 3 before continuing.
python3 --version
After that, install the pip3 tool:
sudo apt install python3-pip
Install Jupyter for Python 3:
pip3 install jupyter
Augment the PATH variable to launch Jupyter notebook easily from anywhere:
export PATH=$PATH:~/.local/bin
Next is the important step of choosing a Java version.
There are more variants of Java than there are cereal brands in a modern American store. Java 8 is shown to work with UBUNTU 18.04 LTS/SPARK-2.3.1-BIN-HADOOP2.7. So we will go with that:
sudo add-apt-repository ppa:webupd8team/java
sudo apt-get install oracle-java8-installer
sudo apt-get install oracle-java8-set-default
Check the installation:
java -version
Set some Java-related PATH variables:
export JAVA_HOME=/usr/lib/jvm/java-8-oracle
export JRE_HOME=/usr/lib/jvm/java-8-oracle/jre
Next, you have to install Scala:
sudo apt-get install scala
Check the installation:
scala -version
Next, install py4j for Python-Java integration:
pip3 install py4j
Now for Apache Spark. Go to this link and choose the latest (default) version to download. I am using Spark 2.3.1 with Hadoop 2.7. After downloading, unpack it wherever you want to use Spark from.
sudo tar -zxvf spark-2.3.1-bin-hadoop2.7.tgz
Now, a long set of commands to add to your .bashrc shell script. These will set environment variables to launch PySpark with Python 3, and to let it be called from Jupyter notebook. Take a backup of .bashrc before doing this.
Open the .bashrc using any editor you like, such as gedit .bashrc. Add the following lines at the end:
export SPARK_HOME='/{YOUR_SPARK_DIRECTORY}/spark-2.3.1-bin-hadoop2.7'
export PYTHONPATH=$SPARK_HOME/python:$PYTHONPATH
export PYSPARK_DRIVER_PYTHON="jupyter"
export PYSPARK_DRIVER_PYTHON_OPTS="notebook"
export PYSPARK_PYTHON=python3
export PATH=$SPARK_HOME:$PATH:~/.local/bin:$JAVA_HOME/bin:$JAVA_HOME/jre/bin
Remember to replace {YOUR_SPARK_DIRECTORY} with the actual address of the directory where you unpacked Spark in the step above.
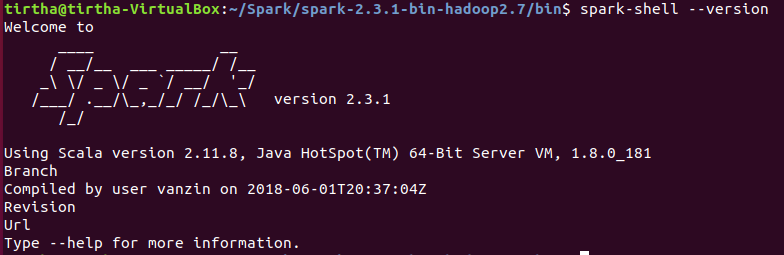
You can check the your Spark setup by going to the /bin directory inside {YOUR_SPARK_DIRECTORY} and running the spark-shell --version command. Here you can see which version of Spark you have, and which versions of Java and Scala it is using.
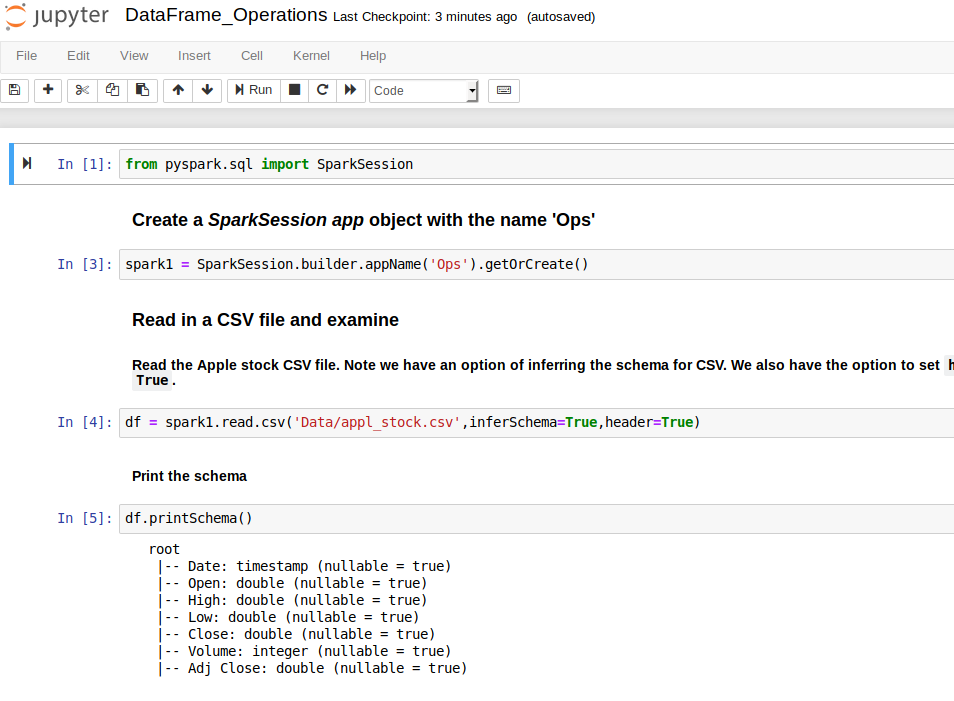
That’s it! After this, you should be able to spin up a Jupyter notebook and start using PySpark from anywhere.
For example, if I have created a directory ~/Spark/PySpark_work and work from there, I can launch Jupyter:
But wait… where did I actually call something like pip install pyspark?
I didn’t. PySpark actually comes bundled with the Spark download package and with the proper setting of environment variables and bindings. So you are all set to go now.
Next on this topic
I am currently working on a detailed introductory guide to PySpark DataFrameoperations. If you have any questions or ideas to share, please contact me at tirthajyoti[AT]gmail.com.
Also, you can check my GitHub repositories for other machine learning/data science projects in Python, R, or MATLAB.
If you are, like me, passionate about machine learning and data science, please feel free to add me on LinkedIn or follow me on Twitter.
https://blog.sicara.com/get-started-pyspark-jupyter-guide-tutorial-ae2fe84f594f
This article combined with yours above helped me to complete the setup.
Hi Tirth,
I am not able to run spark-shell command.
It shows command not found
Please guide. I have updated the .bashcr file, do I need to run it somewhere?