
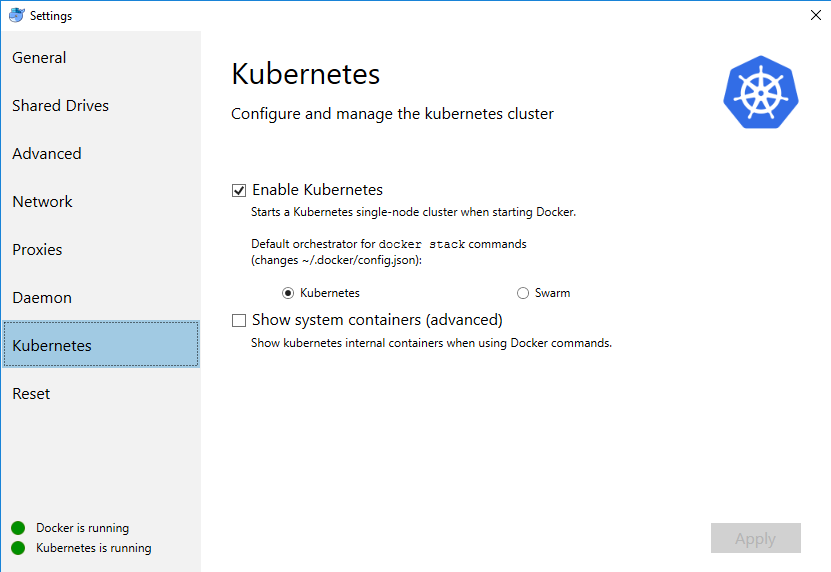
Built-in kubernetes in docker for windows as a quick alternative to minikube
I am a linux guy, but one of my work boxes is Intel NUC under windows with quite good memory specs.
So far I was using it to offload docker builds and use some VMs on a hyperV. Latest docker update
has made things even more interesting - Docker for windows now is capable to run single node Kubernetes 1.1x
cluster, which you can use for your experiments as well.
Even if Windows has WSL, it still does not behave in a way how my usual linux workplace does, thus on my local lab first (note: insecure) step I do - is exposing my windows kubernetes and docker ports to my linux notebook
Expose docker tcp daemon on 2375
SET EXTERNAL_IP=192.168.2.2
netsh interface portproxy add v4tov4 listenport=2375 connectaddress=127.0.0.1 connectport=2375 listenaddress=%EXTERNAL_IP% protocol=tcp
Expose
SET EXTERNAL_IP=192.168.2.2
netsh interface portproxy add v4tov4 listenport=6445 connectaddress=127.0.0.1 connectport=6445 listenaddress=%EXTERNAL_IP% protocol=tcp
Accessing your cluster with kubectl from your linux machine:
by default docker patches your windows kube config with changes similar to below:
apiVersion: v1
clusters:
- cluster:
    insecure-skip-tls-verify: true
    server: https://localhost:6445
  name: docker-for-desktop-cluster
contexts:
- context:
    cluster: docker-for-desktop-cluster
    user: docker-for-desktop
  name: docker-for-desktop
current-context: docker-for-desktop-cluster
kind: Config
preferences: {}
users:
- name: docker-for-desktop
  user:
    client-certificate-data: REDACTED
    client-key-data: REDACTED
What you need - is to replicate config on your linux box, and tune server address to external interface address of your box.
After that, you can see the context on your linux box
kubectx
docker-for-desktop
MINIKUBE
and control it using native kubectl tool
kubectl get pods
NAME       READY     STATUS      RESTARTS   AGE
dns-test   0/1       Completed   0          23h
Lets test install kubernetes dashboard, because docker for windows provides no specific UI for that part
kubectl apply -f https://raw.githubusercontent.com/kubernetes/dashboard/master/src/deploy/alternative/kubernetes-dashboard.yaml
echo kubectl create -f k8s/dashboard-admin.yaml
New release of dashboard comes with RBAC as a default, but for that specific case we can go on a simplier setup, and
get admin rights from the start : kubectl create -f k8s/dashboard-admin.yaml where dashboard-admin.yaml is
apiVersion: rbac.authorization.k8s.io/v1beta1
kind: ClusterRoleBinding
metadata:
  name: kubernetes-dashboard
  labels:
    k8s-app: kubernetes-dashboard
roleRef:
  apiGroup: rbac.authorization.k8s.io
  kind: ClusterRole
  name: cluster-admin
subjects:
- kind: ServiceAccount
  name: kubernetes-dashboard
  namespace: kube-system
Now you can run kubectl proxy in some console, and also some better control over kubernetes cluster, accessible on
http://localhost:8001/api/v1/namespaces/kube-system/services/http:kubernetes-dashboard:/proxy/#!/overview?namespace=default

Prof of concept deployment
Now lets test deploy CrocoHunter application
kubectl create -f croc-hunter.yaml --save-config
apiVersion: v1
kind: Service
metadata:
  name: croc-hunter
  labels:
    component: croc-hunter
spec:
  ports:
    - port: 8080
      targetPort: 8080
  selector:
    component: croc-hunter
  type: "ClusterIP"

---
apiVersion: extensions/v1beta1
kind: Deployment
metadata:
  name: croc-hunter
  labels:
    component: croc-hunter
spec:
  replicas: 1
  strategy:
    type: RollingUpdate
  selector:
    matchLabels:
      component: "croc-hunter"
  template:
    metadata:
      labels:
        component: "croc-hunter"
    spec:
      containers:
        - name: croc-hunter
          image: "voronenko/docker-sample-image:47372c4"
          imagePullPolicy: "Always"
          ports:
          - name: http
            containerPort: 8080
          resources:
            requests:
              cpu: "10m"
              memory: "128Mi"
          livenessProbe:
            httpGet:
              path: /healthz
              port: http
          readinessProbe:
            httpGet:
              path: /healthz
              port: http
and ingress to it
apiVersion: extensions/v1beta1
kind: Ingress
metadata:
  annotations:
     kubernetes.io/ingress.class: nginx
  name: croc-hunter
spec:
  rules:
  - http:
      paths:
      - path: /
        backend:
          serviceName: croc-hunter
          servicePort: 8080
Now we can check, if application was deployed correctly:
kubectl get deployments
NAME          DESIRED   CURRENT   UP-TO-DATE   AVAILABLE   AGE
croc-hunter   1         1         1            0           48s

kubectl get pods
NAME                           READY     STATUS    RESTARTS   AGE
croc-hunter-55c74b5b69-sxn9b   1/1       Running   0          1m
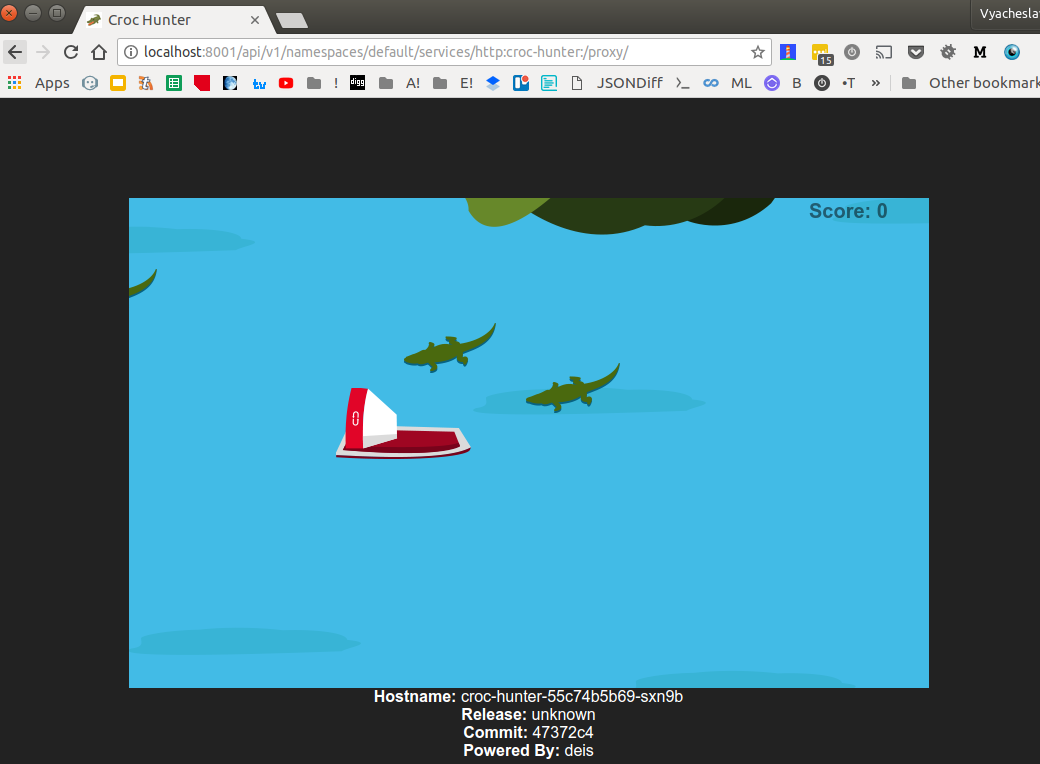
Definitely works. We can also access the application via kube proxy
http://localhost:8001/api/v1/namespaces/default/services/http:croc-hunter:/proxy/
Exposing deployment externally
As usual application has at least one endpoint that can be accessed externally,
we would like to emulate also that functionality (note: redhat minishift does this out of the box).
We might to do it dirty in the console, like
kubectl expose deployment croc-hunter --type=NodePort --name=croc-hunter-dirty-cmd
service "croc-hunter-dirty-cmd" exposed

kubectl get services
NAME                    TYPE        CLUSTER-IP      EXTERNAL-IP   PORT(S)          AGE
croc-hunter             ClusterIP   10.106.108.70   <none>        8080/TCP         29m
croc-hunter-dirty-cmd   NodePort    10.105.89.88    <none>        8080:30815/TCP   31s
kubernetes              ClusterIP   10.96.0.1       <none>        443/TCP          1d
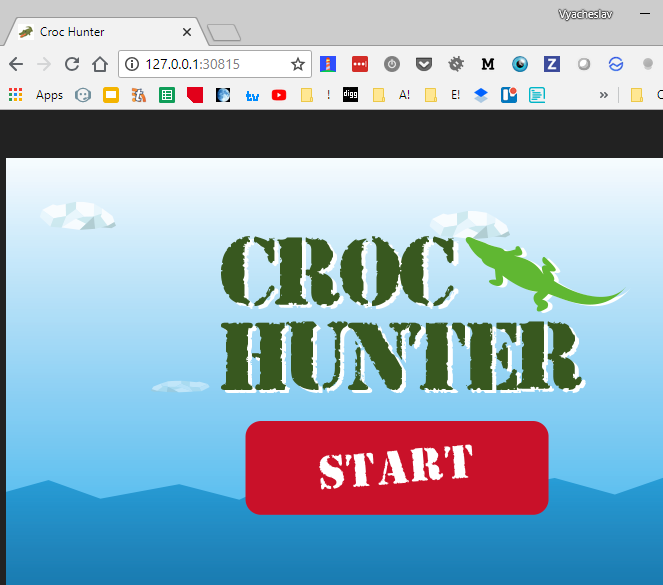
note tcp port 30815 above.
How you can access exposed ports?
Option (a), on the same windows box you can just navigate to http://127.0.0.1:30815/
We can achieve the same effect from the yaml definition
apiVersion: v1
kind: Service
metadata:
  name: croc-hunter-nodeport-service
  labels:
    component: croc-hunter
spec:
  ports:
    - port: 8080
      targetPort: 8080
  selector:
    component: croc-hunter
  type: NodePort
kubectl create -f croc-hunter-nodeport.yml --save-config
service "croc-hunter-nodeport-service" created

kubectl get services
NAME                           TYPE        CLUSTER-IP      EXTERNAL-IP   PORT(S)          AGE
croc-hunter                    ClusterIP   10.106.108.70   <none>        8080/TCP         31m
croc-hunter-nodeport-service   NodePort    10.102.97.238   <none>        8080:30688/TCP   6s
kubernetes                     ClusterIP   10.96.0.1       <none>        443/TCP          1d
note tcp port as well 30688.
Option(b) - basically I am also able to access port exposed on a box from
my external linux box as well:
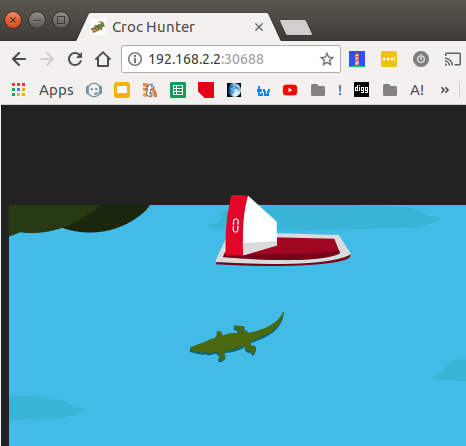
Which is kind of cool.
Summary: you can use built-in single node kubernetes node for small playground with
your kubernetes experiments not only locally, but also on remote using set of tools
you.
Thanks!
Code in action:
Repository with code snippets above: https://github.com/Voronenko/win-k8s-croco
Croco game image: https://github.com/voronenko-p/docker-sample-image which is slightly modified https://github.com/lachie83/croc-hunter (fixed absolute references to resources to allow proper run under proxy)
for the first time
make deploy
for subsequent...
make apply
Debugging access - requires running kubectl proxy in background...
Launch kubernetes dashboard from url http://localhost:8001/api/v1/namespaces/kube-system/services/http:kubernetes-dashboard:/proxy/#!/overview?namespace=default if you have installed one
make dashboard
Launch deployed micro service http://localhost:8001/api/v1/namespaces/default/services/http:croc-hunter:/proxy/
make hunter
This is great! I have been struggling to find a good example to be sure I could use Docker for Windows (10) without Minikube, and this is the first thing that clearly showed what I needed to do to deploy and see my results in the browser. Thanks!
You are welcome. Glad it was useful