
Ultimate Guide to Web Scraping using JavaScript(Node.js + Puppeteer)
In this post, we’ll learn to scrape web pages using browser automation with JavaScript. We’ll be using puppeteer for this. Puppeteer is a Node library API that allows us to control headless Chrome. Headless Chrome is a way to run the Chrome Browser without actually running Chrome.
Generally, web scraping is divided into two parts:
- Fetching data by making an HTTP request
- Extracting important data by parsing the HTML DOM
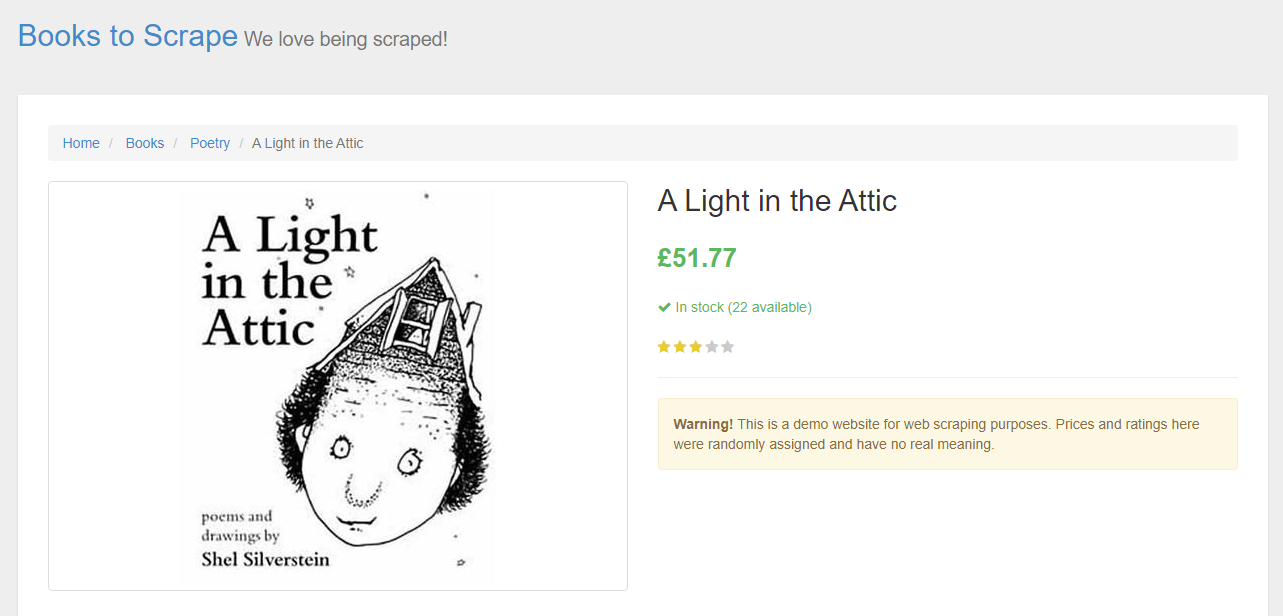
We are going to Scrape Book price and title from this website. Which is a fake bookstore specifically set up to help people practice scraping.
Our setup is pretty simple. Just create a folder and install puppeteer. For creating a folder and installing libraries type below given commands. I am assuming that you have already installed Node.js.
mkdir scraper
cd scraper
npm i puppeteer — save
Now, create a file inside that folder by any name you like. I am using scraping.js.
Now, insert the following boilerplate code in scraping.js
const puppeteer = require(‘puppeteer’);
let scrape = async () =\> {
 // Actual Scraping goes Here…
 // Return a value
};

scrape().then((value) =\> {
 console.log(value);
 // Success!
});
Let’s walk through this example line by line.
- Line 1: We require the Puppeteer dependency that we installed earlier
- Line 3–7: This is our main function
scrape. This function will hold all of our automation code. - Line 9: Here we are invoking our
scrape()function. (Running the function).
Something important to note is that our scrape() function is an async function and makes use of the new ES 2017 async/await features. Because this function is asynchronous, when it is called it returns a Promise. When the async function finally returns a value, the Promise will resolve (or Reject if there is an error).
Since we’re using an async function, we can use the await expression which will pause the function execution and wait for the Promise to resolve before moving on. It’s okay if none of this makes sense right now. It will become clearer as we continue with the tutorial.
We can test the above code by adding a line of code to the scrape function. Try this out:
let scrape = async () =\> { return 'test'; };
Now run node scrape.js in the console. You should get test returned! Perfect, our returned value is being logged to the console. Now we can get started filling out our scrape function.
The first thing we need to do is create an instance of our browser, open up a new page, and navigate to a URL. Here’s how we do that:
let scrape = async () =\> {
 const browser = await puppeteer.launch({headless: false});
 const page = await browser.newPage();
 await page.goto('[http://books.toscrape.com/catalogue/a-light-in-the- attic\_1000/index.html](http://books.toscrape.com/catalogue/a-light-in-the-attic_1000/index.html)');
 await page.waitFor(1000);
 // Scrape browser.close();
 return result;
};
Awesome! Let's break it down line by line:
First, we create our browser and set headless mode to false. This allows us to watch exactly what is going on:
const browser = await puppeteer.launch({headless: false});
Then, we create a new page in our browser:
const page = await browser.newPage();
Next, we go to the books.toscrape.com URL:
await page.goto('[http://books.toscrape.com/catalogue/a-light-in-the-attic\_1000/index.html](http://books.toscrape.com/catalogue/a-light-in-the-attic_1000/index.html)');
Optionally, I’ve added a delay of 1000 milliseconds. While normally not necessary, this will ensure everything on the page loads:
await page.waitFor(1000);
Finally, after everything is done, we’ll close the browser and return our result.
browser.close(); return result;
The setup is complete. Now, let's scrape!
Probably now you must have an idea of what we are going to scrape. We are going to scrape Book title and its price.

Looking at the Puppeteer API we can find the method that allows us to get the HTML out of the page.
In order to retrieve these values, we’ll use the page.evaluate() method. This method allows us to use built-in DOM selectors like querySelector().
First thing we’ll do is create our page.evaluate() function and save the returned value to a variable named result:
const result = await page.evaluate(() =\> { // return something });
Within our function we can select the elements we desire. We’ll use the Google Developer Tools to figure this out again. Right-click on title and select inspect:
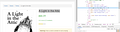
As you’ll see in the elements panel, the title is simply an h1 element. We can now select this element with the following code:
let title = document.querySelector('h1');
Since we want the text contained within this element, we need to add-in .innerText — Here’s what the final code looks like:
let title = document.querySelector('h1').innerText;
Similarly, we can select the price by right-clicking and inspecting the element:
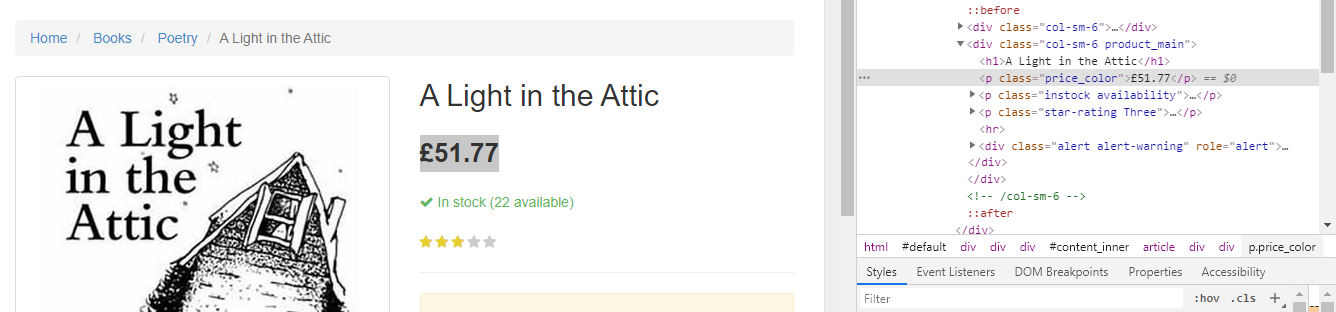
As you can see, our price has a class of price_color. We can use this class to select the element and its inner text. Here’s the code:
let price = document.querySelector('.price\_color').innerText;
Now that we have the text that we need, we can return it in an object:
return { title, price }
Awesome! We’re now selecting the title and price, saving them to an object, and returning the value of that object to the result variable. Here’s what it looks like when it’s all put together:
const result = await page.evaluate(() =\> { let title = document.querySelector('h1').innerText; let price = document.querySelector('.price\_color').innerText;return { title, price }});
The only thing left to do is return our result so it can be logged to the console:
return result;
Here’s what your final code should look like:
const puppeteer = require(‘puppeteer’);
let scrape = async () =\> {
const browser = await puppeteer.launch({headless: false});
const page = await browser.newPage();
await page.goto(‘[http://books.toscrape.com/catalogue/a-light-in-the-attic\_1000/index.html](http://books.toscrape.com/catalogue/a-light-in-the-attic_1000/index.html)');
await page.waitFor(1000);
const result = await page.evaluate(() =\> {
let title = document.querySelector(‘h1’).innerText;
let price = document.querySelector(‘.price\_color’).innerText;
return {title,price}});
browser.close();
return result;
};

scrape().then((value) =\> {
console.log(value);
// Success!
});
You can now run your Node file by typing the following into the console:
node scrape.js// { title: 'A Light in the Attic', price: '£51.77' }
You should see the title and price of the selected book returned to the screen! You’ve just scraped the web!
Making it Perfect
Now, in order to scrape all the book titles from the home page itself would have been a little more difficult for the beginners. However, this provides the perfect opportunity for you to practice your new scraping skills!
Hint: The main difference between this challenge and the previous example is the need to loop through a bunch of results. Here’s how you might set up your code to do this:
const result = await page.evaluate(() =\> {
 let data = []; // Create an empty array
 let elements = document.querySelectorAll('xxx');
 // Select all
 // Loop through each proudct
 // Select the title
 // Select the price data.push({title, price});
 // Push the data to our array return data;
 // Return our data array});
Conclusion
In this article, we understood how we can scrape data using Nodejs & Puppeteer regardless of the type of website.
Feel free to comment and ask me anything. You can follow me on Twitter and Medium. Thanks for reading and please hit the like button! 👍
Additional Resources
And there’s the list! At this point, you should feel comfortable writing your first web scraper to gather data from any website. Here are a few additional resources that you may find helpful during your web scraping journey:
List of free web scraping tools
The 10 Best Residential Proxy Providers
Puppeteer Documentation
Guide to web scraping