
How to build an Alexa Skill to add Objects to your Bucket via Voice
TL;DR
Intro
In this article, we will walk through to how to add, remove, and list Objects in your Cosmic JS Bucket with an Alexa Skill via voice commands. The skill we will use in this tutorial is a Chore / Task Tracker that allows you to say thing like “Alexa, tell chore tracker to add mowing the lawn”, “Alexa, ask chore tracker to list off my chores”, and “Alexa, tell chore tracker to remove mowing the lawn”. We will be Utilizing a custom Cosmic JS Bucket to store these Chores.
Setup
Pre-requisites
- Amazon AWS Account
- Amazon Developer Account
- Node >= v4.5
Install ASK CLI
First, we are going to need to install the ASK CLI. This tool will allow us to easily deploy our skill to our Developer Portal and AWS Lambda Instance in the future for testing.
npm install -g ask-cli
Note: The AWS Configuration is based on @rajeeva's fantastic Medium Article, so make sure to check him out.
Create CLI Policy in AWS IAM
We are going to need a user that has full access to our AWS account in order to deploy our Skill from the command line easily. To do this, go to the IAM tab in your AWS Console, navigate to Policies, and select Create Policy.
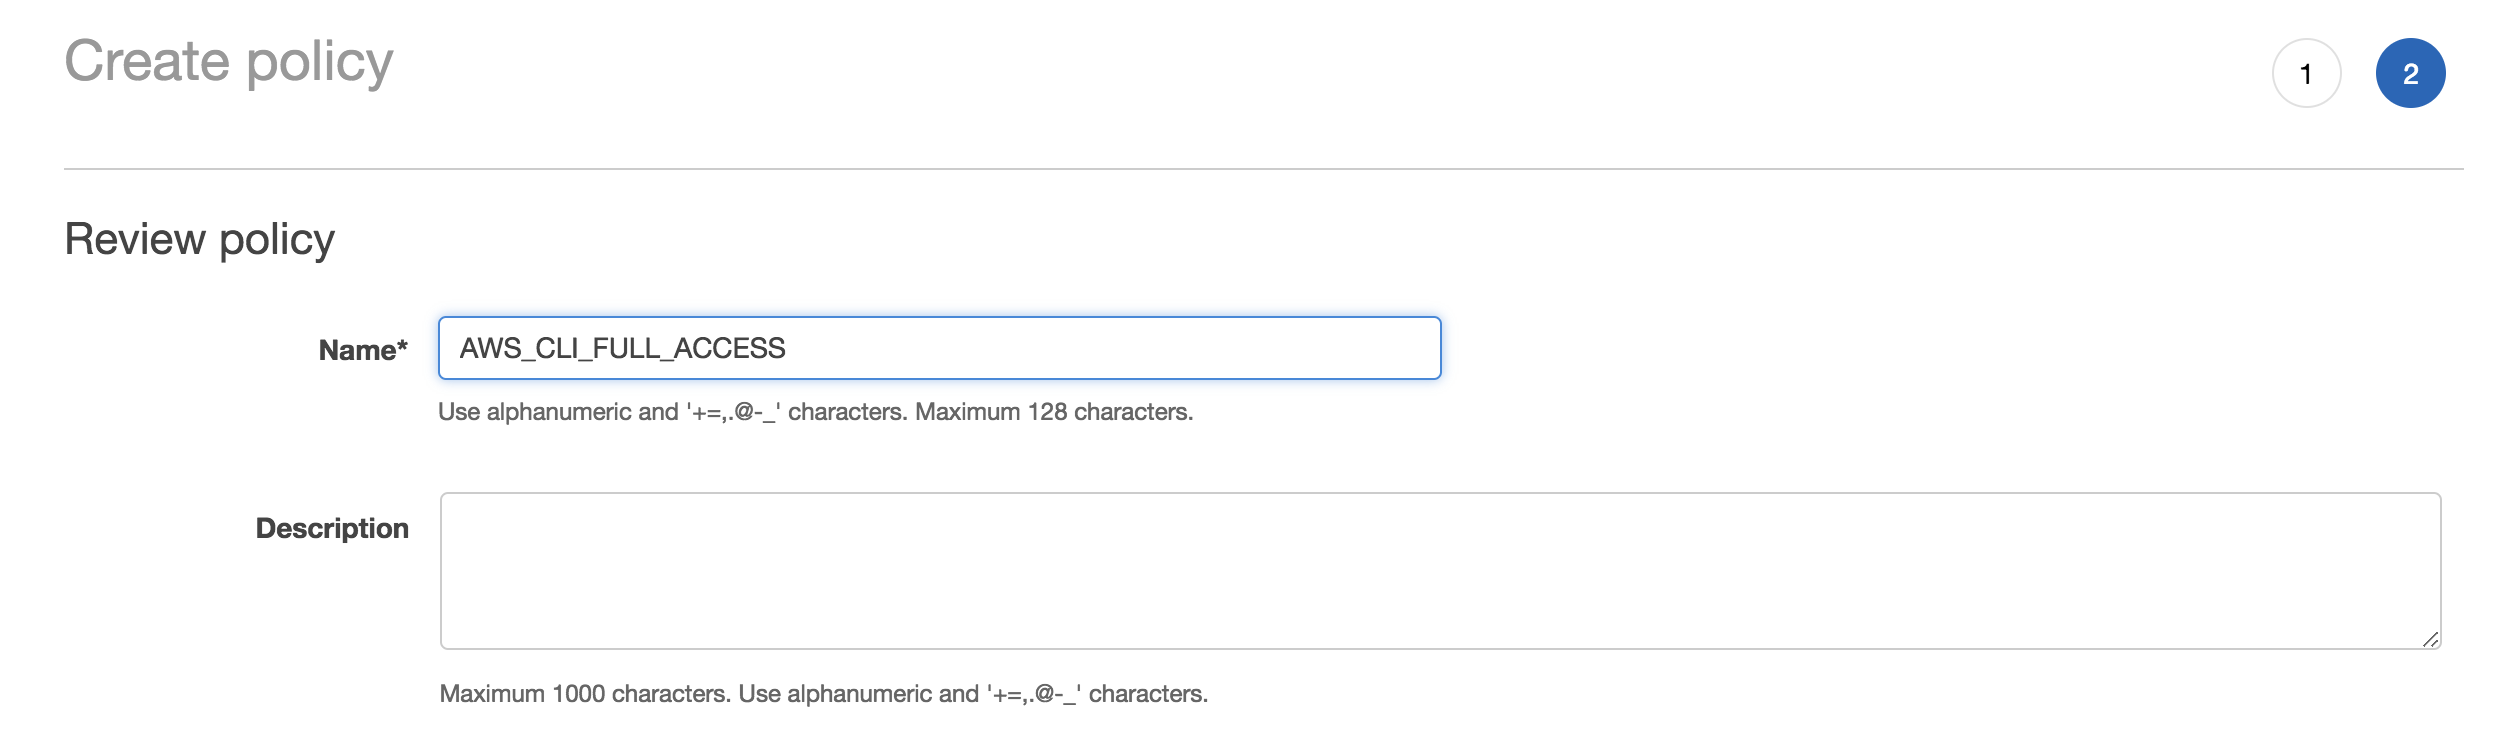
You can name this policy anything, but I am going to stick with AWS_CLI_FULL_ACCESS. Next, we want to add the actual policy contents, and you can copy the following JSON for the policy configuration.
{
    "Version": "2012-10-17",
    "Statement": [
        {
            "Effect": "Allow",
            "Action": [
                "iam:CreateRole",
                "iam:GetRole",
                "iam:AttachRolePolicy",
                "iam:PassRole"
            ],
            "Resource": "arn:aws:iam::*:role/ask-*"
        },
        {
            "Effect": "Allow",
            "Action": [
                "lambda:AddPermission",
                "lambda:CreateFunction",
                "lambda:GetFunction",
                "lambda:UpdateFunctionCode",
                "lambda:ListFunctions"
            ],
            "Resource": "arn:aws:lambda:*:*:function:ask-*"
        },
        {
            "Effect": "Allow",
            "Action": [
                "logs:FilterLogEvents",
                "logs:getLogEvents",
                "logs:describeLogStreams"
            ],
            "Resource": "arn:aws:logs:*:*:log-group:/aws/lambda/ask-*"
        }
    ]
}
After this, follow the prompts and press Create Policy If all is well, you should get this alert.

Create CLI User in AWS IAM
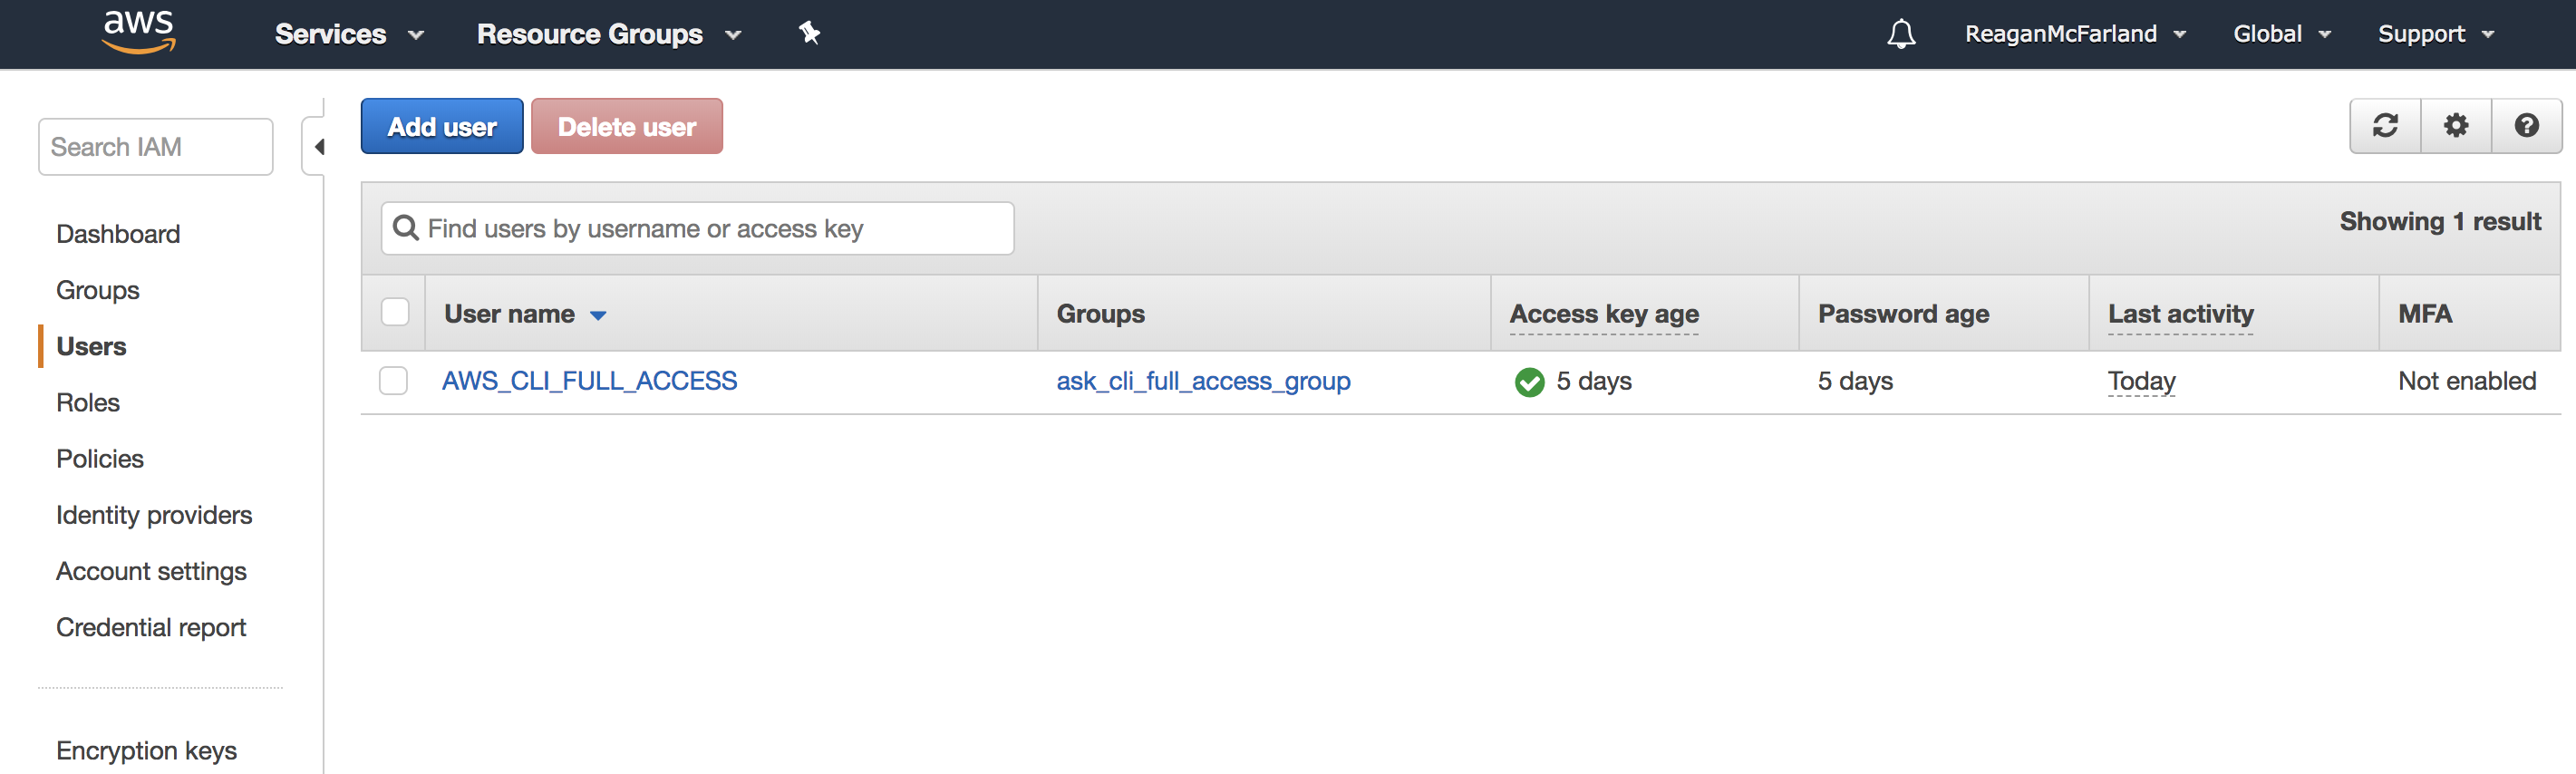
Now that we have created a new policy, we need to attach that policy to a user. Go back to the IAM tab in the AWS Console, navigate to Users, and select Add > User.
Note: I already have a user named AWS_CLI_FULL_ACCESS, but you should not.
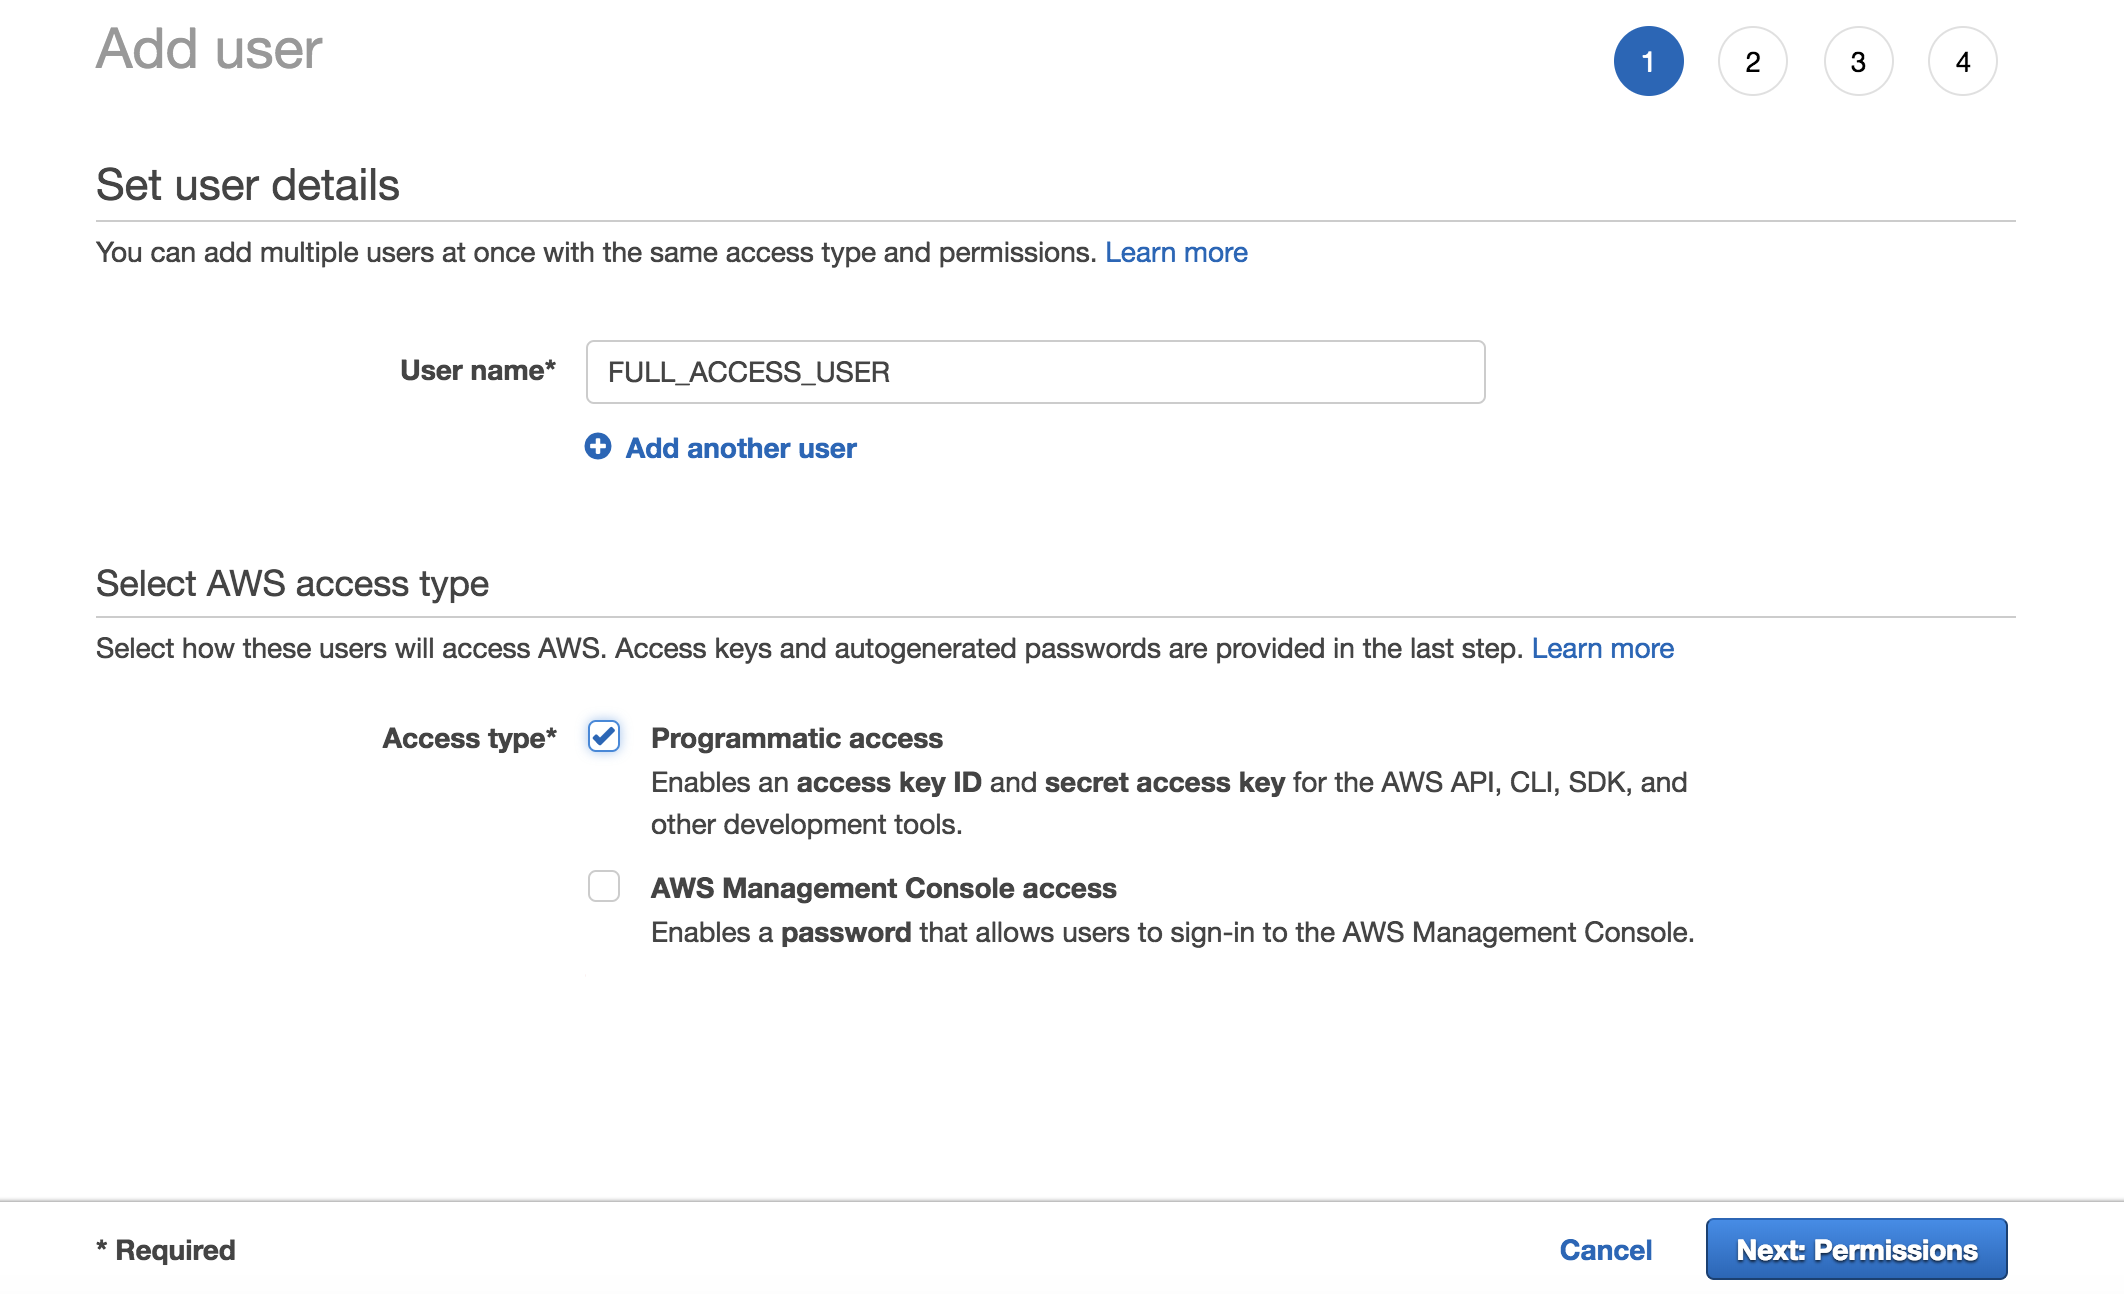
Next, name the user by following the prompts. You can name it whatever you want, but I am going to stick with AWS_CLI_FULL_ACCESS. Make sure to select Programmatic Access when prompted for the Access Type.
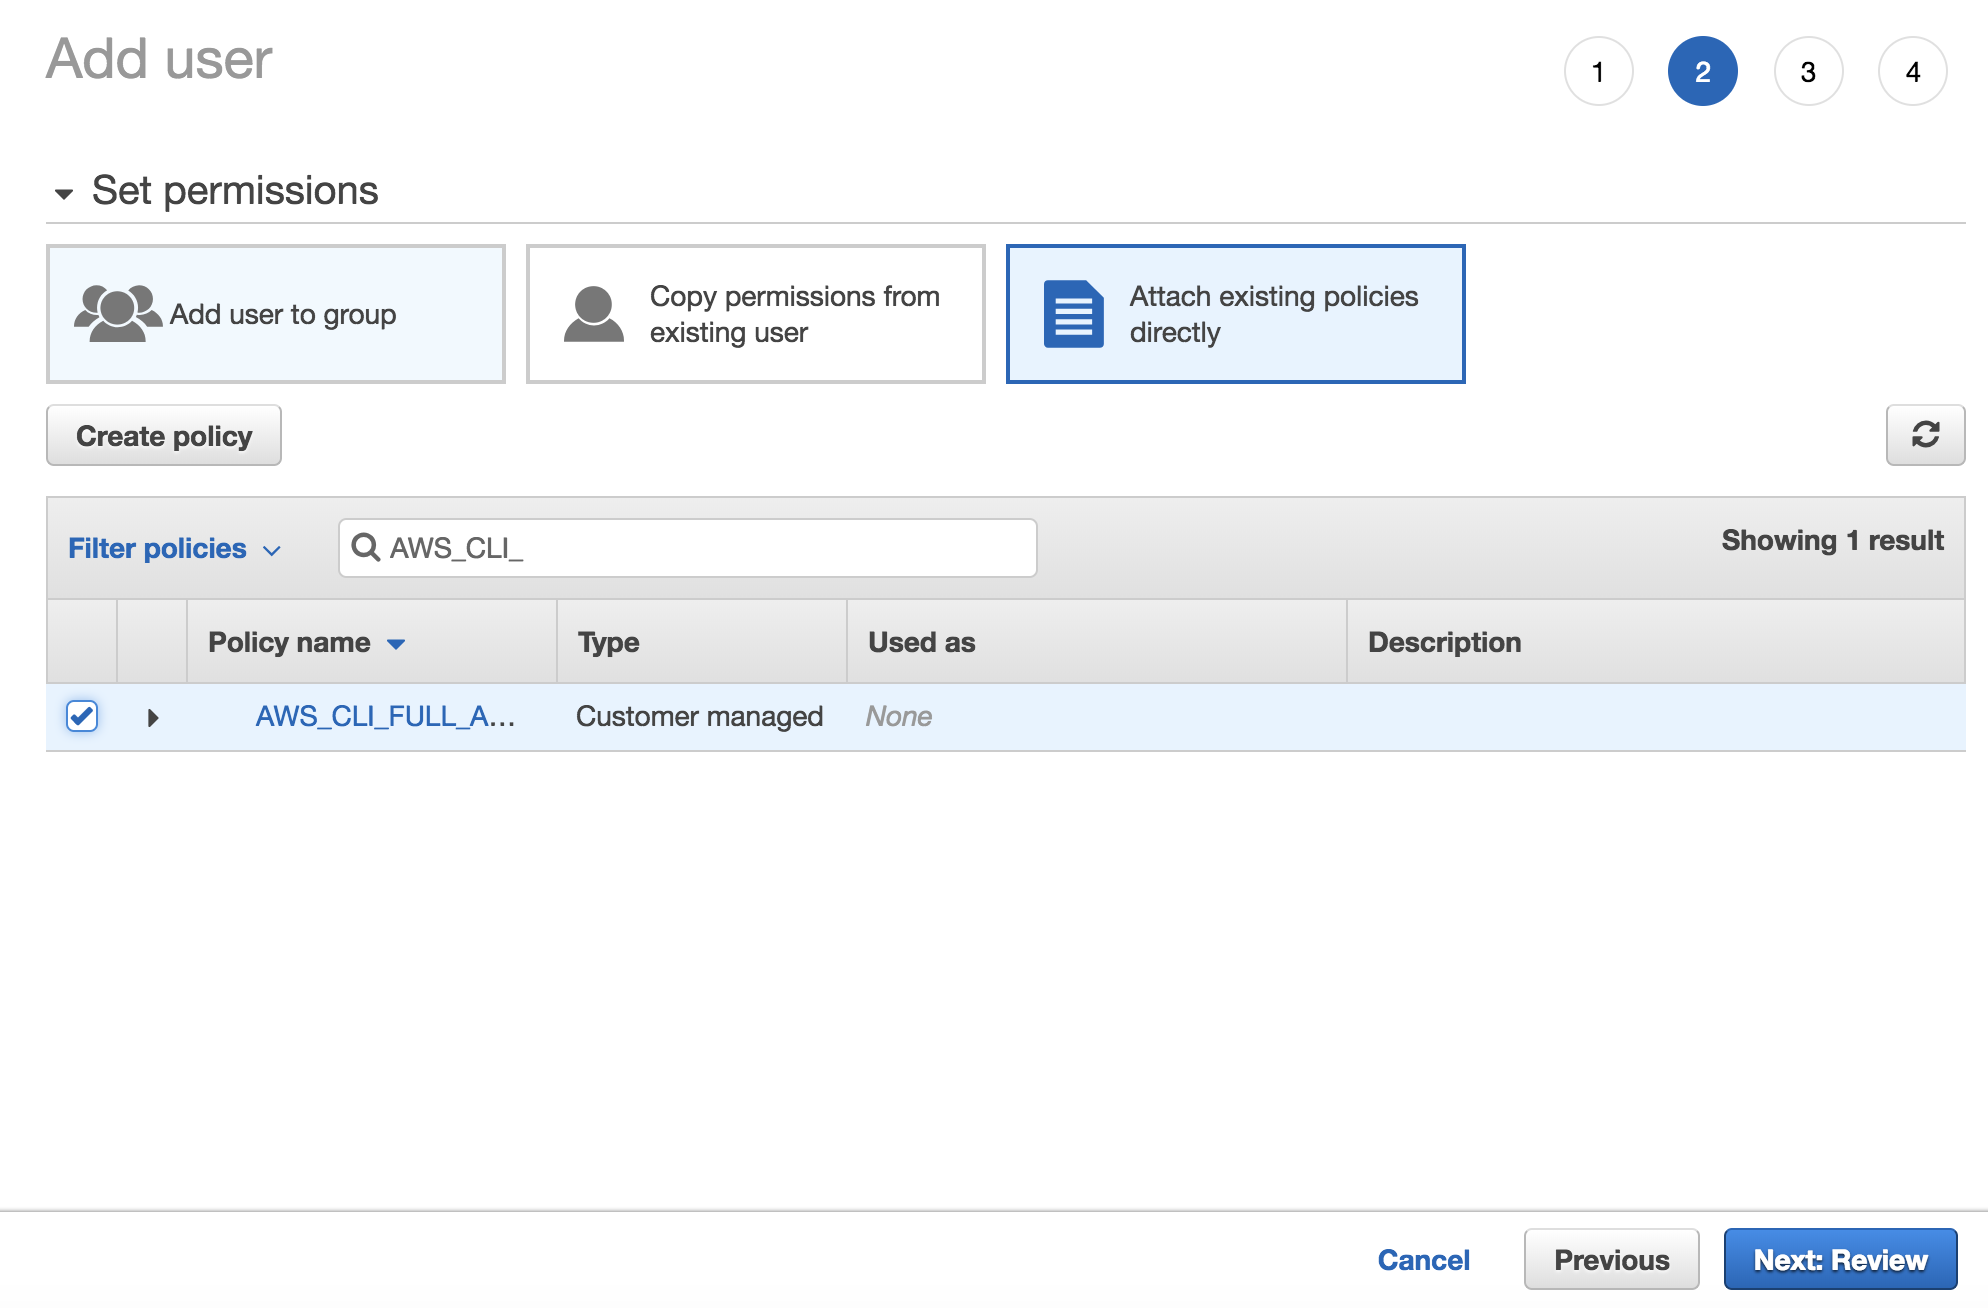
It is going to ask to attach a policy to the user and make sure to select the AWS_CLI_FULL_ACCESS policy we created earlier.
Now follow the prompts until it displays the user and their Access Key ID and Secret Key. These are VERY important and we will need them for the next step, so make sure to write these down somewhere.
Adding our IAM User to our local machine
With our IAM User now created, we need to add him to our AWS Local Config. This is located at different locations depending on your OS.
- macOS: ~/.aws/credentials
- Windows: %USERPROFILE%.aws\credentials.txt
We want to add our AWS IAM User to this file. Add the following lines and save the file.
[AWS_CLI_FULL_ACCESS]
aws_access_key_id=<YOUR_ACCESS_KEY_ID>
aws_secret_access_key=<YOUR_SECRET_ACCESS_KEY>
Initializing the ASK Profile
We need to configure an ASK profile with our IAM User. To do this, we need to run the following command.
ask init -p ASK_CLI_FULL_ACCESS
You will be prompted to log in with your Amazon Account, and if you are authenticated it will let you know that the profile is initialized successfully.
Deploying the Skill
Navigate to the Project , and run the following command.
ask deploy
If you get the following error: [Error]: Cannot resolve profile [default], go into the config file located at ~/.ask/cli/config and change [default] to [AWS_CLI_FULL_ACCESS].
And just like that, your skill is deployed with a corresponding AWS Lambda Instance and Skill. You can now test the skill by navigating to the Alexa Skill Kit page on the Amazon Developer website. From there, you can test the skill by clicking on the Test section.

Make sure to re-deploy the skill every time when you want to test new features!
The Code
Our API File
There currently is not any file for us to put our API calls to Cosmic JS in. So, let's make one. Go ahead and create a file named api.js in the lambda/custom directory. Let's first add some basic Cosmic JS setup.
//import CosmicJS Library
const Cosmic = require('cosmicjs');

//import our local Config
const config = require('./config');

//Fetch our Chore bucket
const choreBucket = Cosmic.bucket({
  slug: config.BUCKET_SLUG,
  read: config.API_READ_ACCESS_KEY,
  write: config.API_WRITE_ACCESS_KEY
});
This is pretty straightforward. The first two parts are basic require statements, one for the Cosmic JS npm module, and the second one is for our config.js file in order for us to access our Bucket Slug and API Keys. We then create a reference to our Chore Bucket for later use.
Reading Objects from our Bucket
Now we want to add a function for retrieving all of our Chores added to the Bucket, that way our Alexa Skill can list them off to the user when they want to retrieve them.
First, let's update our api.js file
/**
 * Retrieve all chores from the bucket
 */
const getChores = async function() {
  const choreData = await choreBucket
    .getObjects({})
    .then(data => {
      return data;
    })
    .catch(err => {
      console.log(err);
      return null;
    });
  let chores = [];
  if (!choreData) {
    return [];
  } else {
    choreData.objects.map(item => {
      chores.push(item.title);
    });
    return chores;
  }
};

//update module.exports
module.exports = {
  getChores
}
This is a simple function that will return all objects from the Chore Bucket that we previously created a reference to before. As getObjects() returns a Promise, we handle it with the traditional then() and catch(). Lastly, we map over all of the Chores in choreData, and add the titles to an array and return it.
We will also need to update our ListChoresIntentHandler in index.js to call getChores() in our API file.
/**
 * Handler for the ListChoresIntent
 */
const ListChoresIntentHandler = {
  canHandle(handlerInput) {
    const { request } = handlerInput.requestEnvelope;
    return (
      request.type === Requests.INTENT_REQUEST &&
      request.intent.name === Intents.LIST_CHORES_INTENT
    );
  },
  async handle(handlerInput) {
    let speakOutput = 'There are no chores in your bucket';
    const chores = await API.getChores();
    if (chores.length > 0) {
      speakOutput = 'Your chores are ' + chores.join(', ');
    }
    return handlerInput.responseBuilder.speak(speakOutput).getResponse();
  }
};
Make sure to include api.js at the to top of index.js with a require() statement. Also, keep in mind that we added the async modifier to handle(). This has to be added in order to allow us to use the await keyword.
Now, when you ask Alexa "Ask chore tracker to list off my chores?", it should say back "Your chores are mowing the lawn."
Writing Objects to our Bucket
Now that we have a way of retrieving all of our chores added, let's add a function that allows us to add a new Chore.
First, let's update our api.js file with the following function.
/**
 * Add a chore to the bucket
 */
const addChore = async function(chore) {
  const params = {
    title: chore,
    type_slug: 'chores',
    content: null
  };
  var returnData = await choreBucket
    .addObject(params)
    .then(data => {
      return data;
    })
    .catch(err => {
      console.log(err);
      return null;
    });
  return !!returnData;
};

//Update module.exports
module.exports = {
  getChores,
  addChore
}
This is a simple function that will add an Object of Object Type Chore to our Chore Bucket. Similar to the getObjects(), we handle the Promise with then() and catch(). Lastly, we return a boolean value whether the response is not null, indicating a successful action.
We will also need to update our AddChoreIntentHandler in index.js to call addChore().
/**
 * Handler for the AddChoreIntent
 */
const AddChoreIntentHandler = {
  canHandle(handlerInput) {
    const { request } = handlerInput.requestEnvelope;
    return (
      request.type === Requests.INTENT_REQUEST &&
      request.intent.name === Intents.ADD_CHORE_INTENT
    );
  },
  async handle(handlerInput) {
    const { request } = handlerInput.requestEnvelope;

    //Retrieve the chore said by the user
    const choreSlot = request.intent.slots.Chore;
    let choreName;
    if (choreSlot && choreSlot.value) {
      choreName = choreSlot.value.toLowerCase();
    }

    let speakOutput = Messages.ERROR_NO_CHORE_SLOT;
    if (choreName) {
      const success = await API.addChore(choreName);
      if (!success) {
        speakOutput = Messages.ERROR_ADDING_CHORE;
      }
      speakOutput = `Added ${choreName} to your chores list!`;
    }
    return handlerInput.responseBuilder.speak(speakOutput).getResponse();
  }
};
This is a little longer than the last Handler since we have to retrieve the name of the Chore the user said by reading the choreSlot. Next, we call addChore() and check to see if it was a successful operation or not and return a corresponding message.
Now, when you ask Alexa "Ask chore tracker to add cleaning the dishes", it should say back "Added cleaning the dishes to your chores list", as well as adding a new Object to your Bucket.
Removing Objects from our Bucket
But, what if we want to remove chores? Like before, we will need to first add **removeChore()**to our api.js file and update the RemoveChoreIntentHandler in index.js.
First, let's update the api.js file for the last time.
/**
 * Remove a chore from the bucket
 */
const removeChore = async function(chore) {
  const params = {
    slug: chore
      .split(' ')
      .join('-')
      .toLowerCase()
  };
  var returnData = await choreBucket
    .deleteObject(params)
    .then(data => {
      return data;
    })
    .catch(err => {
      console.log(err);
      return null;
    });
  return !!returnData;
};

module.exports = {
  getChores,
  addChore,
  removeChore
};
This function is almost identical to addChore(), but we modify the params and call deleteObject() on our Chore Bucket instead. We also have to replace all spaces in the chore with hyphens as that is how Objects are stored in Buckets. This also returns a boolean value on whether the operation was successful or not.
Also update the RemoveChoreIntentHandler in index.js
/**
 * Handler for the RemoveChoreIntent
 */
const RemoveChoreIntentHandler = {
  canHandle(handlerInput) {
    const { request } = handlerInput.requestEnvelope;
    return (
      request.type === Requests.INTENT_REQUEST &&
      request.intent.name === Intents.REMOVE_CHORE_INTENT
    );
  },
  async handle(handlerInput) {
    const { request } = handlerInput.requestEnvelope;

    const choreSlot = request.intent.slots.choreName;
    let choreName;
    if (choreSlot && choreSlot.value) {
      choreName = choreSlot.value.toLowerCase();
    }

    let speakOutput = Messages.ERROR_NO_CHORE_SLOT;
    if (choreName) {
      const success = await API.removeChore(choreName);
      speakOutput = Messages.ERROR_REMOVING_CHORE;
      if (success) {
        speakOutput = `Successfully removed ${choreName}`;
      }
    }
    return handlerInput.responseBuilder.speak(speakOutput).getResponse();
  }
};
This is also very similar to the AddChoreIntentHandler , but with different messages and a different API Call.
So, when you ask Alexa "Ask chore tracker to remove mowing the lawn", it should say back "Successfully removed mowing the lawn", as well as removing the corresponding Object from the Bucket.
Conclusion
There you go! You now have a working Alexa Skill that you can use to keep track of any chores or tasks you have to do around the house. Feel free to experiment with adding your own chores by modifying the en-US.json model file and responses by modifying the Messages.js file.
If you have any questions or run into any snags, feel free to open an issue on the Completed Source Code GitHub Repository and I'll be more than happy to respond  .
.