
All about Core NodeJS — Part 1
Learn all about essential NodeJS in these series of articles. This is part 1 of the article and I will be incrementally updating and adding contents.

Your compass to Node.js
Prerequisites
- Basic knowledge of JavaScript
- Basic HTML/CSS Knowledge
- Assume you know how to install node
I will be referring to Node.js as Node going forward in the article. I may interchange the term,but I mean the same.
The complete source code as is developed can be grabbed from https://github.com/rajeshpillai/node-tutorial
Credits
Before I begin, the credit for this article goes to the Node documentation, the numerous Node book I read, my experience with Node for the past 5 years, my company and my colleagues and my training activities.
Goal behind the “All about xyz in 1 article” series
I am running a startup where we train freshers or interns from all fields to make a career in computer science, web development, data science etc.
What we have observed is that while they undergo training, they have to refer to multitude of documents, articles, books, blogs, videos to gauge the depth of a topic (which is good, but time consuming).
That’s where this idea of “All about xyz in 1 article” came into being, so that the participants can get a single point of reference to most of the major topics in the respective area of study.
They still have to search, watch videos, read books, article etc, but then they can now do in a much more focussed manner.
But alas, NodeJS cannot be covered in 1 article and hence am splitting this into multiple articles and this being the part 1.
First things first
Please note, this article will be very big and I want to progressively publish this so that interested readers will have enough time to catch up, give feedback etc and I also I can improve the article in the process.
Completing this entire thing may take a month, but then I don’t want to publish a big 100 page story at one go , as that won’t give enough time and leverage to those interested to follow up.
And hence r esorting to this incremental publishing.
Hello World
Lets begin with the hello world program, after all traditions matters.
Create a file called helloworld.js (I am using vscode, feel free to use any editor)
let hello = `Welcome to NodeJS Tutorial. Hello World!`
console.log(“Welcome to NodeJS Tutorial”);
To run this code, open up a command shell/terminal and execute the following code.
node helloworld
The output will be a beautiful message starting at you on the screen.

NOTE: Mac/Linux users adjust the scripts accordingly.
The output will be a beautiful message staring at you on the screen.
How is the code in the node file executed?
In the Node.js module system, each file is treated as a separate module. So, in our case the helloworld.js and global.js are separate modules.
The main source code/script is wrapped in an IIFE (Immediately Invoked Function Expression) which passes some global object to every module/file;
The code may look like below
(function(exports, require, module, __filename,__ dirname) { // Module code actually lives in here // For e.g. our helloworld.js

})(exports, require, module, __filename,__ dirname);
You can see now, this is the reason why require , module, __filename, __ dirname is directly available in all node.js files without specifically requiring or importing.
Modules
Modules are reusable functionality. It can be a function, can be a class, can be an object or even simple variables.
To import a module we use the require() function in node. Require function is globally available.
NOTE: New version of Node.js supports es6 notation of import and export statements.
Let’s see some of the features of modules in the examples below. Refer global.js file.
var path = require("path");

console.log(`Full path: ${__filename} and filename is ${path.basename(__filename)}`);
The output of the above code will be (Run the command: node global in your terminal)

The path module provides us some methods to work with files/folders. The basename method returns the filename from the complete path.
__filename is a variable that is available in all node file and it refers the complete path of the current file.
How require() works
In Node, modules are referenced either by file path or by name. A module that is referenced by a name will eventually map into a file path unless the modules is a core module.
Node’s core modules expose some Node core functions to the programmer, and they are preloaded when a Node process starts (refer the IIFE above).
Other modules include 3rd party modules that you installed using NPM (Node Package Manager) or local modules that you or developers around the world has created.
Each module of any type exposes a public API that the programmer can use after the module is imported into the current script.
To use a module of any type, you have to use the require function like shown below:
var module = require('module_name');
This will import a core module or a module installed by NPM. The require function returns an object that represents the JavaScript API exposed by the module.
Depending on the module, that object an be any JavaScript value, a function, an object with some properties that can be functions, an array, or any other type of valid JavaScript object.
Now, we can only import modules that have been exported.
TODO: Require flow diagram (coming up)
Exporting a Module
Node uses the CommonJS module system to share objects or functions among files.
To the end user a module exposes exactly what you specify it to.
In Node, files and modules are in 1-to-1 correspondence, which you can see in the following example.
Let’s create a file square.js, which just exports the Square constructor. For more about constructor function you can read my other story All about functions in JavaScript in 1 article
function Square(side) {
  function area () {
    return side * side;
  }

return {
    area: area
  }
}
module.exports = Square;
The important bit here lies on the last line, where you define what is to be exported by the module. module is a variable that represents the module you are currently in. module.exports is the object that the module will export to other scripts that require this module.
You can export any object. In this case we are just exporting the Square constructor function, which a module user can use to create a fully functional Square instance.
Lets use this Square module in another program. Lets us create a file named square-test.js and add the following code.
// Load from current module path

var Square = require('./square');

// Since the module exports a constructor function we
// have to create an instance before using it.

var square = new Square(5);

console.log(square.area());
The output of the above program is shown below.

One more important thing to note here is since we are importing a local module, we have to use the relative path of the module in the require statement.
Exporting multiple modules
Now let us see an example of exporting multiple objects in one module. Lets us code a small string utility module which will help us to pad strings with characters and capitalize first character of the text.
Add the below code in a file called string-module.js (you can name the file whatever you want)
function pad(text, padChar='', len) {
  let result = padChar.repeat(len);
  result = result + text + result;
  return result;
}

function capitalizeFirstLetter(text) {
  return text.charAt(0).toUpperCase() + text.slice(1);
}

module.exports.pad = pad;
module.exports.capitalizeFirstLetter = capitalizeFirstLetter;
Now in the above module/file we are exporting two functions. Let us use these function in another module.
Create a file called string-module-test.js and add the below code.
var util = require('./string-module');

console.log(util.pad("Hello","*",5));
console.log(util.capitalizeFirstLetter("Rajesh is learning to code!"));
The output of the above code is shown below. Now, what the function actually doesn’t matter here. In our case the pad function pads a string with the padding character and length to the left and right of the original string and the capitalizeFirstLetter does what the name suggest.

NOTE: I am not doing any exception handling in the above code for brevity sake.
Now, lets us see all the three types of module loading
Loading a Core Module
Node has several modules compiled into its binary distribution. These are called the core modules and are referred by the module name, not the path.
They get preference in loading even if a third-party module exists with the same name.
For example, the following code shows how to load the core http module
var http = require('http');
This returns the http module object that supports various standard http functions. See documentation for more details.
Loading a File Module
We can also load a non-core module from the file system by providing the absolute path as shown below.
var myModule = require('/home/rajesh/my_modules/mymodule');
Or you can provide a relative path as shown below:
var myModule = require('./my_modules/module1');
var myModule2 = require('./lib/module2');
NOTE: You can omit the ‘.js’ extension.
Loading a Folder Module
We can use the path for a folder to load a module as shown below:
var module1 = require('./moduleFolder');
In case we do so, Node will search inside that folder and it will presume this folder is a package and try to look for a package definition file named package.json.
If that folder does not contain a package definition file named package.json, the package entry point will assume the default value of index.js, and Node will look for a file under the path ./moduleFolder/index.js.
However, if you place a file named package.json inside the module directory, Node will try to parse that file and look for and use the main attribute as a relative path for the entry pint.
For instance, if our ./myModuleFolder/package.json file looks soke the following, Node will try to load the file with the path ./myModuleFlder/lib/module1.js:
{
  "name": "module1",
  "main": "./lib/module1.js"
}
Loading from the node_modules Folder
If the module name that you are loading is not relative and is not a core module, Node will try to find it inside the node_modules folder in the current directory.
For instance, in the below code snippet, Node will try to look for the file in ./node_modules/module1.js:
var module1 = require('module1.js');
If Node fails to find the file, it will look inside the parent folder called ../node_modules/module1.js.
If it fails again, it will try the parent folder and keep descending until it reaches the root or finds the required module.
We will talk about node_modules and NPM shortly.
So, here node_modules is the local folder where modules are installed/copied when you run the NPM install commands.
Caching Modules
Modules are cached the first time they are loaded, which means that every call to require(‘module1’) returns exactly the same module if the module name resolves to the exact same filename.
Let us see this in action with an example. Create a file named counter.js and a file named counter-test.js to demonstrate the caching feature.
counter.js
var counter = 1;
console.log('module counter initializing...');

module.exports = {
  value: counter
};
console.log('module counter initialized.');
The above module when loaded should output the text mentioned in console.log, the first time. On second require, this long should not come indicating that the file is loaded from the cache.
counter-test.js
var counter = require('./counter');
console.log(counter.value);
counter.value++;

// Lets us require the module one more time

var counter1 = require('./counter');
console.log(counter.value);
Now, you can create multiple files and load the same module and try this or within the same file, as above, the behaviour will remain same.
Now, let us take a peek at the output.

In the above code, we are requiring the module twice but you can see the initialization log only once.
You can also see that the second time we are getting the updated counter value, indicating that the module is kind of a singleton instance.
Process Object
The process object is globally available to every node module. It contains functionalities which allow us to interact with current process in the system.
The Process object also provides information about the runtime environment. In addition, standard input/output (I/O) occurs through process, we can also gracefully terminate a Node application and we can even signal when the Node event loop (We will discuss this) has finished a cycle.
This is also useful for building command line applications as we can capture all user parameters passed to the program which it has been invoked from the terminal.
The user provided parameters are available in the process.argv variable.
Let us create a small terminal program that passes a message to the module. Create a file called greeting.js
console.log("Total Arguments: ", process.argv.length);

console.log(process.argv);
The above program when executed from the command prompt/terminal will output the below details.

Invoking the above program with two parameters “hello” and “world” results in the above output. The first argument is the node process itself, followed by the file/module to be executed.
Understanding Node environment with Process object
Let us now explore the Node environment by using Process along with the -p command line option with Node.
For instance, to check out the process.version, type the following:
node -p "process.versions"
Take a peek at the output from the above command

NOTE: The double quote works on all platform. The single quote may not work in windows. It will even work without giving any quotes.
The process.env property is a great way to peek into the development/production environment.
node -p "process.env"
The output is too long to be displayed here but I assume you got the idea.
You can even dig into the details of the objects as shown below.
process -p "process.release.lts"
The output of the above command may differ depending on what we have installed.
For me the output is shown below.

But in case you have both LTS and Current environments, the output may defer.
Process I/O functions: Standard Streams
Standard streams are pre-established communication channels between an application and its environment. They consist of a standard input (stdin), standard output (stdout), and standard error (stderr).
Process I/O functions are inherited from EventEmitter (we will cover this shortly).
In a Node application, these channels provide communication between the Node application and the terminal. In short they are the means via which we can communicate with the application.
We can receive input from the stdin and write the output to stdout and stderr channels.
NOTE: You can’t close these streams or end them within the application.
TIP: Set the encoding for the stream before working with it.
Reading and writing to standard I/O
Whenever we need to get data into and out of a program, one useful technique is to use the process object to read and write to standard I/O streams.
Problem: How to pipe data to and from a Node program.
Solution: Use process.stdout and process.stdin.
Discussion:
The process.stdout object is a writable stream to stdout and every node program has access to it.
Example: An example program to transform input stream into uppercase data.
/* USAGE: cat file.txt | node uppercase-pipe.js*/

// Tell the stream we're ready to start reading

process.stdin.resume();
process.stdin.setEncoding('utf8');

process.stdin.on('data', function (data){
  process.stdout.write(data.toUpperCase());
});
The output of the above program is shown below. Windows users please use git bash/git shell to execute the program.

In the above screenshot, we are piping the output of cat to our program which converts the text to uppercase.
You can pass in any file as input to this, in this the program itself is the input.
How does it work?
Everytime a chunk of text is read from the input stream, it’ll be transformed to uppercase and then written to the stdout.
Logging Messages
Lets use some logging feature of console object and see the behaviour.
let data = "An important message";
let from = {name: "admin"};

// A space is automatically added after':'
console.log('Notice:', from);

console.log('Hello %s:', from);

console.error('Error: ', from);
Lets’ execute the program as shown below
$ node consolelog.js 2>error-log.txt
Let’s now see the output and understand the redirection to error log that is happening.

You will see the console.log getting logged here, but not the console.error. The reason is we indicated with the 2>error-log.txt to redirect all errors to the file.
If you check the file error-log.txt, you should see the below output.

NOTE: Standard streams come in three flavors: stdin, stdout and stderr. In unix based system these are referred to with numbers.
0 — is used for standard input
1 — is used for standard output
2 — is used for standard error
The same also applies to windows as well.
So, in the above execution 2> error-file.txt, the 2 refers to the error stream. This means we can redirect errors to a log file without having to open files within our Node program, or using a specific logging module.
Benchmarking a Node
One of the useful skills to have is to know how to time your application using built in language features.
Problem: Benchmark a slow operation
Solution: Use console.time() and console.timeEnd()
Discussion
Using console.time(‘label’) records the current time in milliseconds, and then later calling console.timeEnd(‘label’) displays the duration from that point.
NOTE: The time in milliseconds will be automatically printed alongside the label.
Example
// BEGINNING OF PROGRAM

let fs = require('fs');
let args = {
  '-h': commandUsage,
  '-r': readFile
};

function commandUsage() {
  console.log(args);
}

function readFile(file) {
  if (file && file.length) {
    console.log('Reading: ', file);
    console.time('read'); // START TIMING

let stream = fs.createReadStream(file);
    stream.on('end', function () {
      console.log("\n");
      console.timeEnd('read'); // END TIMING
    });
    // OUTPUT to console
    stream.pipe(process.stdout);

} else {
   console.error('Please provide a file with the -r option');
   process.exit(1);
 }
}

let flag = process.argv[2];
let fileName = process.argv[3];

if (!flag) {
  console.log("Usage: filereader-bm [-h/-r] [filename] \n\n");
  process.exit(1); // non-zero menas an error occured}

switch(flag) {
  case '-h':
    commandUsage();
    break;

case '-r':
    readFile(fileName);
    break;
}
// END OF PROGRAM

Lets execute as node filereader-bm.js -r filereader-bm.js and see the output. The above command execution times how long it takes to read filereader-bm.js.
The output will be the contents of the file followed by the time. The extract of the content is shown below.

TIP: We can use several console.time with different lables to time different even nested portion of the code.
NOTE: We will look into file handling functions in later part of this article.
Buffers (wip)
JavaScript traditionally didn’t had great support for binary data. So, the Node developers had to tackle this problem and primarily for performance reason and this is where the Buffer data type came into picture.
They are specifically also useful when working with TCP streams and file operations.
Buffers are raw allocations of the heap and contains binary data, which just consist of bits, i.e. o or a 1.
The buffer documentation is here https://nodejs.org/dist/latest-v9.x/docs/api/buffer.html
They are available globally and thus don’t need to be imported and can be treated like any other JavaScript type.
We will understand buffer by following the below activities.
- Creating Buffer from string
- Creating Buffer from an array
- Convert Buffer to JSON
- Concatenating Buffer
- Compare Buffers
- Converting a Buffer to different encodings
- Using the Buffer API to transform a binary file to JSON
- Encoding and decoding your own binary protocol
Changing data encodings
When working with file if no encoding is given, file operations and many network operations will return data as a Buffer.
For example, take this fs.readFile (Take a look at the source code, buffer folder)
let fs = require('fs');
fs.readFile('./phone.txt', function (err, buf) {
   console.log(Buffer.isBuffer(buf)); // true});
Running this program as node readfile.js will give the below output

Example 1: Turn a Buffer into plain text
Let us take the example of a text file, phone.txt, which contains the below data
name,mobile
a,987837373
b,897878787
c,383783737
By default if we load this file, without specifying any encoding we will get a Buffer object by default.

The output is shown below:

But in the above example, since we already know that this data is only comprised of ASCII characters, we could also get a performance benefit by changing the encoding to ASCII rather than UTF-8.
To do this, we will provide the type of encoding as the first argument to toString as shown below.
let fs = require('fs');
fs.readFile('./phone.txt', function (err, buf) {
   console.log(buf.toString('ascii'));
});
Running this, will result in the same output as before, but for larger files will be much more performant.
The Buffer API provides other encodings such as base64, hex, utf16le etc. More details about it can be found in the Node documentation as well as http://unicode.org/faq/utf_bom.html.
Changing string encodings using buffers
In addition to converting buffers, we can also utilize buffers to turn one string encoding into another.
Example 1: You want to change from one string encoding to another.
Let us take a dig at the above problem by creating a basic authentication header.
Sometimes it is very helpful to build a string of data and then change its encoding. For example, if you wanted to request data from a server that uses Basic authentication, you would need to send your credentials, like username and password encoded using Base64:
Authorization: Basic dG9tbXk6c2VjcmV0
Before Base64 encoding is applied, Basic authentication credentials combine the username and password, separating the two using a : (colon). For our example, let us use the following credentials:
username: tommy
password: secret
let username = 'tommy';
let password = 'secret';
let authvalue = username + ':' + password;
Let us now convert this into a Buffer in order to change it into another encoding. Buffer can be allocated by bytes and also can be allocated by passing in string data.
// Let's convert the string value to a Buffer
let buf = new Buffer(authvalue);

let encoded = buf.toString('base64');

console.log(encoded); // outputs: dG9tbXk6c2VjcmV0
NOTE: By default when strings are used to allocate a Buffer, they are assumed to be UTF-8 strings. But we can also specify the encoding of the incoming data using a second, encoding argument as shown below
new Buffer('dG9tbXk6c2VjcmV0', 'base64')
Example 2: Embedding a PNG as a Data URI
Data URI’s are another example of when using the Buffer API can be helpful. Data URIs allow a resource to be embedded inline on a web page using the following scheme:
data:[MIME-type][;charset=<encoding>[;base64],<data>
For example, the following kungu pada https://static.wixstatic.com/media/2cd43b_d1ecd76051de458b9041402093ffeb54~mv2.png image can be represented as a data URI:

data:image/png;base64,iVBORw0KGgoAAAANSUhEUgAAAQ...
Let’s check the code to accomplish this. Let us put this code in a file named png-to-datauri.js

Example 3: Creating and image file from the Data URI
Lets’ take the data uri created above and reverse it to a png file. To get the complete data uri you can redirect the output to a file as shown below.

Running the above command will save png as base64 in a file named base64png.txt.
Lets have a look at the code to reverse the process and create the png. (file: datauri-to-png.js)

The important part of the code is uri.split, and then we take the base64 encoded string and create a buffer.
NOTE: We are using the sync method of fs for demonstration (for real apps use the async version whereever applicable)
Running the command

creates a file named secondpanda.png.
Example 4: Compressing files using gzip (buffer)
(Also check the stream version)
The code is small and easy to understand and hence I am putting it down for your reference.
We import the required libraries and store the file name that is passed in the command line into a varible named file.
The steps to gzip using buffer is outlined below.
- Use fs to readFile
- Use zlib.gzip to compress the buffer passed from the readFile method.
- Use fs writeFile to store the file to disk.

You can run the following command from the terminal.
node gzipbuffer.js <filenametocompress>
Streams (wip)
Node basically has two kinds of streams, a readable stream and a writable stream. An example of a stream is a TCP socket that we can read from and write to, or a file that we can append or read from sequentially.
Example 1: Let us create a HTML5 video streaming server with Node and Express
Why do we need streaming? If we won’t then the entire video file will be downloaded to the client and loaded into memory which may or may not be good.
Imagine the video size to be 100’s of MB’s, in that case the network bandwidth etc will break the user experience.
Also, take this scenario. You have 8GB RAM on the server, but you have a 20GB video file on the drive and you would like to load that file?
Welcome to streaming!
With streams, the file stays on the disk and only chunks from the whole thing is transferred to the client. For example, just 1MB at a time.
The Pipe
The Unix | (pipe) is mostly common way to pass output of one program to another one.
In Node we can use Pipes inside the code to pass the result of one function to the next one.
For example
somefile.pipe(somewritableStream).pipe(toSomeOtherWritableStream)
Combining Pipes and Streams
We will combine the pipe and stream to build our video streaming server.
Refer streams\video-streaming folder for the complete source code.
Let us first setup ExpressJs by running the below command
npm install --save express
Let us now create and index.html file that will host the <video> tag.
<!DOCTYPE html>|
<html>
  <head>
    <meta charset="utf-8">
    <title>Stream Video</title>

<meta name="viewport"
        content="width=device-width,initial-scale=1">
  </head>

<body style="text-align:center">
    <div style="margin:0 auto;">
      <video src="" controls
             width="640"
             height="480">
      </video>
    </div>
  </body>
</html>
Thats it for the HTML file. Note we are using the <video> element, the src is set to empty,as we will pass it from the URL.
All the videos will be stored in a subfolder videos within our project as shown below

The entire commented source code is in the index.js
Lets understand the important part of the code and first lets setup the route to server our index.html file.

Let us start with the /video/:videoname route. The following is and example of how to request the streaming media.
http://localhost:3000/videos/datatable-reorder-columns-drag-drop.mp4
The above request will fetch the media from the videos folder and stream it.

First we grab the file name from the parameter and then use fs.state to check the status of the file. If there are any errors, we simple end the response with the message.
Next, let us grab the range the browser will be requesting and also the filesize from the stats variable that is available as a result of call to fs.stat.

Once we grab the range and the size, lets compute the start and the end of the buffer. The end will remain the same and the start will vary with each buffered request. We have to compute the chunksize.

Note in the above screenshot, the range is in the format bytes=0-100, where 0 is the start and 100 is the end just for example.
If the end value is not available, then we take the size of the file as the end value.
Once we get the start and the end we compute the chunkSize. This is the size of response that the Node server will send back every time when data is requested from the client.
Now let us set the response header with the required information to support sending chunked data as shown below and also set the status code to 206 meaning the status is set to partial content.

Let us understand this in more detail. In order to support streaming HTML5 video on server side, we need to handle the Range HTTP header from the browser.
The Range HTTP header specifies what byte rnge from the video the browser is requesting.
If the range is missing, we can send the whole video starting from byte 0. Otherwise we ill only send the range of bytes requested indicated by start and end values.
As discussed the range header format variation is given below.
Range: bytes=0-
The above means the browser is requesting the whole video or atleast this is the initial request so the size of the video can be determined by the browser from the Content-Length header in the response.
Range: bytes=2000–5000
The above values mean the browser is requesting the video starting from 2000 bytes to 10000 bytes (may be the user has skipped ahead in the video).
Also, note the response headers that the Node server is sending.
Accept-Ranges: bytes
Content-Type: video/html
Content-Length: (length)
Content-Range: bytes (start)-(end)/(total)
The Accept-Ranges tells the browser that the server supports HTML5 video streaming and can take byte ranges.
Content-Length sends the total length of the file in bytes.
Content-Range sends the range of content being returned in bytes.
The next step is to create a read stream as shown below and watch for the open event.

We open a readable stream using fs.createReadStream and pass in the optional start and end bytes ranges.
Once the stream is open we pipe the stream data to the response so that the data is available to the client/browser.
Then we handle error if any and clost the fs.state function call.

And finally, lets start our server on a specific port as show below.

Let us know run our app using node index.js at the terminal and open up your browser and fire a request for a video file within the videos folder (Refer the source code).
The output of streaming video is shown below for your reference.

Put console.log in the index.js file and observe the stream values, start, end values etc.
Example 2: Compressing files using gzip (stream)
Lets roll out a quick program to compress files using gzip. (I am not doing any error handling for brevity sake)
Lets import the fs and zlib modules (they are built in to node)

Let’s grab the filename from the command line argument.

Let us now use the fs.createReadStream method to read the file, then pipe the output to zlib and then create a new .gz compressed file.

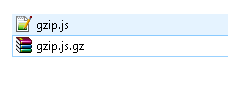
If you run the below code in your terminal

You get the new compressed file as the output as shown below. I ran the the code on the file itself, but you are free to pass in any file as the second argument.
NOTE: You can use winrar or 7zip or any other standard tool to unzip or as an exercise roll your own unzip command.
Coming up
- setImmediate() vs process.nextTick()
History
- 27-April-2018 - First release
P.S: The article will be updated every week with more in depth content and example. Feel free to share if anything specific topics you would like to see in detail or just share your thought and keep the conversation alive.
Promotion : If you would like to support our open source curriculum Mastering Full Stack Engineering in 12 to 20 weeksthen here is a special 10$ coupon for medium readers for my upcoming live ReactJS-Beyond the basics course on udemy (MEDIUM_500 is the coupon code, which is already tagged in the above URL)
This is a good article, even to someone who is not new to nodejs. Thank you