
Implement flexible UI with UITableView
Introduction
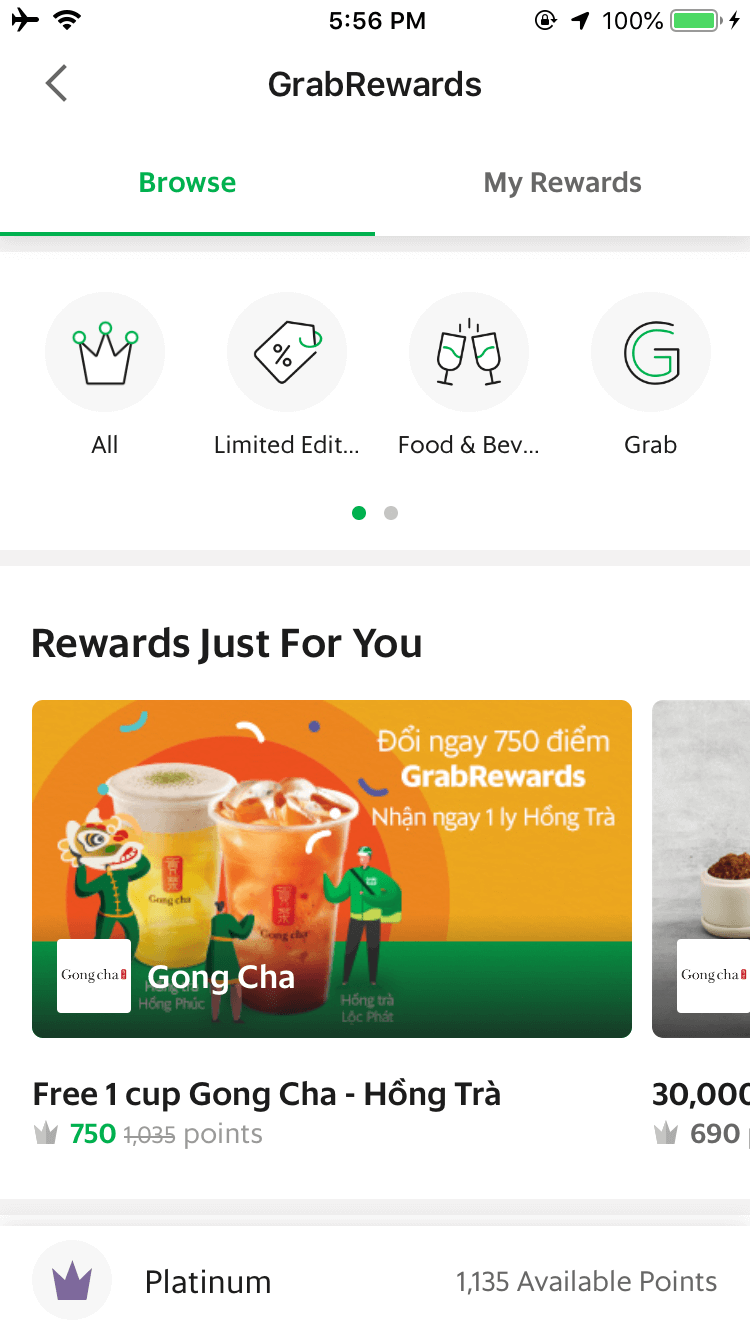
Have you ever do implement some screens like below?

What do you do with UI like this?
My solution can be good practice for UIs have some points:
- Long screen (scrollable)
- Form (scrollable when keyboard on/off)
- Need add/remove items in run-time
How it works
We seperate everything into many UITableViewCell. And in cellForRows:atIndexPath, we return cells.
For instance:
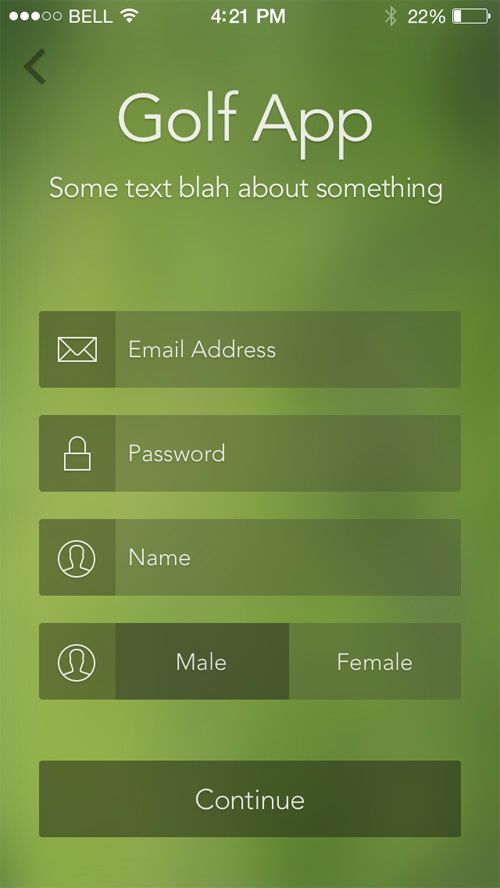
We will seperate this screen into different parts.
- Title cell: Title and subtitle label
- Email cell
- Password cell
- Name cell
- Gender cell
- Button cell
Code
I have a class knStaticListController to wrap common stuffs.
I use Auto layout programmatically with my own extension KNConstraints. You can do check my post about Auto layout programmatically at here and choose other way to use Auto layout by code with this post.
All these files are added in starter project. Download here
In this demo, I just focus on telling you how to use this way, instead of making a good UI.
1. Make title cell
  func makeTitleCell() -> knTableCell {
        let titleLabel = UIMaker.makeLabel(text: "Golf App",
                                           font: UIFont.boldSystemFont(ofSize: 22),
                                           color: .white,
                                           numberOfLines: 0,
                                           alignment: .center)
        return knTableCell.wrap(view: titleLabel,
                                space: UIEdgeInsets(top: 16, left: 16, bottom: 44, right: 16))
    }
makeLabel is my quick way to create a UILabel with format. You can check other function to create popular controls in UIMaker.
knTableCell.wrap: embed the view into UIView.
You should set 4 sides (top, left, bottom, right) of the UILabel. So that the cell can automatically resizing depend on the UILabel. Or you can set the cell to fixed height (82 px, for instance).
Remember bottom spacing is 44 px, I explain to you in next part.
VERY IMPORTANT NOTE
You have to make sure every cell can autoresizing. Otherwise your layout can be broken at that cell.
2. Make textfield cell
  func makeTextFieldCell(placeholder: String) -> knTableCell {
        let textField = UIMaker.makeTextField(placeholder: placeholder,
                                              font: UIFont.systemFont(ofSize: 14),
                                              color: .white,
                                              alignment: .left)
        textField.backgroundColor = UIColor.black.withAlphaComponent(0.5)
        textField.height(48)
        return knTableCell.wrap(view: textField,
                                space: UIEdgeInsets(left: 16, bottom: 16, right: 16))
    }
You can make a flexible function to reuse for email cell, password cell, name cell.
I am using a fixed height for textfield cell. Make sure every cell can calculate its size.
This cell has top spacing is 0px, and bottom spacing is 16px. Why?
Because the title cell has bottom spacing 44px. If I add 16px at top to textfield cell, the spacing between title and name textfield is 60px. And I want to increase/decrease the spacing, which one I have to change? You will confuse for that and next year, when you want to change spacing, you don't remember where to change.
NOTE
Only set vertical spacing at bottom for all UIs, all projects.
3. Add cells to UITableView
  override func setupView() {
        tableView.backgroundColor = UIColor.green.withAlphaComponent(0.8)
        view.addSubviews(views: tableView)
        tableView.fill(toView: view)

        datasource = [
            makeTitleCell(),
            makeTextFieldCell(placeholder: "Email"),
            makeTextFieldCell(placeholder: "Password")
        ]
    }
Run and see how it works. My wrapper handles the everything for you, no need to care about that anymore.
The UI is not gorgeous so I don't want to show here 
Conclusion
Implement UI is very interesting. Choose a good solution can help you save time and efforts. Share me your solutions also.
Hey Nhuyen,
Thanks for fantastic dynamic UI demo, But i am not able to run your code as i do not know where to put data to show the UI.Could you please send me running demo code.I want it please help me.
Hi sorry, I missed to push latest code. Please check branch
completedfor final code.The GrabRewards is complicated, can finish by this solution. I can make a demo for GrabRewards UI if requested.
yeah please do that one too.
Please send updated code link on git. I try to find its showing old one.
Check out branch
completedor access this link https://github.com/nguyentruongky/FlexibleController/tree/completed@vivek nc: please check this post https://www.codementor.io/nguyentruongky33/how-to-build-layout-for-grabrewards-sq4efx30i
Thank you very much Ky Nguyen