
What are Hubspot webhooks and why are they useful?
Learn how to set up custom webhooks
In the previous article, I set out the three ways to integrate Hubspot with almost anything, webhooks being one of the options.
You might have first heard about webhooks when trying to connect Hubspot with a 3rd party software that needed a notification to trigger an external workflow.
For example, Zapier will natively allow you to start a Zap based on a contact property change, but does not support a trigger by a company or deal property change. So how do we set up Hubspot to notify a 3rd party application of a company property change?
That’s when webhooks come into play. There’s no complete documentation about it on Hubspot, hence this article.
What’s a webhook exactly?
Sometimes referred to as reverse API, webhooks are user-defined HTTP callbacks from a platform to an external service, usually triggered when an pre-defined event occurs
As far as contacts are concerned, webhooks for contacts can be set up using a Hubspot Workflow since enrolment criteria can be a contact property change. However for companies/deals property changes or to trigger things based on creation/deletion of a contact/company/deal, you will need to set up a custom webhook.
(I also discuss here how to extend the native Zapier integration with Hubspot).
1. Each webhook needs an application
Hubspot authorises, executes and monitors webhooks in the context of an application. It is by checking the access rights of this application that Hubspot will determine whether a given webhook can read your data and push updates outside of Hubspot.
These rights are the ones you grant whenever you install a Hubspot integration in your portal.
So the first step to register your webhook is to create a Hubspot developer account (free) which will let you create your first Hubspot application.
Don’t worry, you don’t have to be a developer. At this stage an application is just an abstract entity for which you need no code at all. If you just need to set up a webhook, your application will only consist of a name, ID, Client ID and Client secret.
Client ID and secret are what Hubspot uses to authenticate requests made by your application. “Client” is meant in the context of the OAuth standard, of consuming a platform data, it is basically credentials for your app. It’s the equivalent of username/password for software.
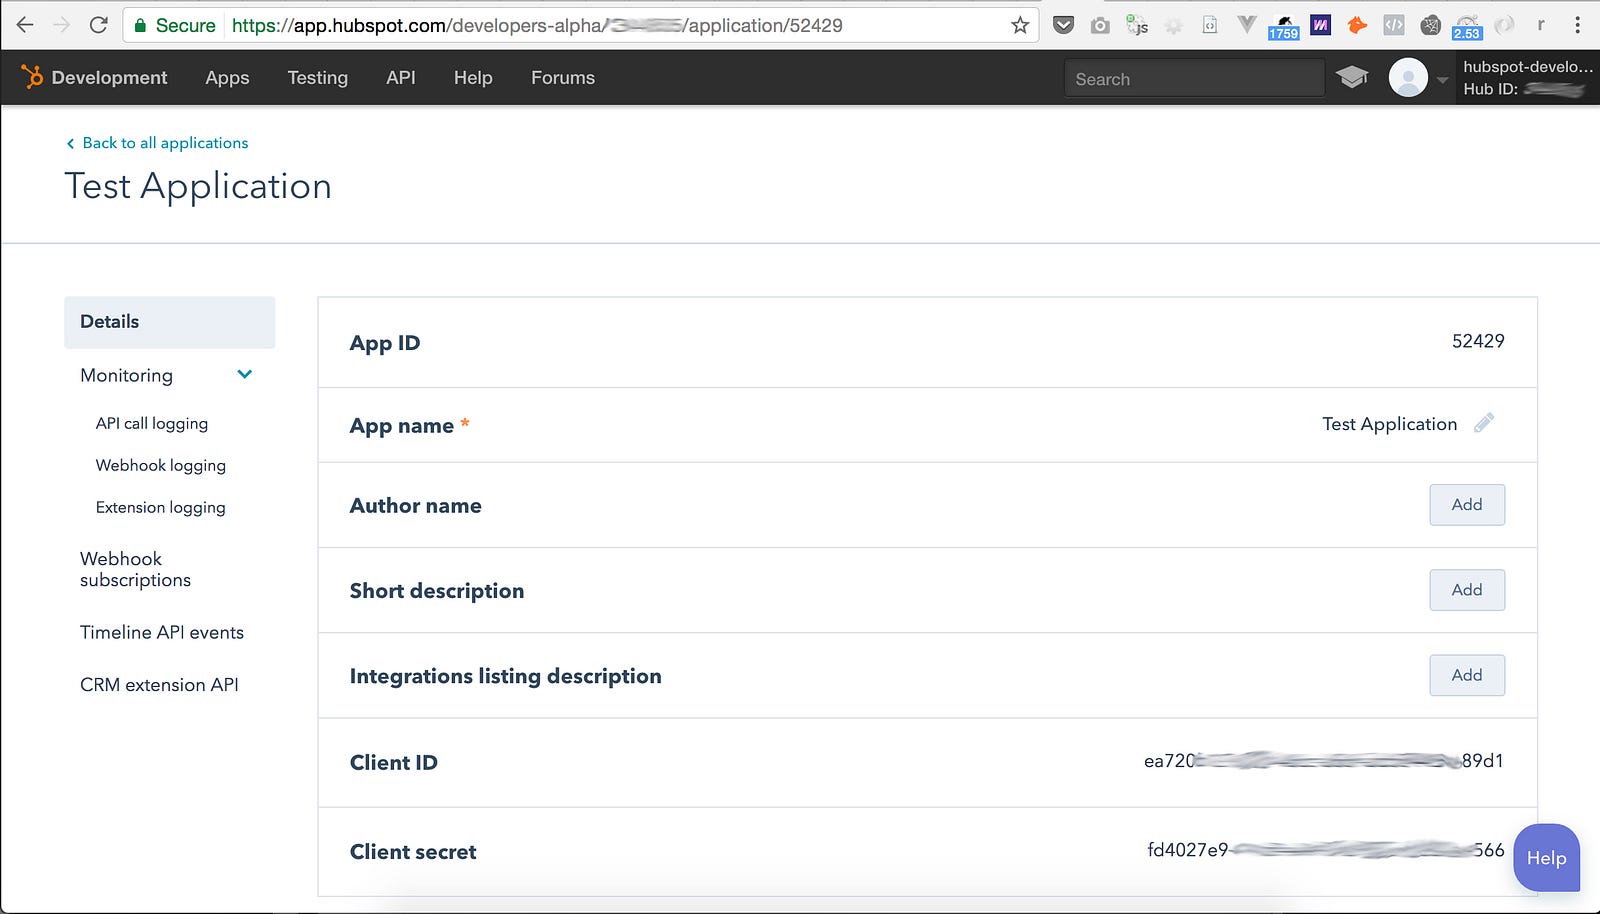
Your first Hubspot application! It’s really only a name, ID and Client ID / Client secret
2. Configure your webhook
Once you have created an app, go to Webhook subscriptions and click Create subscription.
Each webhook in Hubspot can be triggered by one of:
— a property change on a contact / company / deal
— a new contact / company / deal being created
— an existing contact / company / deal being deleted

Set up a webhook for when a contact is deleted
Configure your webhook to target the correct URL. If you want to send a trigger to Zapier, then copy your Zapier hook URL. Otherwise, you can have it point to a custom application of yours.
In the meantime, I recommend using a https://requestb.in/ URL to try and debug your webhook. It is a temporary server that will listen for your webhook and display the payload generated by Hubspot servers, right in your browser.
3. Activate the webhook on your portal
Installing your application will need to follow the exact same process as for a 3rd party Hubspot integration. It follows the OAuth 2.0 Client Authorization Code Flow.

OAuth Flow to grant an application access to another
- First, browse this URL after replacing CLIENT_ID with your application client_id: https://app.hubspot.com/oauth/authorize?client_id=CLIENT_ID&scope=contacts%20automation&redirect_uri=https://www.hubspot.com
- You will need to select the portal where to install the application (and its webhook) on.
- Hubspot will then show you (as the portal Hubspot owner) a prompt to authorise the application to access your Hubspot data.
You will be redirected to the Hubspot homepage, but take care copying the “code” parameter in the URL of the page. - Even though you granted access to the application, you’ll notice it still does not appear in your portal’s Integrations tab where it should be.
To activate it, you will need to get your “application” to generate an access token (which we won’t need) by calling this one request on the Access Tokens Hubspot API. To do that through your browser, use https://www.hurl.it to generate this request:
Destination:
POST https://api.hubapi.com/oauth/v1/token
Parameters:
client_id=YOUR_CLIENT_ID
code=THE_CODE_FROM_STEP_3
redirect_uri= https://www.hubspot.com
client_secret=YOUR_CLIENT_SECRET
grant_type=authorization_code
Don’t worry about saving the query response, the query itself should have been enough to activate your application in the Integrations tab of your Hubspot portal.
4. Test your webhook
Once the application (and therefore its webhook) is activated on your Hubspot portal, go ahead and create/delete a contact to see it appearing in Request.bin.
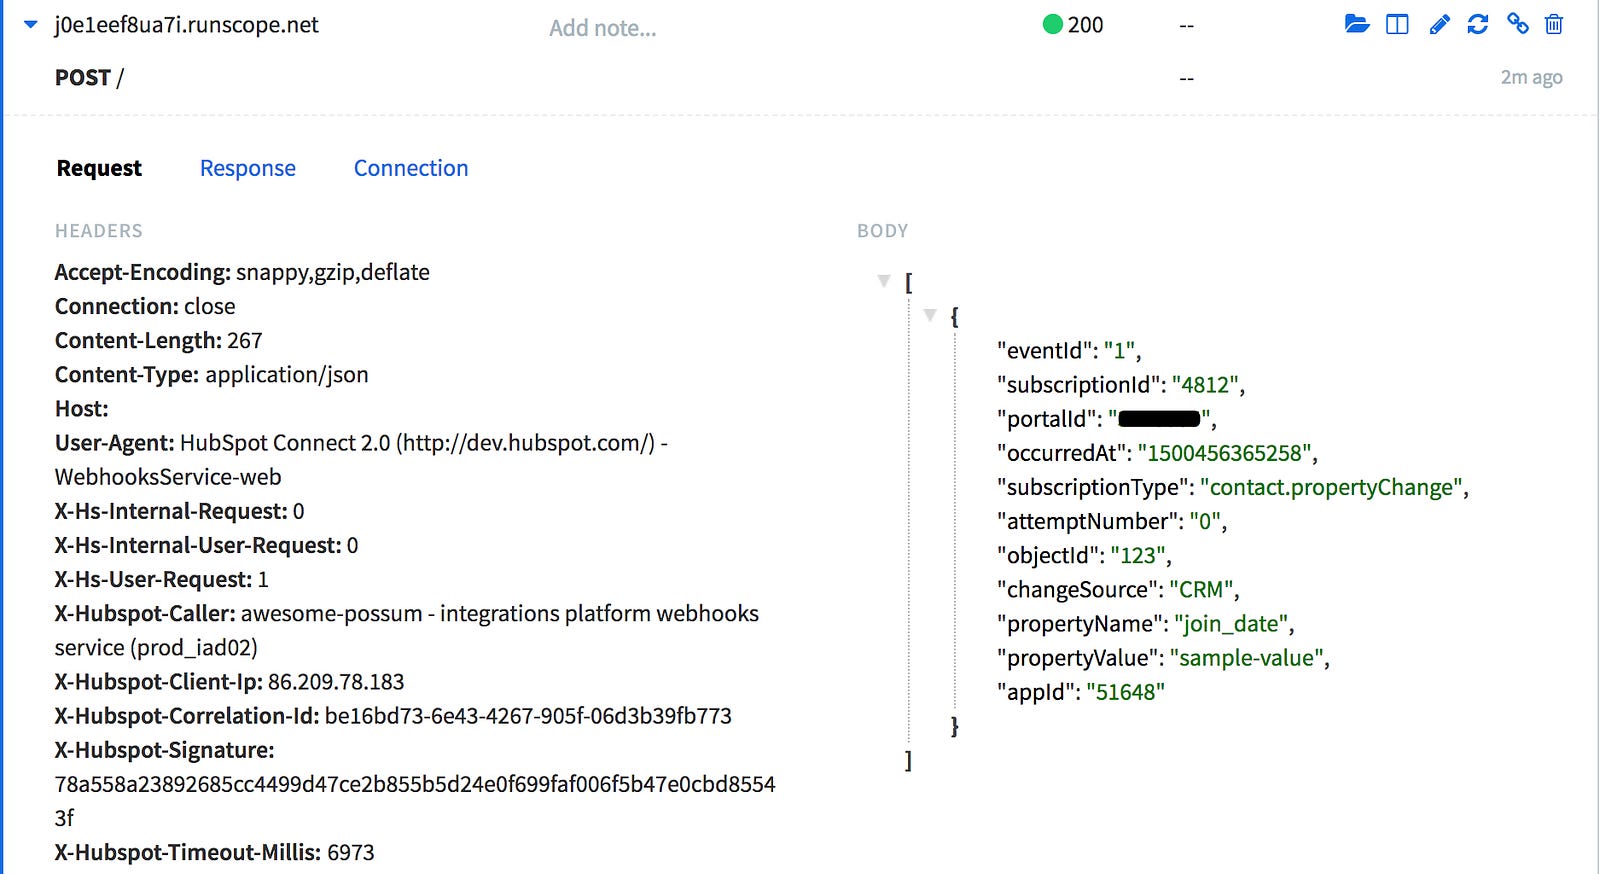
A Hubspot webhook captured in Requestb.in for debugging: the “join_date” property for the contact #123 has just been updated into Hubspot portal
If you’re happy with everything, you can now replace the webhook URL with either a Zapier trigger URL or a link to another custom application of yours.
Limitations
One thing to keep in mind is that the destination URL is configured at the application level and not the webhook level. Therefore, all webhooks for one application will only be able to report to one single destination URL.
If you need to trigger different Zaps in Zapier for example, which would use one trigger URL per Zap, you would have to create and install as many applications in your Hubspot portal, which can get a bit cluttered.
I hope this article was useful.
If you’re looking into integrating your software with Hubspot, I encourage you to have a look at my other article or even to get in touch. Shoot me a message on LinkedIn!