
AirBnB Clone with React Native Part 13: Firebase Push Notifications for iOS and Android
This is the eleventh chapter of our implementation of an Airbnb clone in React Native, we’ll set up push notifications for our AirBnB clone in iOS and Android. With the use of Firebase, we can easily complete this task. Before the implementation, however, we have to configure our apps to enable push notifications.
To catch up on the other parts of this series, head over to my Medium profile, where you’ll find tutorials 1–12.
Set up Push Notifications for iOS
You need an Apple developer account, which costs 100$ a year, for this implementation. If you don’t have a developer account, don’t worry, you can skip to the Android implementation of push notifications.
Configuring APNs with FCM
We need an Apple developer certificate or key to allow Firebase to send a notification message to APNs (Apple push notification service). To acquire a certificate or key, go to the Apple developer dashboard.
Create the authentication key
This section describes how to generate an authentication key for an app ID enabled for push notifications. If you have an existing key, you can use that key instead of generating a new one.
To create an authentication key:
-
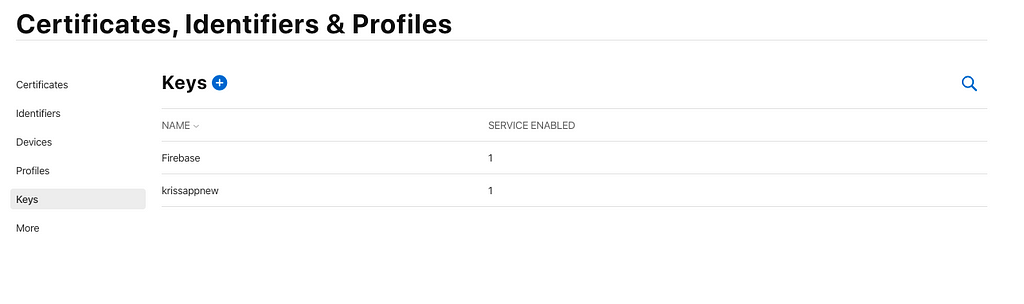
In your developer account, go to Certificates, Identifiers & Profiles, and under Keys, select All.
-
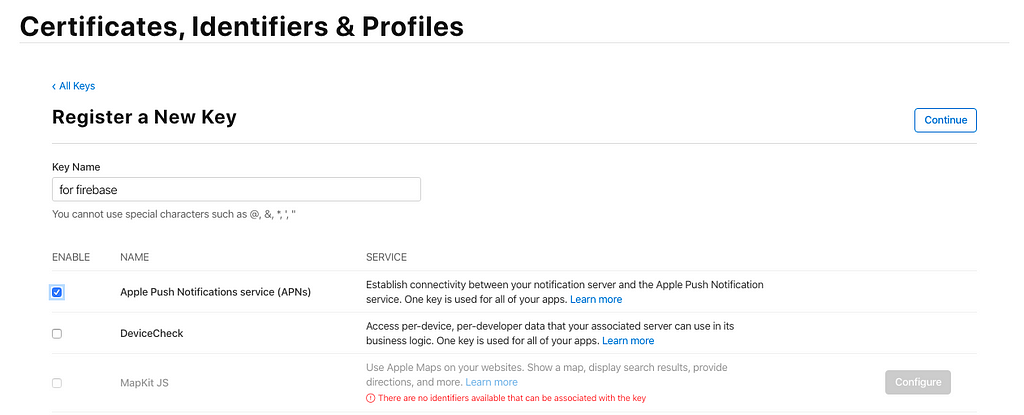
Click the Add button (+) in the upper-right corner.
- Enter a description for the APNs Auth Key. Under Key Services, select the APNs checkbox, and click Continue.
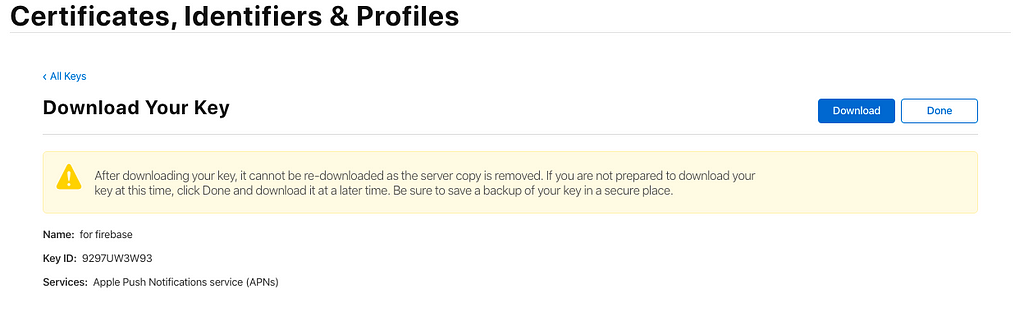
- Click Confirm and then Download. Save your key in a secure place. This is a one-time download, and the key cannot be retrieved later.
- If you’d like to verify that your APNs authentication key is set up properly and is accepted by APNs, try sending a test push notification.
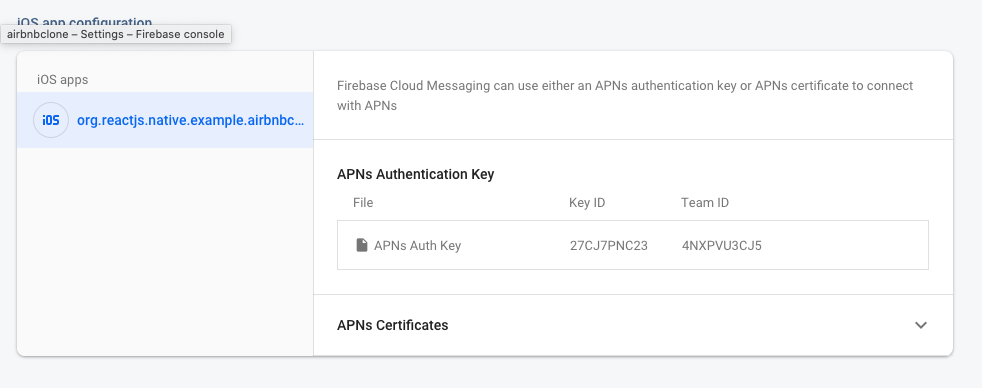
Add the Certificate to Firebase
Go to cloud messaging setting to add the certificate to Firebase.
Upload the certificate to the AirBnB clone app and add the Key ID as well as the Team ID.
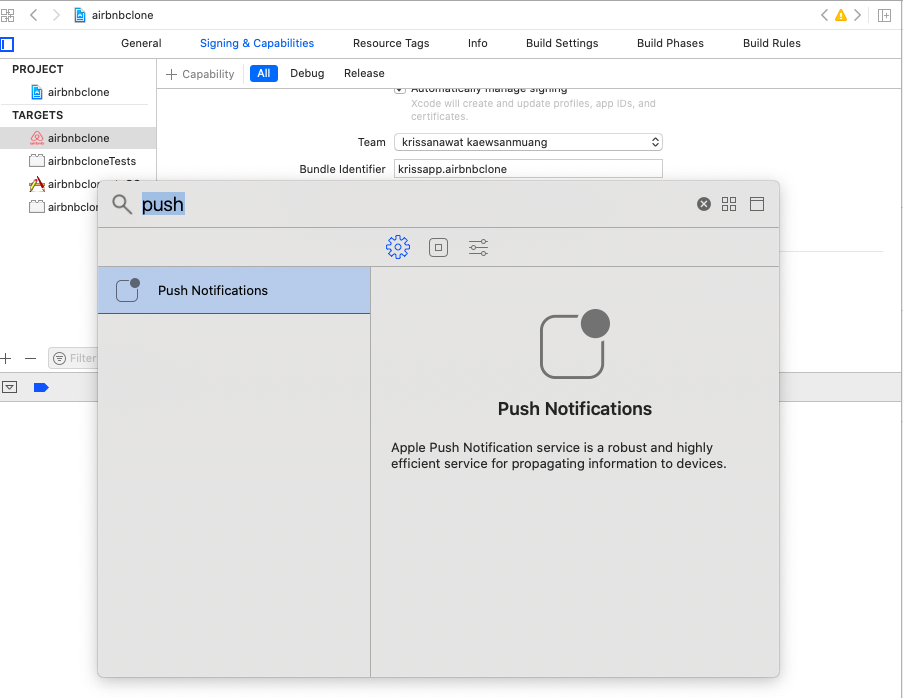
Configure the Project in Xcode
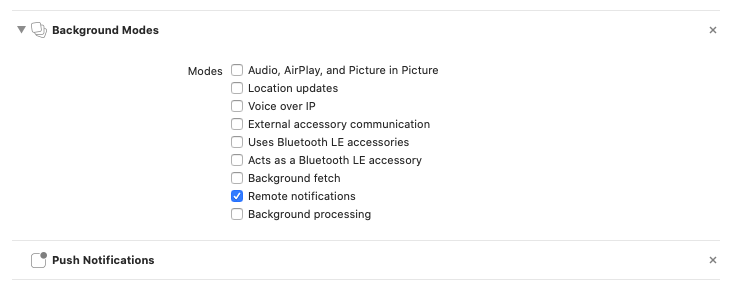
Open our project with Xcode and select the +Capability option inside Signing & Capabilities. Search for the push notification option and select it. In the same way, search for background modes. Select the Remote Notifications option from the listed options.
If you have followed the steps correctly, you will be able to see the following window.
As the next step, include Firebase messaging in the Podfile
{% gist https://gist.github.com/krissnawat/da326d39d6ee9519fe186995a46a964d %}
We’ll now return to Xcode and open the Appdelegate.m file. To activate messaging on Appdelegate.m, first import the Firebase Notification library.
#import "RNFirebaseNotifications.h"
We activate the lib by adding a code segment below the Firebase lib:
if ([FIRApp defaultApp] == nil) {
    [FIRApp configure];
    [RNFirebaseNotifications configure];
  };
    [[UNUserNotificationCenter currentNotificationCenter] setDelegate:self];
  return YES;
}
- (void)application:(UIApplication \*)application didReceiveLocalNotification:(UILocalNotification \*)notification {
  [[RNFirebaseNotifications instance] didReceiveLocalNotification:notification];
}
We’ve now completed the push notification set up. Close the packager terminal and run Xcode build once again to add the new functionality to the app.
Looking for a spark to take your apps to the next level? Machine learning enables powerful, highly-personalized mobile experiences. Subscribe to the Fritz AI Newsletter to learn how.
Set up Push Notifications for Android
You can also use the React Native Firebase package to set up push up notifications for Android following these steps.
Step 1 : Add a dependency to android/app/build.gradle file:
{% gist https://gist.github.com/krissnawat/173e74c49beff1e199eb2da0d942f735 %}
Step 2 : Import and activate the package in MainApplication.java:
import io.invertase.firebase.messaging.RNFirebaseMessagingPackage;
Add the following line of code to activate the package:
packages. **add** (new **RNFirebaseMessagingPackage** ());
You can see the combined implementation in the following example:
{% gist https://gist.github.com/krissnawat/5779e6ec0e861b00ab94b42265c2e8fe %}
Step 3: Configure AndroidManifest
We will add the messaging service to the application component inside the manifest file, which resides in the following path: android/app/src/main/AndroidManifest.xml
{% gist https://gist.github.com/krissnawat/16bdf472c2021c8083fc820d3375e65f %}
Your manifest file should now have the following format:
{% gist https://gist.github.com/krissnawat/10a14d808a5a9d127a12e65666e8a50b %}
Import the Firebase module to App.js to verify the device token.
import firebase from react-native-firebase
Check whether the device has already given messaging permission.
{% gist https://gist.github.com/krissnawat/d6362e3fbe789203be9878002faf631a %}
If the user doesn’t have permission, request permission from the user.
{% gist https://gist.github.com/krissnawat/64121f62c2a72fa4ee761850609402f2 %}
If the user accepts the request, retrieve the token.
{% gist https://gist.github.com/krissnawat/b8beeab039927de29720906b85c4fe4a %}
Then reload the app.
We can see the generated token on the Firebase console.

In Android, once you rebuild the app again, permission will be enabled by default.
Let’s try sending a test message now. First, go to the Firebase cloud messaging console.
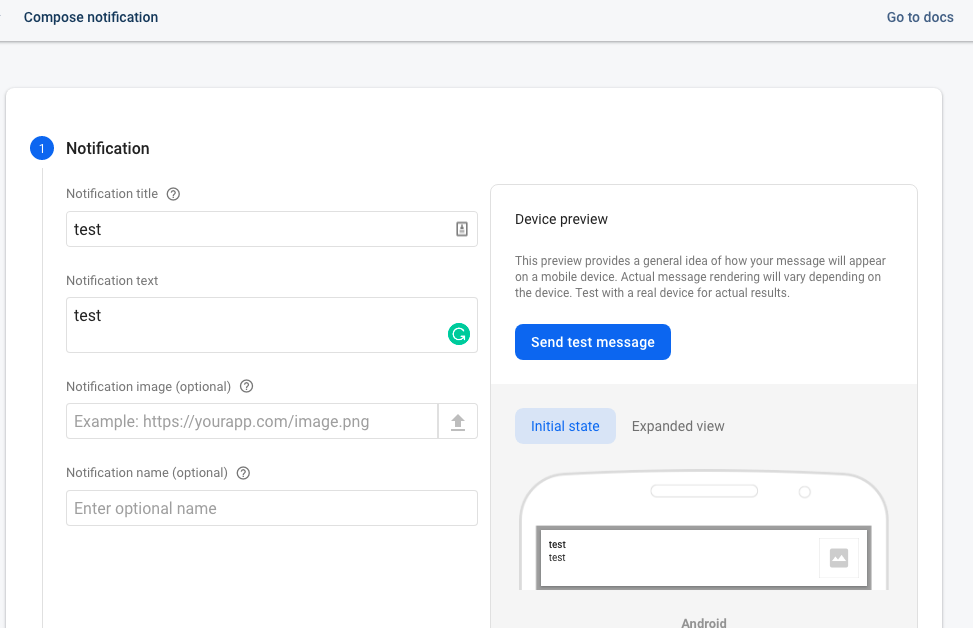
Press “Send test message”.
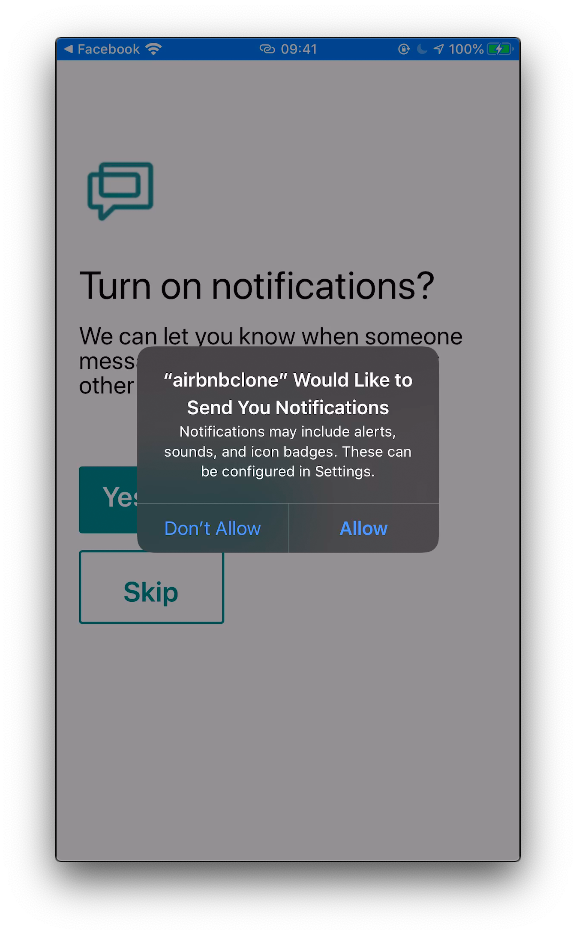
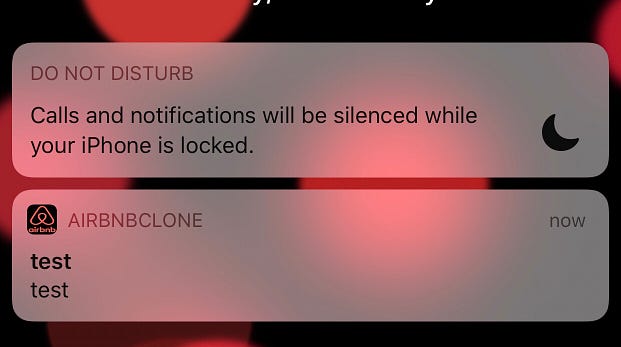
The test notification will appear on the mobile screen. In iOS:
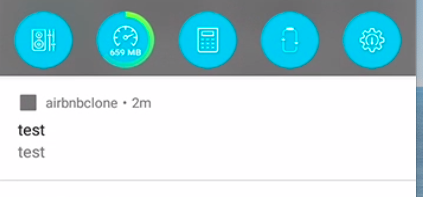
And in Android:
Summary
Today, we learned how to set up Firebase push notifications on iOS and Android. We also set up an APNS certificate on Firebase when setting up push notifications for iOS. In the next chapter, we’ll store the token in a real-time database and then, using cloud functions, fetch the token and send it to the subscribed device.