
Let's build Java full-stack spring boot and React app : Backend REST API / 1
Hello,
In this tutorial, we'll set up the backend. What you'll learn here are:
- How to initialize a Spring boot app using the official Spring boot initializer and
- How to customize a spring boot app port.
Project set up
Our backend API will be named : Easytrans-api. Let's use Spring initializer to initalize the project.
Initialize the project
- Go to : start.spring.io
- Choose Maven Project , language Java, Spring boot version (2.5.2 while I am writing this article)
- In the Project Metadata section, type :
- Group name : com.codeurinfo; (reminder, conventionally, a maven group id is the project reverse domain name, here our domain name is : codeurinfo.com)
- Artifact : easytrans-api
- Name : easytrans-api
- Description : a beautifull description of yours
- Package name : com.codeurinfo.easytransapi
- Packaging : Jar (we'll make use of the embeded tomcat server in spring boot)
- Java : 11
4 . As for dependencies, we just need four, so in Dependencies section, hit ADD DEPENDENCIES ... and choose these below:
- Rest Repositories, for Spring Data Rest
- Spring Data JPA, for JPA
- H2 Database, embeded database
- Spring Boot DevTools
Everything must look like this picture:
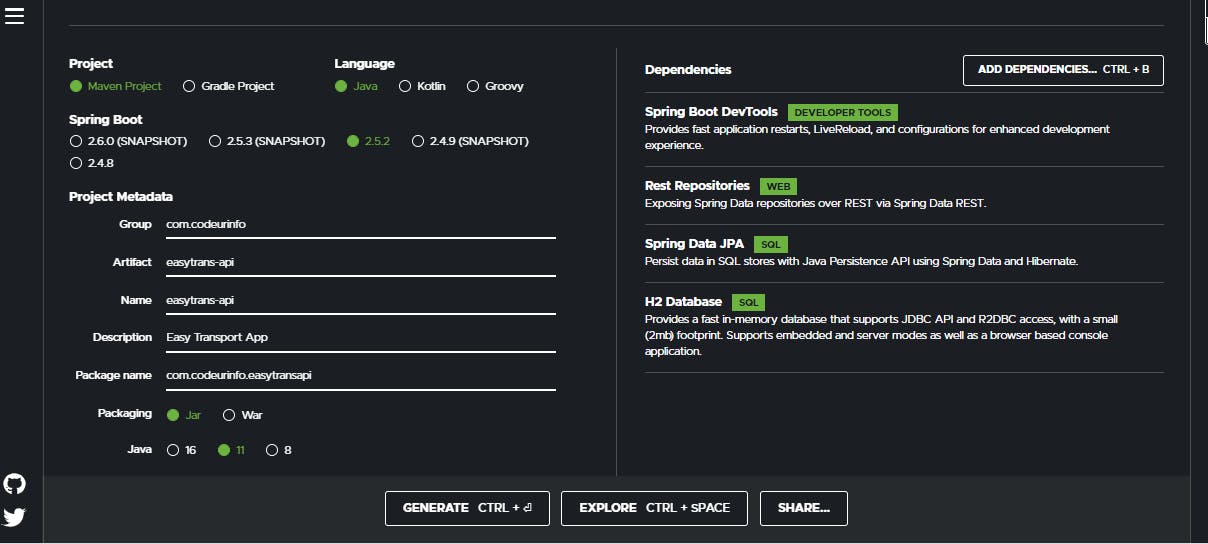
You just need to hit GENERATE CTRL+ ... to generate the zip file of the project.
Now, unzip the zip file  in your prefered directory and open it in your IDE.
Using VS Code, just open your editor and go to File -> Open folder then select the project folder.
Our project is ready and must look like this:
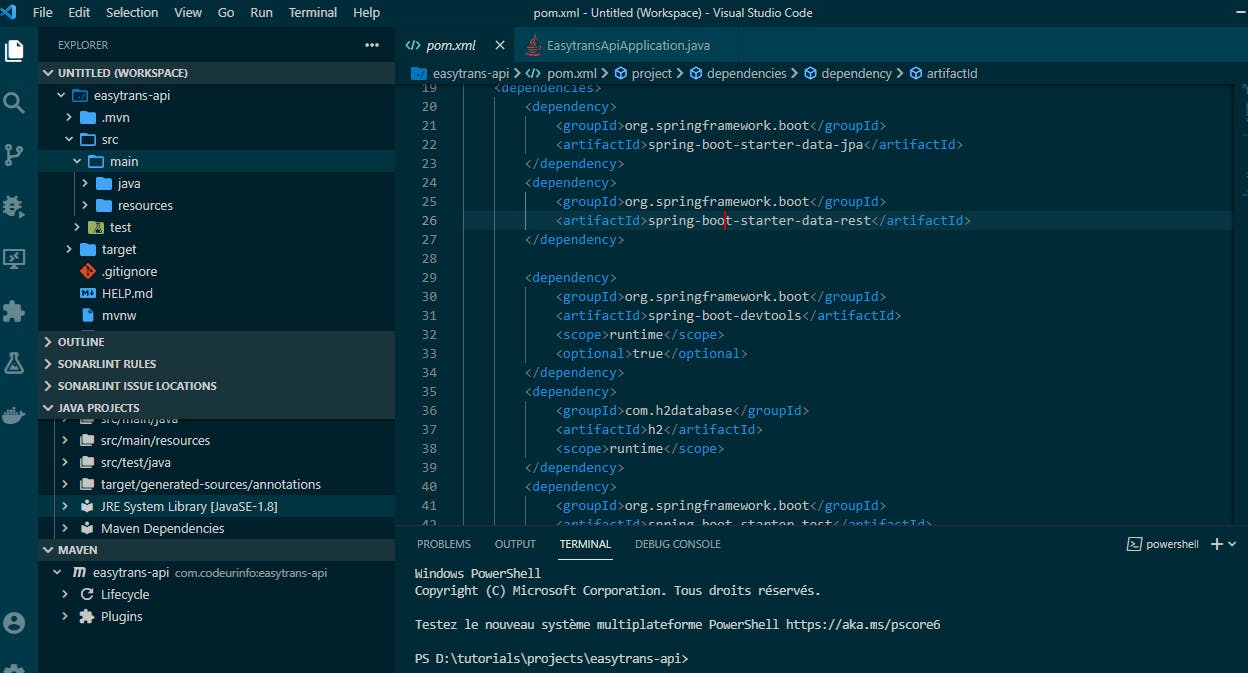
Notice the 4 dependencies in the pom.xml file!
Test project
Our project is ready, before we run it, let's remove the application.properties file and add application.yml file in the src/main/resources folder.
Let's configure our app port to 9000. So, open the application.yml file and add the below code snipet:
server: port: 9000
Now we can run our app, in VS Code, you just open the main java class with @SpringBootApplication annotation and clic Run above the public static void main instruction.
As result, you must have a similar console:
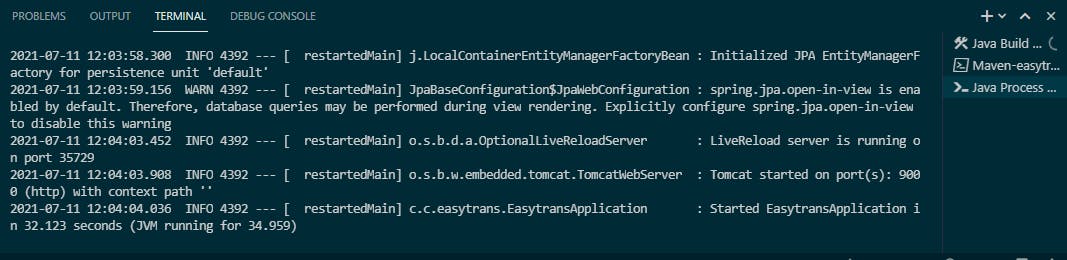
Bravo, our backend is ready. Hope you've learnt something here, if yes please give a like to this tutorial and share it. In the next tutorial, we'll add entity classes and make REST call.