
Getting Started With Flask
Flask is a simple, easy to use microframework for Python. It’s great for beginners because it is easy to set up, actively supported by the community, well documented and simple and minimalistic. It’s also possible to build scalable and secure web apps with Flask
Prerequisites
Homebrew
A free and open-source software package management system that simplifies the installation of software on Apple’s Mac OS operating system and Linux.
$ /bin/bash -c "$(curl -fsSL [https://raw.githubusercontent.com/Homebrew/install/master/install.sh](https://raw.githubusercontent.com/Homebrew/install/master/install.sh))"
Python 3
Mac OS X comes with Python 2 installed but this tutorial uses Python 3.Install it with Homebrew.
$ brew install python3
Check the Python version
$ python --version
  Python 3.7.6
Virtualenv
A tool to create isolated Python environments. The problem being addressed is dependencies and versions of those dependencies. For instance you have two projects and one requires version 1 of some library, but the other requires version 2 of the same library. If you install both libraries into your host python you would end up with conflicts.
$ pip install virtualenv
A set of extensions for virtualenv. These extensions include wrappers fro creating, deleting and managing our development workflow.
For example with only virtualenv to activate a virtual environment you would need the following command.
$ source ~/myproject/env/bin/activate
With virtualenvwrapper is much simpler.
$ workon myproject
Let’s install it
$ pip3 install virtualenvwrapper
You might run into the following error after installing virtualenvwrapper
$ workon
  -bash: workon: command not found
- Update your .bash_profile with the following environment variables
$ vi ~/.bash_profile
- Add the following
    export PATH="/usr/local/opt/python@3/libexec/bin:$PATH"

    export WORKON_HOME=$HOME/.virtualenvs
    export PROJECT_HOME=$HOME/Devel
    export VIRTUALENVWRAPPER_PYTHON=/usr/local/bin/python3
    export VIRTUALENVWRAPPER_VIRTUALENV=/usr/local/bin/virtualenv
    source /usr/local/bin/virtualenvwrapper.sh
- Hit the
esckey on your keyboard to exit insert mode or abort the current command and:q!to close file and abandon changes, use the:wqkeys to save your changes. Here is a nice Vim cheatsheet
Create and activate a new virtual environment
    $ mkdir flask_hello_world
    $ cd flask_hello_world
    $ mkvirtualenv flask_hello_world
    $ workon flask_hello_world
Notice the virtualenv is named the same as the project we are going to be working on. This is not necessary but I like following this pattern as it allows me to remember the name of the virtual environment my application will be running in.
Build a basic Hello World App
- Install Flask
$ (flask_hello_world) $ pip install flask
- Create a new package called app
    $ (flask_hello_world) $ mkdir app
    $ (flask_hello_world) $ touch app/__init__.py
In Python, a sub-directory that includes an init.py file is considered a package. When you import a package, the init.py executes and defines what symbols the package exposes to the internet.
- Add the following to the init.py in the app package
    # app/__init__.py: Flask application instance

    from flask import Flask

    app = Flask(__name__)

    from app import routes
The script above simply creates the application object as an instance of class Flask imported from the Flask package. The name variable passed to the Flask class is a Python predefined variable, which is set to the name of the module in which it is used. Flask uses the location of the module passed here as a starting point when it needs to load associated resources such as template files. Notice the bottom import , it is a workaround to circular imports, a common problem with Flask applications. The routes don’t exist yet, so let’s create it next.
Create a routes module
$ (flask_hello_world) $ touch app/routes.py
- Add the following view function to the new routes.py file.
    # app/routes.py

    from app import app

    @app.route('/')
    @app.route('/index')
    def index():
        return "Hello, World!"
The view function simply returns a “Hello World” string. The decorator @app.route creates the association between the given url and the function. If the browser requests either of the associated urls / or /index Flask is going to invoke the index function and pass the return value to the browser as a response.
- To complete this simple application, create a top-level Python script to define the Flask application instance.
$ (flask_hello_world) $ touch run.py
- Define the application instance and import it.
    # run.py
    from app import app
Here is what the directory structure should look like at this point.
    ├── flask_hello_world
           ├── app
           │   ├── __init__.py
           │   └── routes.py
           └── run.py
Our simple application is now complete , but before running it we need to tell Flask how to import it by setting a FLASK_APP environment variable. Also we’ll enable debugging to automatically restart the server to reload any changes we make.
(flask_hello_world) $ export FLASK_APP=run.py
(flask_hello_world) $ export FLASK_DEBUG=1
Run the application
(flask_hello_world) $ flask run
* Serving Flask app
* Running on [http://127.0.0.1:5000/](http://127.0.0.1:5000/) (Press CTRL+C to quit)
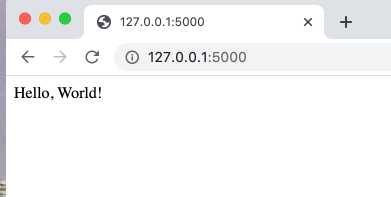
View your application by pointing your browser to the **IP address indicated by Flask, in this case http://127.0.0.1:5000/ Your application should look similar to the following.
Congratulations on building your first Flask app. Before finalizing this article let us do some housekeeping to keep our app clean and maintainable. It also reinforces best practices.
-
Stop the server by pressing
Ctrl-C -
Save your dependencies to a requirements.txt file
$ (flask_hello_world) $ pip freeze > requirements.txt
This automatically creates the file for you and it is best practice to allow other to collaborate on your project. Flask installs a few other dependencies so don’t worry if you see them in your file.
    # requirements.txt
    Click==7.0
    Flask==1.1.1
    itsdangerous==1.1.0
    Jinja2==2.11.1
    MarkupSafe==1.1.1
    Werkzeug==1.0.0
Here is our final project structure.
    ├── flask_hello_world
           ├── app
           │   ├── __init__.py
           │   └── routes.py
           ├── requirements.txt
           └── run.py
Here is the final code hosted on Github.
Also remember to deactivate you virtual environment to prevent installing other dependencies not related to this project.
$ (flask_hello_world) $ deactivate
That’s it! you built your first Flask app. If liked this article or found it helpful please give me some likes. Thanks for reading.
Hey Joaquin, overall a nice primer for newcomers to flask.
Just a suggestion, but maybe separating into
routes.pyin a “getting started with” article (and then not using e.g.blueprints) might be best avoided?The reasoning for this is that your post implies that circular imports are the norm (or common problem) for flask apps, whereas when done right they shouldn’t be.
How to install flask on ubuntu 20 3.8?