
Deploying a Python Flask app on Heroku

In my previous post I described on a high level how I developed an API using Flask. I talked briefly about how I hosted it via Heroku. In this post, I am going to go deeper and show you how to deploy the API to Heroku step by step.
Let`s Get started
After developing application on your local machine you always have the desire to share it with others far away but… you won`t carry your PC and go show them. So, you will then need to host it on the internet so that you provide them a public URL where they can view your work or product.
Heroku is a Platform as a service(PaaS) which abstracts us from dealing with servers, all we have to do is sign up, download a few tools and then upload our code to the platform effortlessly.
Before we continue, please ensure you have basic knowledge of Git, how it works as well as knowledge of how to use the terminal (Command line).
Heroku CLI
You need to download the Heroku CLI which will enable us deploy and manage our application.
After installation login into the Heroku Cli by running this command in the terminal.
heroku login
You will be prompted to enter your email address and password. You will only be logged in if these details match the credentials you signed up with on the Heroku platform.
The application
We are going to deploy the API application I developed and wrote about in this post, though you can follow along with your own application.
I have the application code hosted here on my Github account. Follow along with me if you do not have an application to use.
Let us start by cloning the application. Open the terminal and paste in this command to clone the application. A gentle reminder that this step will only work if you have Git installed on your computer.
git clone https://github.com/jokamjohn/bucket_api_heroku.git
Open the folder bucket_api_heroku with your favorite text editor or IDE. Create a virtual environment and install the dependencies by running.
pip install -r requirements.txt
Note: if you are using your own application, make sure you have added a requirements.txt file by running pip freeze > requirements.txt so that all the application dependencies are added.
Adding a Procfile
In order for us to successfully deploy any application to Heroku, we must add a Procfile to that application.
Before we can add a Procfile, we need to first install a web server called Gunicorn. Run the following command within the application folder.
pip install gunicorn
Update the requirements file by running
pip freeze > requirements.txt
Create a new file with Procfile as the name and do not add any extension. Add this line below
web: gunicorn app:app
web is used by Heroku to start a web server for the application. The app:app specifies the module and application name. In our application we have the app module and our flask application is also called app. If your’s are different you can change them.
Deployment
We are now ready to deploy our application. In the application folder run
heroku create kbucket-api-heroku
k-bucket is the name of the application, this has to be unique across Heroku. So change it to yours otherwise you will be unable to deploy. You can completely discard the application name for Heroku to assign for you a unique name.
The output of that command will be similar to this below. Take note of the application URL because it is where your app lives.
(venv) G:\PyProjects\bucket_api_heroku>heroku create kbucket-api-herokuCreating kbucket-api-heroku... donehttps://kbucket-api-heroku.herokuapp.com/ | https://git.heroku.com/kbucket-api-heroku.git
This https://git.heroku.com/kbucket-api-heroku.git is the Heroku git remote repository where our application lives on Heroku. We now have to push our application to the master branch of the above git URL. Here is the state of our application at this stage. Clone the repository if you have not been following along and push to the Heroku master .
Now head over to your application URL to see the application API documentation as the homepage.
Homepage
Database
As you might already know by now, our application needs a database to save data. It uses the Postgresql database to persist this data.
Heroku is intelligent enough to scan through our application code and assign it a Postgres database. If you look at the your Heroku application dashboard under overview you will see a configured add-on called Heroku Postgres as shown below.

Dashboard overview
Do not get very excited yet, we still have to populate the database with our tables. To do this we add one more line in our Procfile .
release: python manage.py db upgrade
The command db upgrade from the manage.py file populates the table schema from the database migration file into the database.
Commit the changes and push to the Heroku master git repository or clone and use this repository.
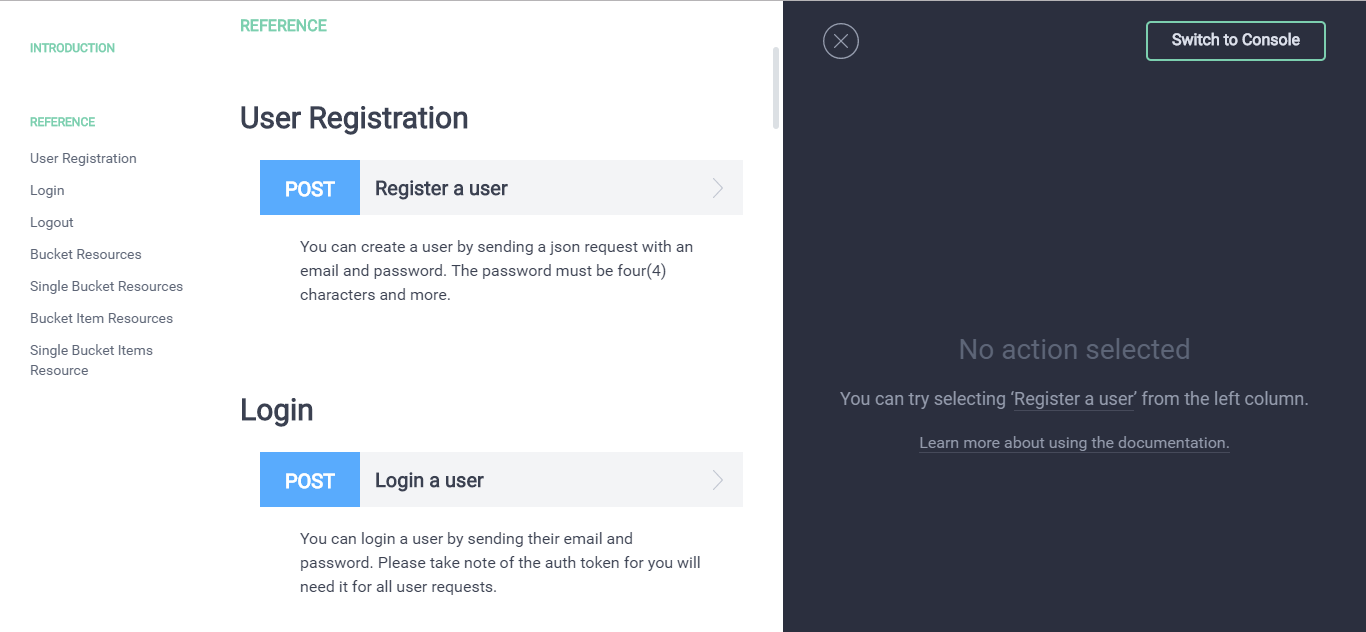
Testing the application
We can now finally test out our live API application. Head over to the application homepage and click on the Register a user under the reference section. Then click on switch to console choose production so that the data we send can be persisted into the database. Click on body to display the sample email and password data.

API documentation and console
A 201 code is returned when a user is successfully created as shown below.

Successful user creation
Congratulations you have deployed your first app to Heroku.