
Creating and connecting to a MongoDB Atlas cluster
Cross-posted from my personal blog.
Choosing the right database for your project is hard, there are so many things to consider that it’s not unusual to be confused. But let’s suppose that after some careful thinking, you decided to go for the NoSQL database MongoDB. Great! We’ve got you covered then. Creating and connecting to a Mongo DB Atlas cluster is really simple and fast. Also, did I mention that it is free?
First of all, we can’t connect to thin air, we need our database up and running. Go to https://www.mongodb.com/atlas/database and Sign In with your account (or create one if needed). First of all, we will need to create an organization, so choose a name for it, and as for the service, choose Mongo DB Atlas. Leave the user configuration as it is and move on. Now you need to create a new project, but the process is almost the same.
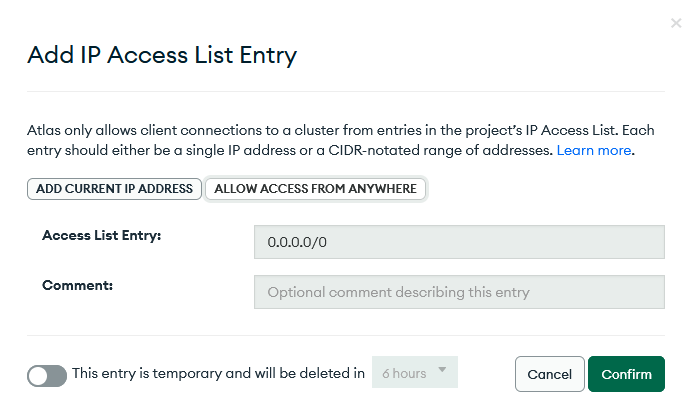
Navigate to Network Access on your left. You will get a message saying that your IP address is not currently set, but we are not going to do that, we are going to click on that big green “Add IP Address” button and then we’ll allow access from anywhere. Obviously, you should not do this for production environments, but for testing it’s fine.
Then, finally, we need to create a database. Navigate to the Database menu on your left and click on Build a Database. Select the Shared option, since it’s the free one. Again, on production scenarios, you probably would want to go for a different one. Also, you can choose the region if you want, just be sure to pick a free one.
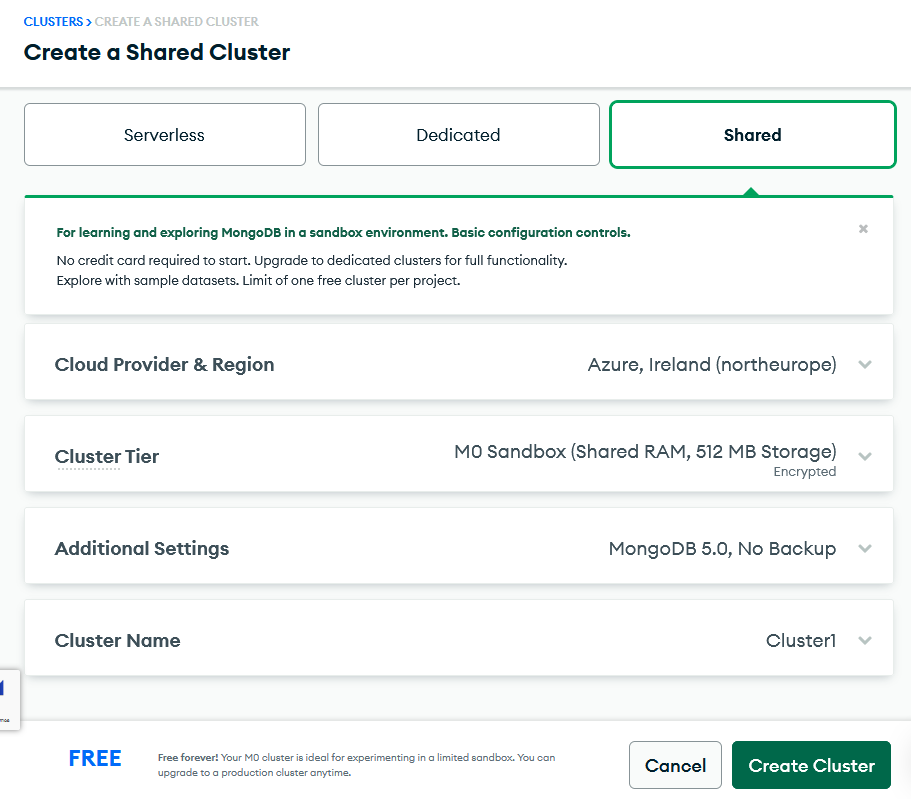
You will be presented with a screen that allows us to create a user, so pick a name and password and be sure to write it down. Ignore the networking section, since we have already done that, and finish your configuration.
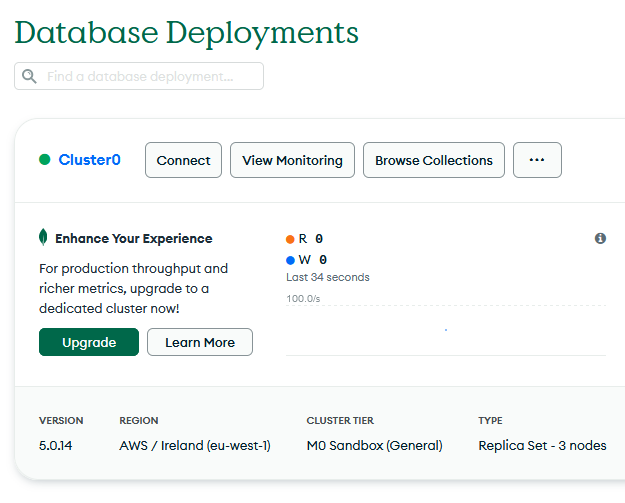
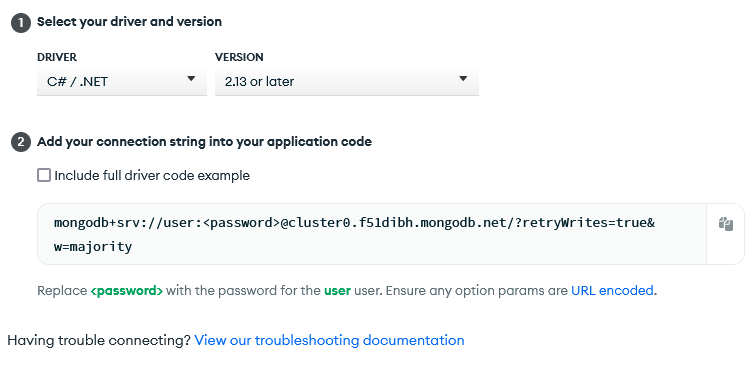
Now the fun begins, but before that, let’s grab the connection string. Go into your database deployments and click on Connect. Then choose “Connect your application” and set the driver and version fields accordingly. Now simply copy the connection string, replace <password> with the actual password and you’ve got yourself a connection string. Copy it somewhere because we are about to use it.
Now, Create a .NET project of your liking (I choose Console App for simplicity) and go straight to the NuGet packages and install the MongoDB.Driver. With the snippet below we can connect to the database and insert a document.
using MongoDB.Driver;

var client = new MongoClient("mongodb+srv://user:you-are-not-getting-my-secret-password@cluster0.f51dibh.mongodb.net/?retryWrites=true&w=majority");

var database = client.GetDatabase("Cluster0");

var collection = database.GetCollection<Lie>("Lies");

var newLie = new Lie("Mint chocolate tastes good");

await collection.InsertOneAsync(newLie);

class Lie
{
  public Guid Id { get; set; }
  public string Description { get; set; }

  public Lie(string description)
  {
    Id = Guid.NewGuid();
    Description = description;
  }
}
So, by analyzing the code line by line, we can see that we are:
- Creating a new MongoClient, which basically handles the connection
- Getting a reference to our “Cluster0” database.
- Getting a reference to our “Lies” database. Yes, it doesn’t exist, but that’s not a problem since it will automatically create it for us once we insert our first document
- Creating a new document to insert
- Finally inserting the document into the database.
Now if you were to browse your cluster, you would find your new document in its collection. Very simple isn’t it? Just be sure to follow the best practices regarding your MongoDB client if you want to avoid issues.
Creating a MongoDB cluster is pretty simple, and along with it being free and schemaless, it makes a great database for learning. If you ever wanted to try NoSQL, it’s a great database for it. And in case you want to deepen your knowledge about it, do check the MongoDB University.