
Getting Started with PostgreSQL on Mac OSX
Table of contents
I. Introduction
The other day I began a new Node.js project and wanted to use PostgreSQL as my database backend. If you’re here reading this tutorial, hopefully, you are trying to do the same!
This tutorial will teach you how to set up, configure, and use PostgreSQL on MacOSX 10.7 (Lion) and above. You will need at least a basic level of comfort using the command line using either the MacOSX built-in terminal, iTerm2, Zsh, or something similar. By the time we are finished, you will:
- Have a running PostgreSQL 9.5.4 instance
- Know how to create and manage databases and users
- Know how to use both command-line and UI tools to manage your database
II. About PostgreSQL
PostgreSQL is an ACID-compliant Object Relational Database Management System, or ORDBMS (quite a mouthful!). Put simply, it is a database that allows you to relate one piece of data to another (thus, “relational”). It runs on nearly any operating system including Linux, Unix, and Windows. It is high performance and highly scalable, capable of handling huge amounts of data and high-load internet applications with thousands of concurrent users. Its unique combination of simplicity and power makes it a popular choice for individual users and small businesses, but enterprise businesses like Yahoo, Uber, Disqus, and TripAdvisor as well.
Postgres supports a long list of database features, including several enterprise features. Aside from standard relational database features, some of the most notable features in Postgres are:
- Streaming replication
- Schemas
- User-defined objects like operators, data types, and functions
- Nested transactions
- Table inheritance
- Partitioning
- Several unusual data types, like Money, Geometry, IP addresses, JSON, and data ranges.
- Can execute stored procedures in over a dozen programming languages, including Java, Perl, Python, Ruby, and C/C++.
Due to its first-class support for JSON, Postgres is often a good alternative to “No-SQL” databases like MongoDB. Read more about PostgreSQL
III. Getting Started
The first thing we’re going to do is install Postgres. There are two main ways to get Postgres onto your machine:
- Using a graphical installer like BigSQL or Postgres.app
- Using a package manager to install via the command line.
You can pick whichever option is right for you. For this tutorial, let’s see how to install on the command line.
1. Getting Homebrew
To install PostgreSQL on the command line we will be using a package manager called Homebrew. If you already have Homebrew installed, you can skip to Installing PostgreSQL. Otherwise, let’s keep going.
Let’s start by copying and pasting the following command into our command line:
/usr/bin/ruby -e "$(curl -fsSL https://raw.githubusercontent.com/Homebrew/install/master/install)"
Don’t worry about what all that does—as long as you’re using MacOSX 10.7 or higher, the Ruby interpreter comes pre-installed. The rest of this command (the curl command) is a tool to make web requests from your command line. This one downloads the script at the given URL, and then the Ruby interpreter executes it. You should see output similar to the following:

Installing Homebrew
Now that we have Homebrew, we can proceed to install Postgres!
2. Installing Postgres
Now that we have Homebrew, installing PostgreSQL is very easy. Run the following command to install PostgreSQL using Homebrew:
brew install postgresql
You should then see the following output:

*Installing *
Homebrew takes care of resolving Postgres’ dependencies, which in this case are OpenSSL and Readline. It also takes care of knowing which are the latest versions, where to get them, and how to unpack them. Most importantly are the easy-to-miss instructions at the very end of the install:

Starting Services
Let’s go ahead and start Postgres running, and make sure Postgres starts every time your computer starts up. Execute the following command:
pg_ctl -D /usr/local/var/postgres start && brew services start postgresql
Finally, let’s make sure Postgres is installed and running. Let’s check what version is running:
postgres -V
Your output should look like the following:

Postgres Installed
That’s it! You have Postgres installed. Now we’re finally ready to learn how to use it!
3. Configuring Postgres
Postgres works pretty hard to make itself usable right out of the box without you having to do anything. By default, it automatically creates the user postgres. Let’s see what other users it has created. Let’s start by using the psql utility, which is a utility installed with Postgres that lets you carry out administrative functions without needing to know their actual SQL commands.
Start by entering the following on the command line:
psql postgres
(You may need to use sudo psql postgres for this command to work, depending on how your system is configured).
You’ll see output like the following:

psql output
That’s the psql command line. We can now enter a command to see what users are installed:
postgres=# \du
Under the covers, this command executes an SQL query (we’ll learn about those later) that gets all the users in the database. On my machine, it returns the following:

psql User List
We see the Postgres user I mentioned, but what is that other user, engineerapart? This is one of the things Postgres does to make your life easier when you first install it. On most Linux-based operating systems, the username that is used by default by all processes is the one you are logged in as. You don’t have to pass your username to most programs. But if a particular program, like Postgres, doesn’t have your username configured—it will fail!
So when Postgres is installed, it automatically creates a database user that matches your username, so that you can get started right away.
A. Creating Users
Postgres doesn’t actually directly manage users or groups, like most standard permission models do. Instead, it directly manages what it calls roles.
While it is certainly convenient that Postgres sets up a set of default users for you, it is a very bad idea to use them for anything except local development, because they are very widely known and more importantly, they are super user accounts—they can do anything, including delete databases. This is not safe for a production database—we need users with limited permissions. So how do we create and use new users (roles)?
There are two main ways to do this:
- Directly execute the
CREATE ROLESQL query on the database - Use the
createuserutility that comes installed with Postgres (which is just a wrapper for executingCREATE ROLE).
Let’s look at both cases.
A.1. CREATE ROLE with psql
The basic syntax for CREATE ROLE looks like this:
CREATE ROLE username WITH LOGIN PASSWORD 'quoted password' [OPTIONS]
Where username is the user you want to create, and the password goes at the end in quotes. We will get to the options later.
Let’s start by logging in again to our helpful psql tool:
psql output
While we’re in here, let’s set the password for the default postgres account—by default, it has no password.
postgres=# \password postgres
You will be prompted to enter the password and confirm it. Now let’s create our new role:
postgres=# CREATE ROLE patrick WITH LOGIN PASSWORD 'Getting started';
postgres=# \du
Your output should look like the following:

psql CREATE ROLE
Wait. The attributes list for the user patrick is completely empty. Why?
This is how Postgres securely manages defaults. This user can read any database, table, or row it has permissions for, but nothing else—it cannot create or manage databases and has no admin powers. This is a good thing! It helps keep your database secure.
So let’s add the CREATEDB permission to our new user to allow them to create databases:
postgres=# ALTER ROLE patrick CREATEDB;
postgres=# \du
postgres=# \q # quits
Your output should like this:

psql ALTER ROLE
A.2. The createuser utility
Postgres ships with a number of very useful command line utilities that make the above process much easier. Instead of logging into psql, executing SQL queries, and needing to know the details of the query statements, you can use a familiar command line interface to do the same tasks. A few of these tools are:
- createuser: creates a user
- createdb: creates a database
- dropuser: deletes a user
- dropdb: deletes a database
- postgres: executes the SQL server itself (we saw that one above when we checked our Postgres version!)
- pg_dump: dumps the contents of a single database to a file
- pg_dumpall: dumps all databases to a file
- psql: we recognize that one!
Full list of client applications
So let’s use createuser to do the same thing we did above: create the patrick user:
createuser patrick
This creates the user patrick with all of the default attributes, again, without the ability to create databases. If we wanted the ability to create a database, you would execute the following instead:
createuser patrick --createdb
Unfortunately, there is no command line tool to accomplish the same thing as ALTER ROLE. To change users after they are created, you must use psql.
A.3. Summary
That’s it! Now our new user is set up and can create databases. Let’s start managing our database with that new user.
B. Creating a Database
Just like creating a user, there are two ways to create a database:
- Executing SQL commands directly with psql
- The
createdbcommand line utility.
B.1. CREATE DATABASE with psql
The core SQL syntax for creating a database in PostgreSQL is:
CREATE DATABASE databasename;
We’ll go through the same process as above:
psql postgres -U patrick
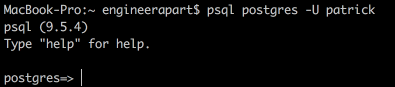
psql user login
You’ll notice the prompt is slightly different – the # has changed to a >. This indicates you’re no longer using a Super User account.
postgres=> CREATE DATABASE super_awesome_application;
Documentation for CREATE DATABASE
Once this is done, you need to add at least one user who has permission to access the database (aside from the super users, who can access everything). To do that, we’re going to learn a new SQL command:
postgres=> GRANT ALL PRIVILEGES ON DATABASE super_awesome_application TO patrick; postgres=> \list
postgres=> \connect super_awesome_application
postgres=> \dt
postgres=> \q
Here, I have also shown you a few new commands that can be used with psql:
\list: lists all the databases in Postgres\connect: connect to a specific database\dt: list the tables in the currently connected database

psql CREATE DATABASE
And that’s it.
You can now create, read, update and delete data on our super_awesome_application database with the user patrick!
B.2. The createdb Utility
As above, creating a database using createdb is simpler, with the caveat that you cannot manage the database after it is created. For that, psql is required.
createdb super_awesome_application -U patrick
Here, I have invoked the createdb utility and passed it the patrick user to use for connecting to the database. It is that user whose permissions will be checked to execute the create command.
It is very, very rare that you will want to change a database after it is created. The only things you can change are its name and some configuration parameters. Changing configuration parameters (such as collation or character sets) have implications that go far outside of this tutorial. However, we can change the name if we’d like.
Again, there is no command line tool to change a database once it’s created. We must use psql:
psql postgres -U patrick
postgres=> ALTER DATABASE super_awesome_application RENAME TO even_more_awesome_application;
postgres=> \q
And the output should be similar to:
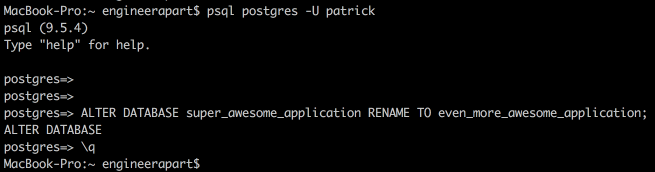
psql ALTER DATABASE
Documentation for ALTER DATABASE
B.3. Summary
That’s it! We have created our user, created a database, and given the user permissions to use the database. Along the way, we learned to use some of the pre-installed Postgres command line tools. This will give us a great foundation for understanding more complex behavior in the next section.
Now let’s take a look at some popular graphical tools for managing PostgreSQL on MacOSX.
IV. Popular GUIs for PostgreSQL on MacOSX
So far, we have focused pretty heavily on the command line tools for managing our Postgres installation. However, for some things, that is laborious and time-intensive: For example, if you want a quick view of the data you have in a table, getting that out of the command line tools takes more time than using a GUI. Do it 100 times a day while developing, that time starts to add up!
So naturally, a bunch of enterprising developers has built some pretty impressive GUIs that can be used to managed your local (and remote!) Postgres servers. We’ll take a look at a few of the most popular and user-friendly.
1. Postico (https://eggerapps.at/postico/)
Postico is a modern Postgres client for OSX, built by the same developer who built Postgres.app (mentioned above). It is free, but you can buy a license to unlock additional power features. This is the GUI that I use to manage Postgres because it is built specifically for Mac and has a beautiful, very easy to use (but powerful) UI. It also includes an SQL editor for complex queries.
To get started with Postico, simply:
- Download it at https://eggerapps.at/postico/download/
- Double-click the downloaded Zip file in Finder
- Drag the extracted
Postico.appfile to your Applications folder - Find Postico in Launchpad and launch the app.
You’ll see a screen that looks like the following (without any database connections configured):
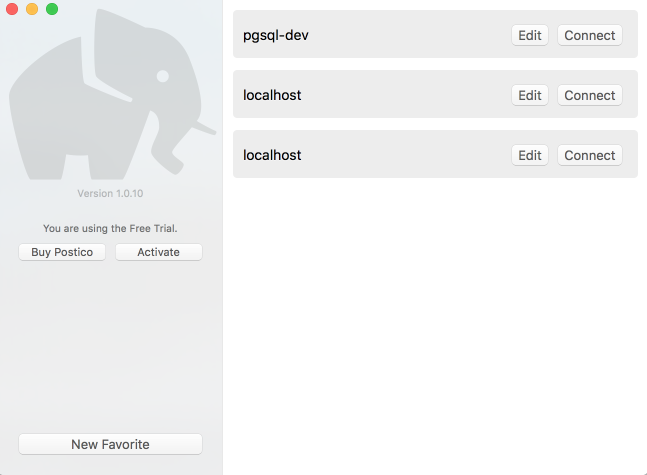
Postico
To connect to your local database:
- Click on ‘New Favorite’
- Give it an easy to remember name
- You can leave the default values entered in the boxes
- If you changed the
postgresuser password above, enter it in the password box - Drop down the
Optionsand select “Show All Databases” – otherwise you’ll wonder where your databases are!
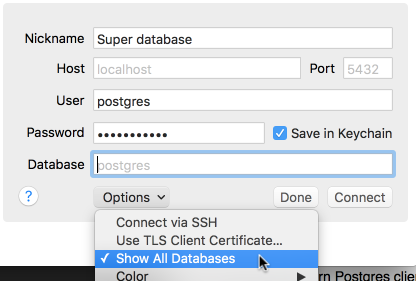
Postico new favorite
- Click ‘Done’ to save it
- Then click the ‘Connect’ button.
- You’re done!
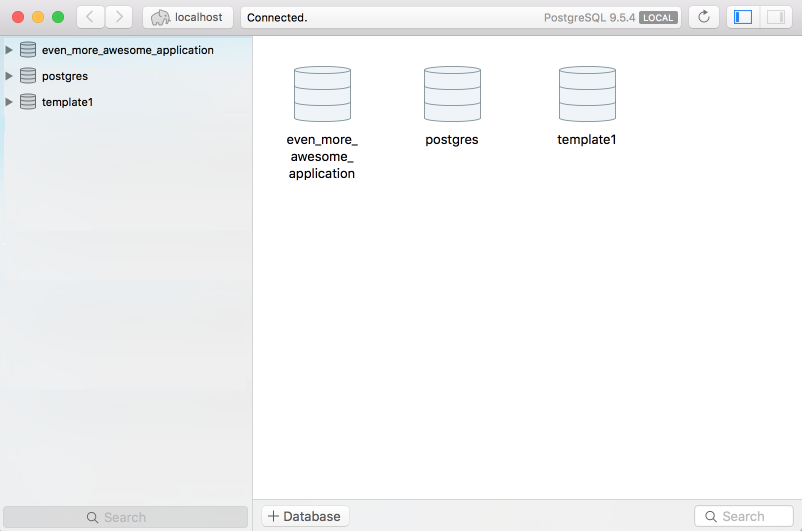
Postico connected
Read the Postico Documentation to learn how to use Postico’s amazing features!
2. pgAdmin (https://www.pgadmin.org/)
pgAdmin is the oldest of the Postgres GUIs, its first version being released just a few months after Postgre’s first release in 1996. Having been rewritten several times, it can run on Linux, MacOSX, and Windows, and features powerful database management tools including a syntax-highlighted SQL editor. Designed to run on both client machines and on deployed servers, pgAdmin is capable of handling advanced cases that Postico cannot.
To get started with pgAdmin, simply:
- Download it at https://www.pgadmin.org/download/macos4.php
- Double-click the downloaded disc image (DMG) file in your Downloads folder
- Drag the pgAdmin 4 app to your Applications folder
- Find pgAdmin in Launchpad and launch the app.
You’ll see a screen that looks like the following:
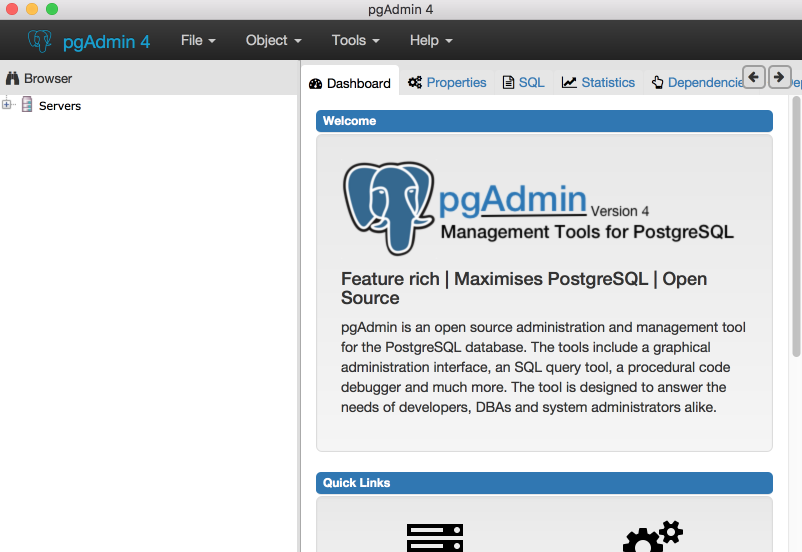
pgAdmin
To connect to your local database:
- Right-click on ‘Servers’ and select Create => Server
- Give it an easy to remember name and uncheck the “Connect Now” box
- For server address, enter
localhost - You can leave the default values entered in the boxes
- If you changed the
postgresuser password above, enter it in the password box
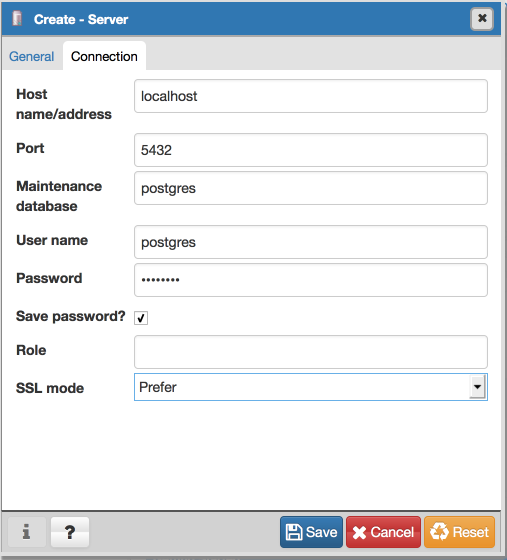
Postico new favorite
- Click ‘Save’ to save it
- Your new server will appear in the list of servers
- Click your new server and enter the password one more time to connect
- You’re done!
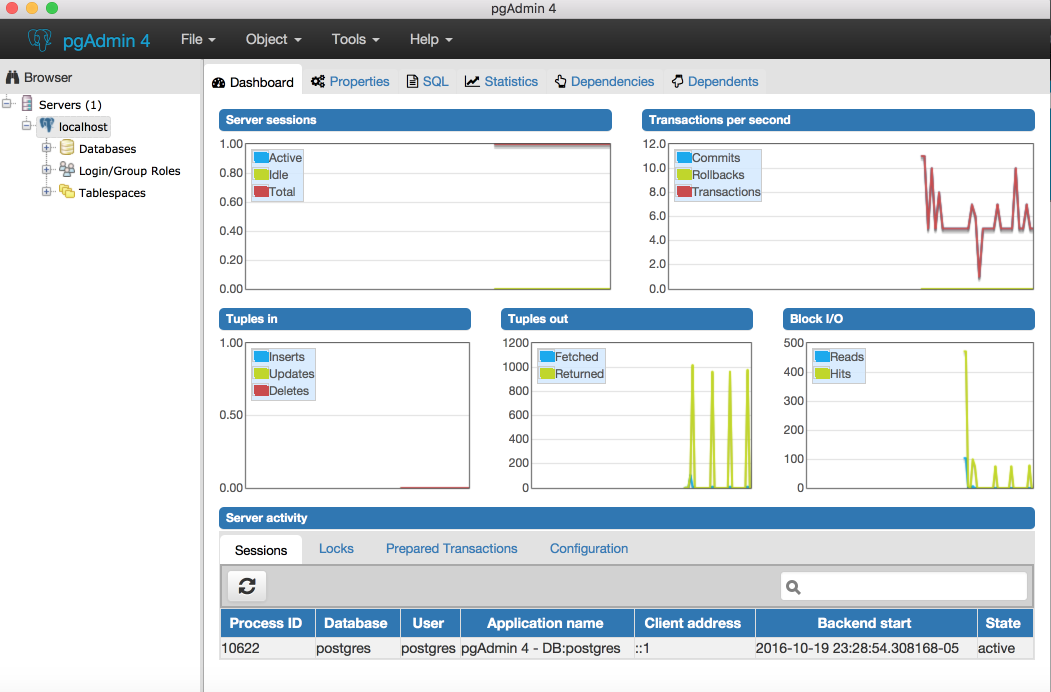
pgAdmin connected
Read the pgAdmin Documentation to learn how to use Postico’s amazing features!
3. Navicat (https://www.navicat.com/products/navicat-for-postgresql)
Navicat is without a doubt one of the best Enterprise-level management GUIs for PostgreSQL. Featuring not only an SQL editor and database, table and row viewing and management, Navicat also features a Data Modeler that allows you to graphically design and debug your database schemas. However, although Navicat comes with a 14-day free trial, its licenses range from $100-$250.
To get started with Navicat, simply:
- Download it at https://www.navicat.com/download/navicat-for-postgresql
- Double-click the downloaded disc image (navicat112pgsqlen.dmg) file in your Downloads folder
- Drag the Navicat app to your Applications folder
- Find Navicat in Launchpad and launch the app.
You’ll see a screen that looks like the following:
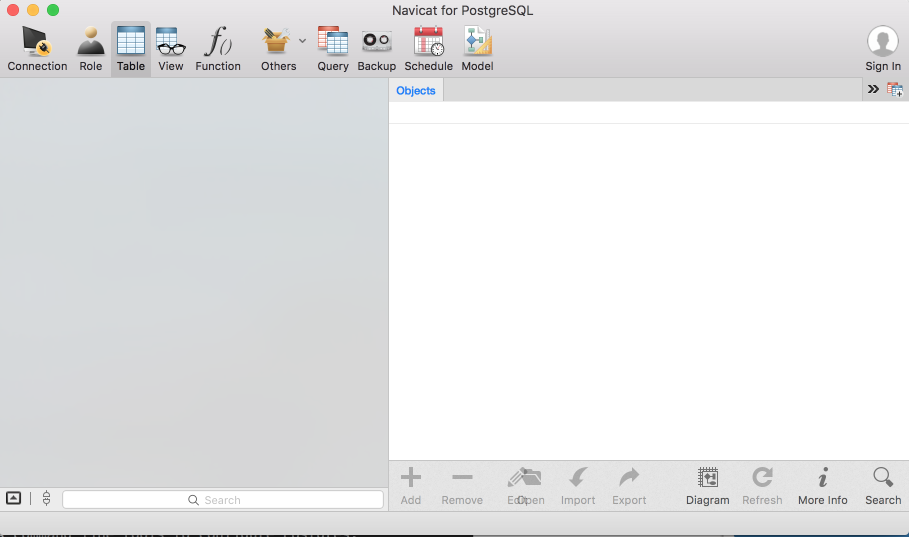
Navicat
To connect to your local database:
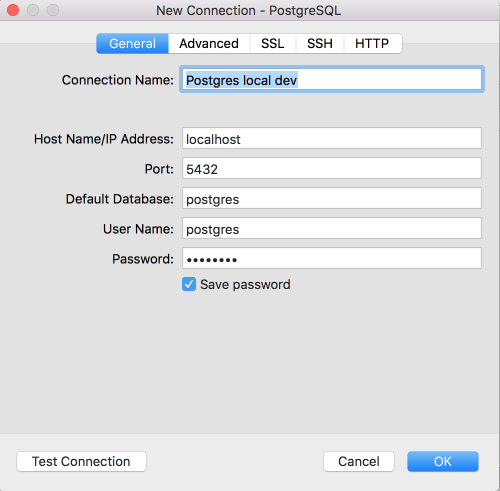
- Click “Connection”
- Fill out the dialog provided using the same information as above
- Click “Ok” to save the connection.
- Double-click the new connection in the list on the left, and you’re connected. That’s it!
Navicat connect
Read the Navicat Online Manual to learn how to use Postico’s amazing features!
V. Summary
PostgreSQL is one of the top relational databases in the world, used by individuals, small businesses, and huge enterprises alike. Despite its high performance and powerful feature set, it is incredibly easy to get started with it. In this tutorial, we have learned how to:
- Install PostgreSQL server on MacOSX using Homebrew
- Use the Postgres command line tools to configure Postgres:
- Use the
psqlcommand line tool to view information about the database - Create a new user using
psqlandcreateuser - Change a user’s password
- Create a database using
psqlandcreatedb - Change a database name
- Grant access permissions on a database to a specific user
- Use the
We have also taken a brief look at some popular GUI-based management tools for Postgres, including Postico, pgAdmin and Navicat.
Good luck! Have fun Postgres-ing!
VI. References
PostgreSQL Homepage
PostgreSQL Documentation
- Full list of client applications
- Documentation for
createuser - Documentation for
createdb - Documentation for
CREATE ROLE - Documentation for
ALTER ROLE - Documentation for
CREATE DATABASE - Documentation for
ALTER DATABASE - Documentation for
GRANT
Great article, thank you so much !
This is a very interesting article; thank you, author!
I would like to mention that I use dbForge Studio for PostgreSQL, and it suits me better than the listed programs. For those interested, here is the link: https://www.devart.com/dbforge/postgresql/studio/
P.S. I hope this won’t be considered as advertising that I leave the link. If it is, please forgive me :-)
Just saved my life, Patrick! Thank you so much for such a complete and detailed amazing content :)