
Vehicle Detection Using Cameras for Self-Driving Cars
Project #5 in Udacity’s Self-Driving Car Nanodegree
Project #5 in the Udacity self-driving car program involves creating a pipeline to detect other vehicles on the road in images taken from a vehicle’s dash-cam.
My code for this project is publicly available and can be found here.
This is part of a series. You can also read about my first, second, third, and fourth projects if you missed them!
Overview
- Extracting Features
- Training a Classifier
- Sliding Window Search
- Vehicle Detection and Heatmaps
Extracting Features
To identify vehicles in an image, we need an idea of what exactly we are looking for — we need a vehicle “signature.” This signature must ultimately come from the pixel values themselves, because that’s all the information we have. To create the vehicle signature, I extracted three different feature-sets:
- Spatial Features
- Color Histogram Features
- HOG (Histogram of Oriented Gradients) Features
Spatial Features
Spatial features are essentially the pixel values themselves. The image is resized (I used 16x16) and flattened out to a one-dimensional array, and these values are used directly in the “signature.” I used RGB images for this feature-set.
Color Histogram Features
A color histogram totals the number of pixel values that fall into evenly-distributed bins for the image’s color spectrum. This essentially tells us things like “there’s a lot of dark red” or “not much light green” (when RGB images are used). These “color bin” totals are added on to the vehicle signature. I chose to use 32 color bins and images in the HSV color space for this feature-set. While an explanation of color spaces wouldn’t be appropriate here, the image comparison below should give you a quick idea of what I’m talking about.
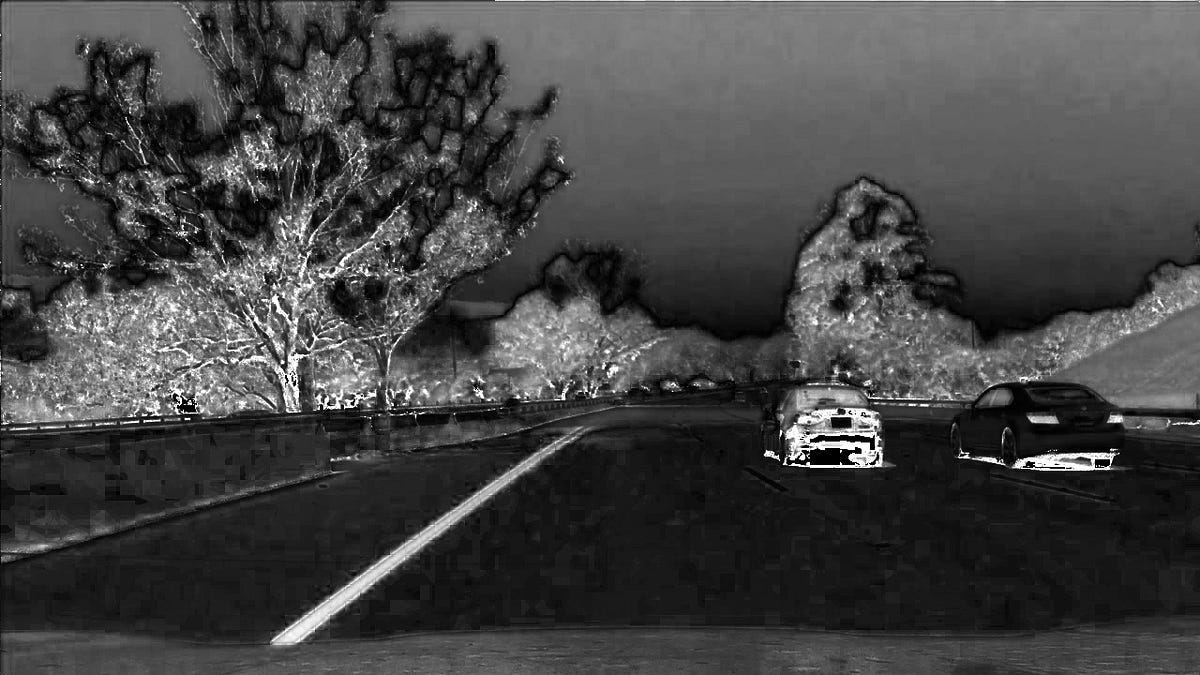
RGB image (left) and a visualization of the S channel (right) for an HSV image. S is for Saturation in HSV — you can see how the line on the left stands out a lot.
HOG (Histogram of Oriented Gradients) Features
HOG features can basically be thought of as “colors are changing by X amount in Y direction” (hence “oriented gradients”). Detailed tutorials are widely available on the web if you desire to know the intricacies. HOG features make up the bulk of the vehicle signature and are the most valuable features gathered. I used HSV images for this feature-set, also.
Training a Classifier
For each image we wish to train the machine learning classifier on, the features discussed above are extracted and concatenated together to form the image’s vehicle “signature.” I trained a Linear SVM (support vector machine) classifier on over 17,000 images (half of which contained vehicles). The features were normalized before being passed in to the classifier. The test results showed over 99% accuracy, thankfully!
Below is an example vehicle image the classifier was trained on along with the raw and normalized features extracted for that image. Normalizing is important for quicker learning and better accuracy!
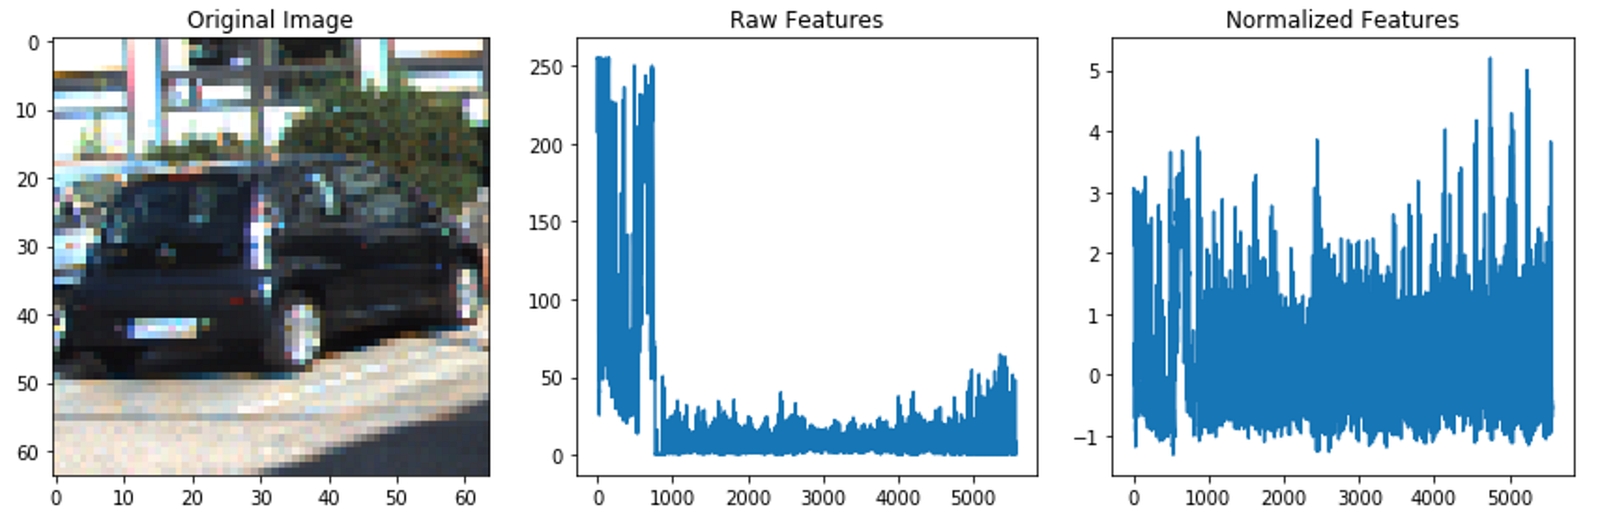
Example “vehicle” image the classifier was trained on. The raw features need to be normalized to help the classifier learn better.
Sliding Window Search
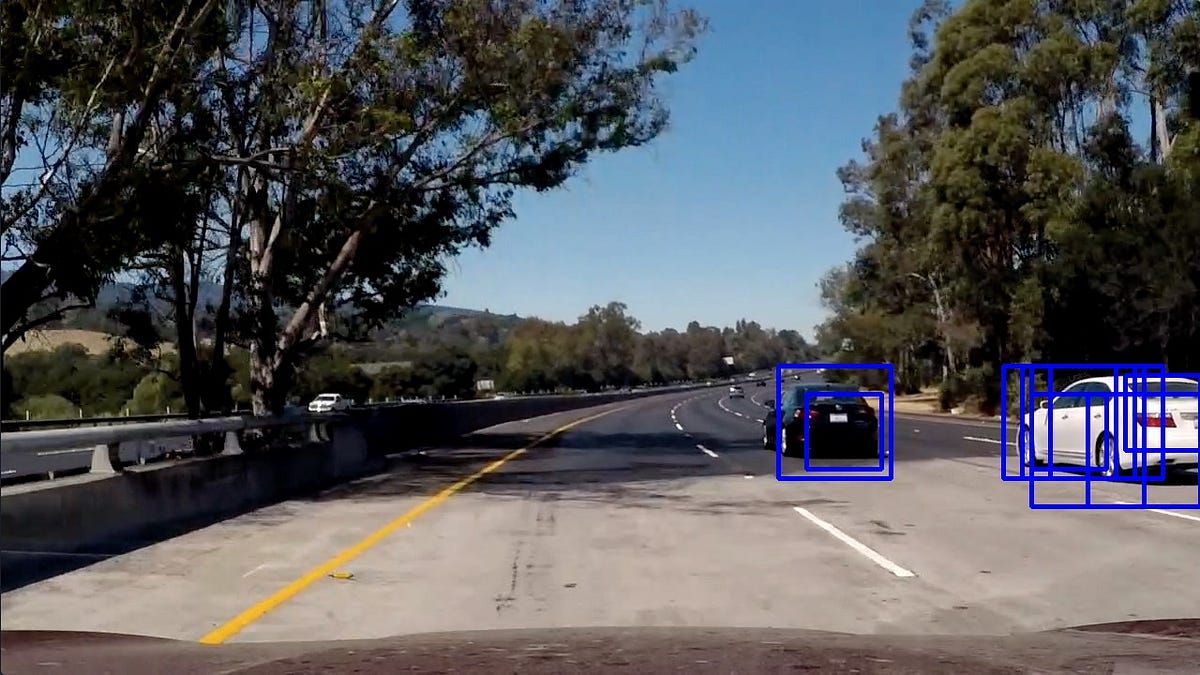
A trained classifier does no good unless you give it similar information on which it was trained. I trained the SVM on 64x64 pixel images, so I needed a way to pass it 64x64 cutouts of the larger images coming from the dash-cam. Specifically, I want the SVM to be passed 64x64 cutouts of the parts of the image that have vehicles so they can be identified. The closest I can get to knowing where the vehicles will be in the image without using the classifier is the bottom half, roughly. Thus, I performed a sliding window search (with overlap) in the bottom half of the image to produce windows that will be tested to see if they contain a vehicle.

The mesh of overlapping windows that represent sub-images which will be tested to see if they contain a vehicle.
Vehicle Detection and Heatmaps
The sliding window search produces many windows — potentially hundreds! Each of these windows represents an image that will be tested with the classifier, meaning each window needs to have features extracted for it. This is the main bottleneck of the pipeline.
Nevertheless, once features are extracted for each window-image and classified, the windows containing vehicles remain. Unfortunately, these windows usually don’t produce nice, single bounding-boxes around the vehicles like we want. To reach a single bounding-box per vehicle, a heatmap is implemented, and a new bounding-box is drawn around the “hot” areas. Results before and after the heatmap are shown below.

On the left we see the windows which were identified as containing vehicles. On the right we see the result after a heatmap is applied and a single bounding-box is chosen.

The final result — vehicles in the image are identified by a single bounding-box each!
Applying the Pipeline to Videos
As in my other projects, while the pipeline processes single images, it can easily be applied to processing videos by separating the video into frames and processing each frame individually.
Here you can see my final project video: