
Advanced Lane-Detection for Self-Driving Cars
Project #4 in Udacity’s Self-Driving Car Nanodegree
Project #4 in the Udacity self-driving car program involves using computer vision and machine learning techniques to identify road lanes and lane features from a vehicle’s dash-cam.
My code for this project is publicly available and can be found here.
This is part of a series. You can also read about my first, second, and third projects if you missed them!
Overview: The Pipeline
The goal of this project is to develop a pipeline. Given an image of the road, the pipeline should draw onto the image the features it identifies about the road’s lane and lines. The lane-detection pipeline I developed consists of the following steps:
- Pre-Step: Calibrate the camera
- Undistort the image
- Threshold the image using gradients and colors
- Apply a perspective transform (warp) to view the image from top-down
- Identify the lane lines in the warped image
- Draw features back onto the original image
The pre-step, calibrating the camera, is performed only once (assuming all the images are taken from the same camera). All the other steps are performed on each image.
Let’s look at each of these steps one-by-one.
Calibrate the Camera
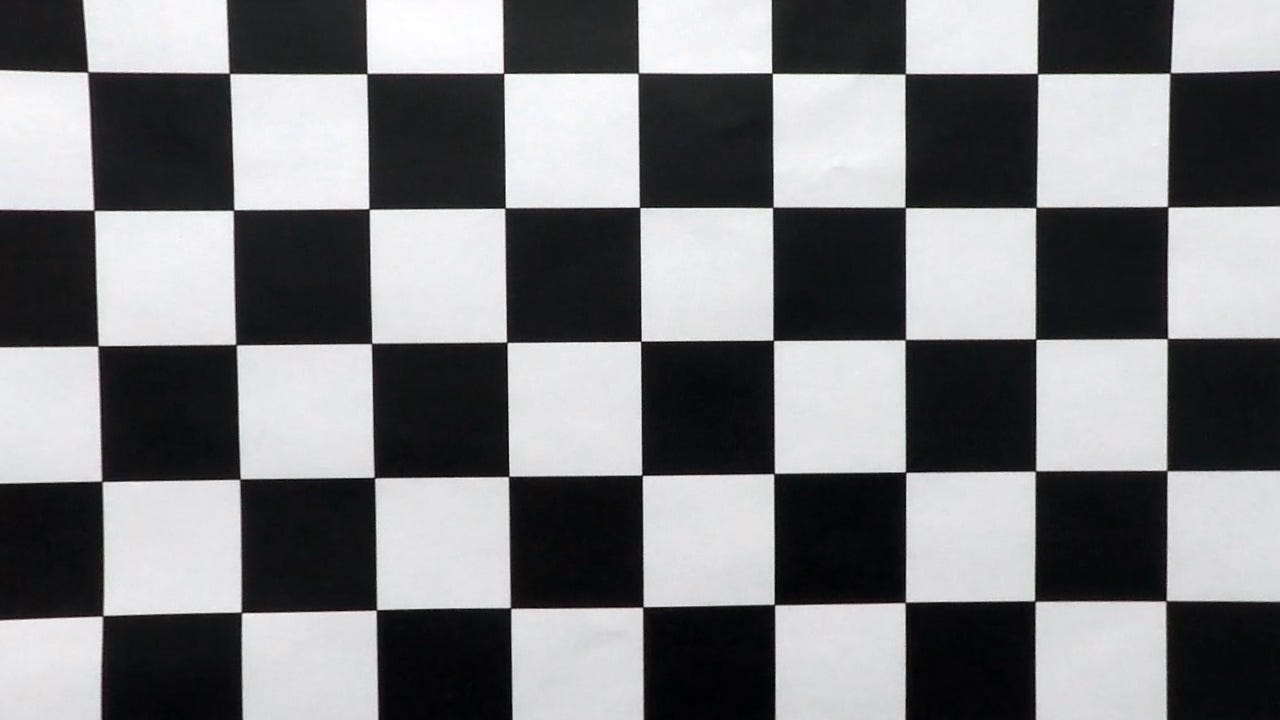
“Calibrating the camera” really means accounting for the distortion in an image introduced by the camera’s lens. This is done using multiple images of checkerboard patters, which should have straight lines. Examining how the checkerboard patterns are distorted (not straight) allows us to precisely identify how the camera lens is distorting images — which means we can undistort them.

A distorted image of a checkerboard pattern placed on a wall. These lines should be straight….
Undistort the Image
Once the camera is “calibrated,” we simply need to apply the knowledge gained to undistort images. This is important because it will restore the straightness of lines, helping to identify lane lines later in the pipeline. The difference between the distorted and undistorted images is clear. The bent lines are now straight.
While the very top and left still don’t seem perfect, it’s a whole lot better now!
Threshold the Image
Thresholding is a method of isolating the pixels we are interested in. This can be done using a combination of gradient and color filters. Here’s what a thresholded image looks like next to the original.

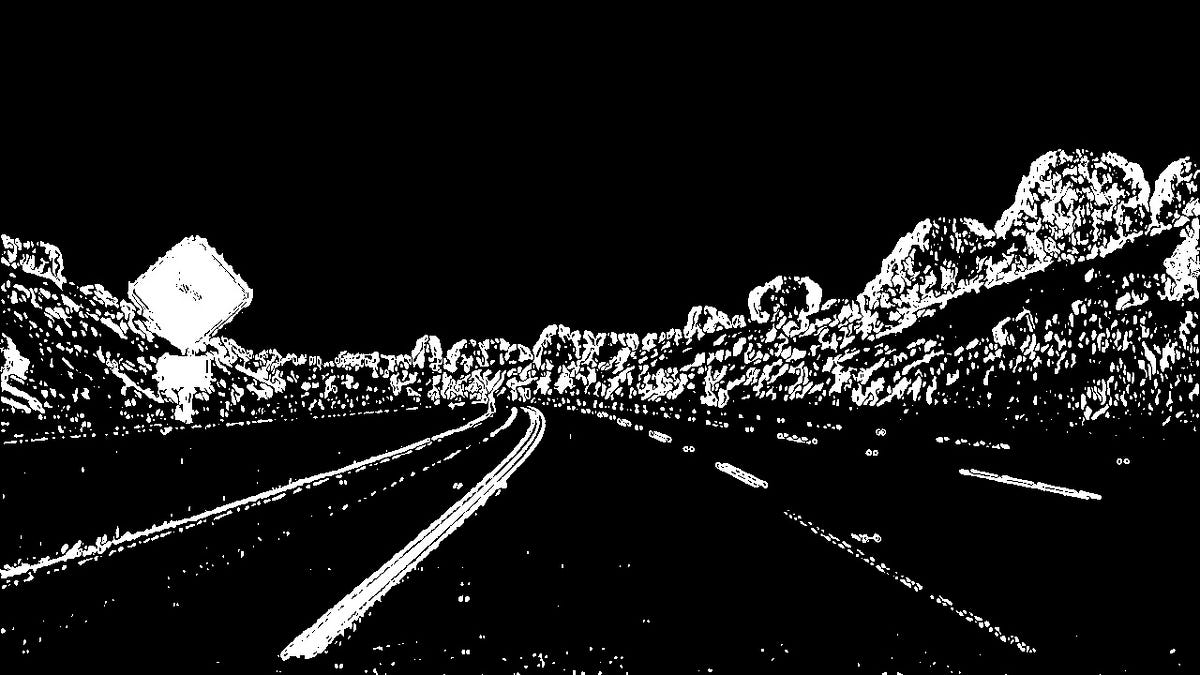
The original road image and a thresholded image. I applied pixel-gradient and color threshold filters to narrow down the pixels of interest (lane lines).
Perspective Transform
While undistorting and thresholding help isolate the important information, we can further isolate that information by looking only at the portion of the image we care about — the road. To focus in on the road-portion of the image we shift our perspective to a top-down view of the road in front of the car. While we don’t gain any extra information from this step, it’s much easier to isolate lane lines and measure things like curvature from this perspective.

The thresholded image (left), and the same image with a top-down perspective shift (right).
Identify the Lane Lines
From the top-down perspective we can easily identify the lane lines. Below you can see the lane lines identified by a sliding window search. The green boxes represent the windows where we colored the lane lines. As the windows search upward they recenter to the average pixel position so they “follow” the lines. The colored lines will be drawn back onto the original image.

A sliding window search identifies each of the lane lines.
Drawing onto the Original Image
Finally, we take all this information we gathered and draw the results back onto the original image. The blue and red lines we identified above are present, and the space between them is colored green to show the lane. The calculated right/left lane curvature and center-lane offset are shown in the top-left of the image as well. (These values would be useful when telling a self-driving car how to steer.)
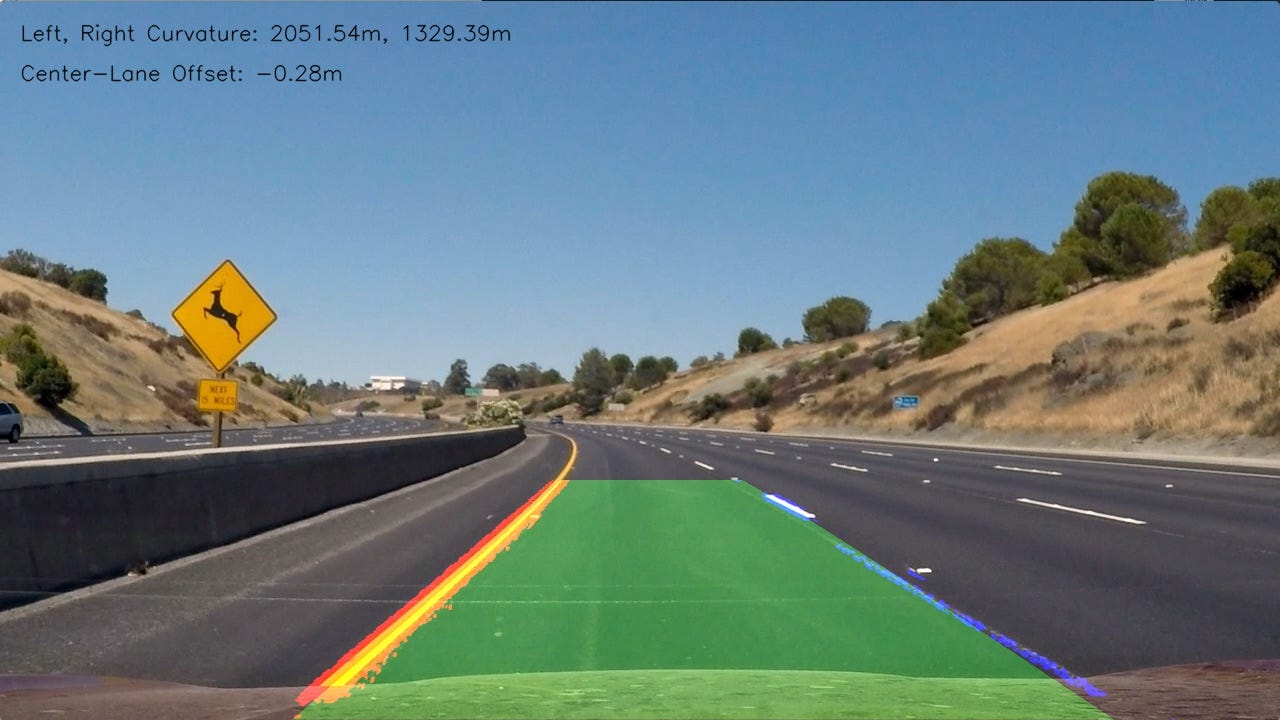
Final output — lane and lines drawn onto original image along with curvature and offset measures.
Applying the Pipeline to Videos
While the pipeline processes single images, it can easily be applied to processing videos by separating the video into frames and processing each frame individually.
I applied my pipeline to three different videos: the normal project video, a challenge video, and a harder challenge video.