
Flask Atlantis Dark - Learn Flask by coding a simple seed project
Hello Coders,
This article presents a simple Flask Dashboard coded with a few modules like authentication, database, and deployment scripts on top of modern, open-source design - Atlantis Dashboard (Dark Version). The product, released under the MIT License, can be downloaded directly from Github and the permissive license allows unlimited copies for hobby & commercial projects.
Thank you for reading!
Please find below the relevant links regarding this Flask seed project. In case anyone finds this project useful and have issues using it, just drop any question you might have in the comments section.
- Flask Atlantis Dark - LIVE Demo
- Flask Atlantis Dark - product page
What is Flask
Flask is a lightweight WSGI web application framework. It is designed to make getting started quick and easy, with the ability to scale up to complex applications. Classified as a microframework, Flask is written in Python and it does not require particular tools or libraries. It has no database abstraction layer, form validation, or any other components where pre-existing third-party libraries provide common functions.
Compared to his older brother Django, Flask provides a lightweight codebase and more freedom to the developer. This might be a good thing because you have more freedom in terms of app design and structure but in the same time, this freedom might inject problems when your application becomes complex.
Set up PC for Flask
Being a Python framework, Flask requires Python to run and expose his magic. Flask is compatible with Python2, Python3 (the recommended version).
Install Python
To get started working with Python3, you’ll need to have access to the Python interpreter (the console, and related tools and libraries). We can accomplish this in several ways:
- Download the installer from the official download page.
- Use a package manager like yum, apt on Linux systems
- Homebrew for MacOS users.
- Build Python from sources, a method used by super-geeks.
Once we have Python3 installed and accesible via the terminal, we can move forward and install Flask.
$ pip install Flask
During Flask installation, other modules will be installed under-the-hood:
- Werkzeug implements WSGI, the standard Python interface between applications and servers.
- Jinja is a template language that renders the pages your application serves.
- MarkupSafe comes with Jinja. It escapes untrusted input when rendering templates to avoid injection attacks.
- ItsDangerous securely signs data to ensure its integrity. This is used to protect Flask’s session cookie.
- Click is a framework for writing command line applications. It provides the flask command and allows adding custom management commands.
App Codebase
Starter uses a simple codebase (no Blueprints) with a structure presented below:
< PROJECT ROOT >
   |
   |-- app/               # Implements app logic
   |    |-- base/         # Base Blueprint - handles the authentication
   |    |-- home/         # Home Blueprint - serve UI Kit pages
   |    |
   |   __init__.py        # Initialize the app
   |
   |-- requirements.txt   # Development modules - SQLite storage
   |
   |-- .env               # Inject Configuration via Environment
   |-- config.py          # Set up the app
   |-- run.py             # Start the app - WSGI gateway
   |
   |-- *************************************************
App Configuration
The starter can be easily configured by editing the config.py file present in the root of the project. For instance, if we want to switch from SQLite (the default storage) to Mysql we need to update only a single line in the config.py file:
SESSION_COOKIE_HTTPONLY  = True
REMEMBER_COOKIE_HTTPONLY = True
REMEMBER_COOKIE_DURATION = 3600

# PostgreSQL database
SQLALCHEMY_DATABASE_URI = '{}://{}:{}@{}:{}/{}'.format(
    config( 'DB_ENGINE'   , default='postgresql'    ),
    config( 'DB_USERNAME' , default='appseed'       ),
    config( 'DB_PASS'     , default='pass'          ),
    config( 'DB_HOST'     , default='localhost'     ),
    config( 'DB_PORT'     , default=5432            ),
    config( 'DB_NAME'     , default='appseed-flask' )
)
Just add your credentials (database name, DB user and DB password) and the app will create automaticaly the tables for you.
How to compile the app
To compile the sources and see the app running locally, we need to write a few lines of code in the terminal.
Clone the sources
$ # Clone the sources
$ git clone https://github.com/app-generator/flask-dashboard-atlantis-dark.git
$ cd flask-dashboard-atlantis-dark
Activate a virtual ENVIRONMENT
$ # Virtualenv modules installation (Unix based systems)
$ virtualenv env
$ source env/bin/activate
Install dependencies
$ pip3 install -r requirements.txt
Start the app
$ # Set the FLASK_APP environment variable
$ export FLASK_APP=run.py
$
$ flask run
$ # App runs on address http:localhost:5000
By default Flask embedded server starts on port 5000. Once we see the app running in the browser, all we need to do is to create a new user and authenticate it.
Some nice pages will be revealed for authenticated users:
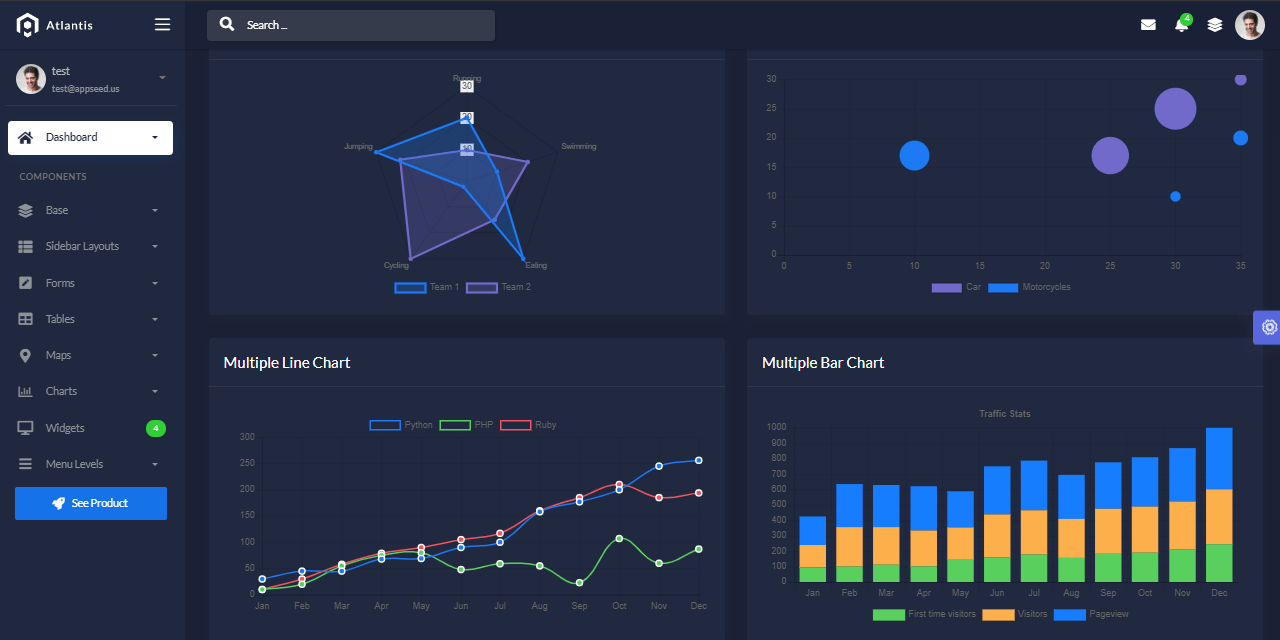
Flask Atlantis Dark - Main Dashboard Screen
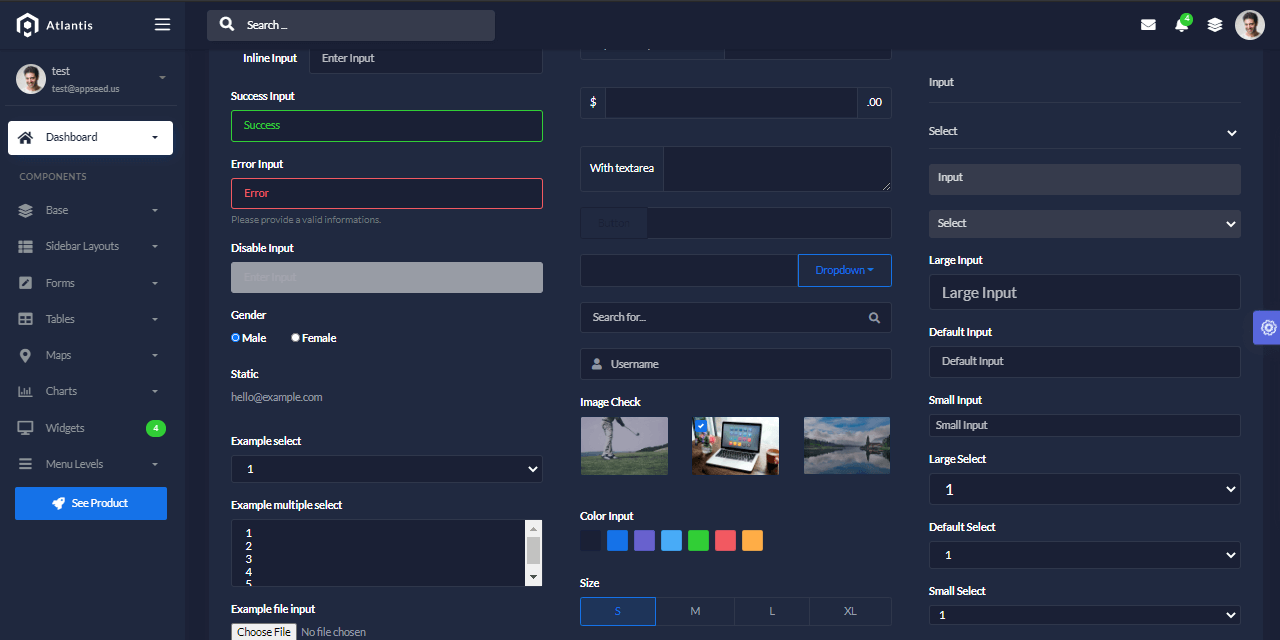
Flask Atlantis Dark - UI elements
Flask Atlantis Dark - UI Timeline element

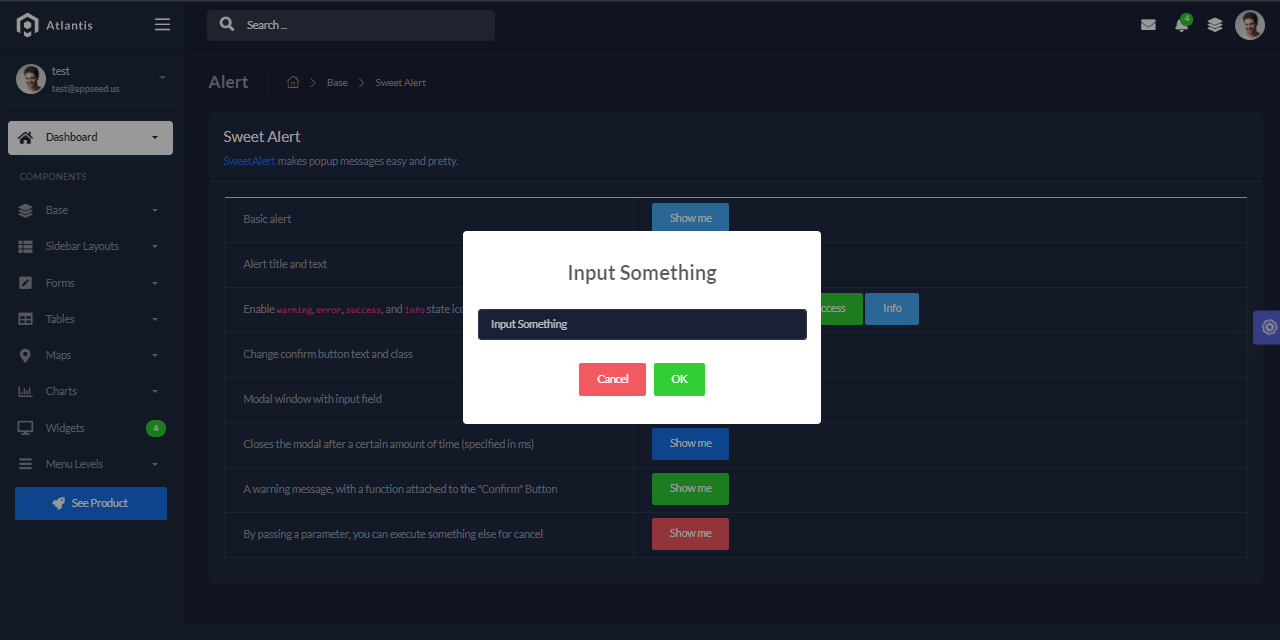
Flask Atlantis Dark - UI Alerts
This free Flask Dashboard can be used in many ways by beginners or even by experienced programmers based on the permissive licensed and modular codebase that can be extended with ease by any developer.
Thank you!