
Tutorial: Styling Angular CLI apps with Bootstrap
In this tutorial I explain how to add Bootstrap 4 and FontAwesome 4 to an app created with Angular CLI.
If you don’t have Angular CLI v1.5.0 or higher installed you can do so by npm install -g @angular/cli@latest (requires Node v6.9.0 or higher and NPM v3 or higher).
⚠️ Note: At the time of writing Bootstrap 4 is in beta (4.0.0-beta.2). That being said, the way we add and enable the library will be very similar throughout versions. I’ll try to keep the tutorial updated when Bootstrap changes.
What’s on the menu
We will scaffold a new app from scratch using Angular CLI.
Next we will add the Bootstrap and FontAwesome packages and configure them.
As a final step we will configure a base template and add some UI components that we can use in our app.
Scaffold a new project
First we will create a new project using ng new.
$ ng new tutorial-angular-cli-styling-bootstrap$ cd tutorial-angular-cli-styling-bootstrap
The ng new command creates a new directory, scaffolds our new app inside that directory and installs the required packages using npm which can take a while.
Add and configure Bootstrap and FontAwesome dependencies
When we have our app created we run the following command to install our dependencies using npm.
$ npm install --save bootstrap@4.0.0-beta.2 font-awesome
Now that we have the dependencies in place, we can tell Angular CLI that it needs to load these styles by opening the file src/styles.css and adding the following two statements.
@import "~bootstrap/dist/css/bootstrap.min.css";@import "~font-awesome/css/font-awesome.css";
You can start the project by running this command:
$ ng serve
If you load the app in the browser you should see the default welcome page with a sans-serif font

Create base template and UI components
In this step we will implement the starter template from the Bootstrap site. The first thing we will do is update the default template that Angular CLI creates.
Edit the file src/app/app.component.html and change the contents to:
<div class="container"> <div class="starter-template"> <h1>Angular CLI + Bootstrap</h1> <p class="lead">This tutorial shows how to use Bootstrap and Font Awesome with an app generated by Angular CLI.</p> </div></div>
And edit the file src/styles.css and add the following lines to the bottom:
body { padding-top: 5rem;}.starter-template { padding: 3rem 1.5rem; text-align: center;}

UI Component: navigation
We now have the basic page of the starter template in our app. The only thing that is missing is our navigation bar.
We will use Angular CLI to create a component calledapp-nav:
$ ng generate component nav
Running this command will do a few things for us:
- It creates a folder
src/app/nav/containing these 4 files:
nav.component.ts - The component class + definition nav.component.css - The component stylesheetnav.component.html - The component templatenav.component.spec.ts - The component test spec class
- It references the component in our AppModule (
src/app/app.module.ts)
This last step makes sure we can reference the app-nav component in other components. So that’s what we will do next.
Edit src/app/app.component.html and add this as the first line, before the line that says <div class="container">:
<app-nav></app-nav>
When our app refreshes you will see the words nav works above the content from the previous step.
To add the actual navigation bar edit src/app/nav/nav.component.html and change the content to:
<nav class="navbar navbar-expand navbar-dark bg-dark fixed-top"> <a class="navbar-brand" href="#">Angular CLI + Bootstrap</a> <div class="collapse navbar-collapse"> <ul class="navbar-nav mr-auto"> <li class="nav-item active"> <a class="nav-link" href="#">Home <span class="sr-only">(current)</span></a> </li> <li class="nav-item"> <a class="nav-link" href="#">About</a> </li> <li class="nav-item"> <a class="nav-link" href="#">Contact</a> </li> </ul> <ul class="navbar-nav"> <li class="nav-item"> <a class="nav-link" href="https://medium.com/@beeman"><i class="fa fa-medium" aria-hidden="true"></i></a> </li> <li class="nav-item"> <a class="nav-link" href="https://twitter.com/@beeman_nl"><i class="fa fa-twitter" aria-hidden="true"></i></a> </li> <li class="nav-item"> <a class="nav-link" href="https://github.com/beeman"><i class="fa fa-github" aria-hidden="true"></i></a> </li> </ul> </div></nav>
If you now refresh the page you should be presented with a layout very similar to that of the Bootstrap starter template.
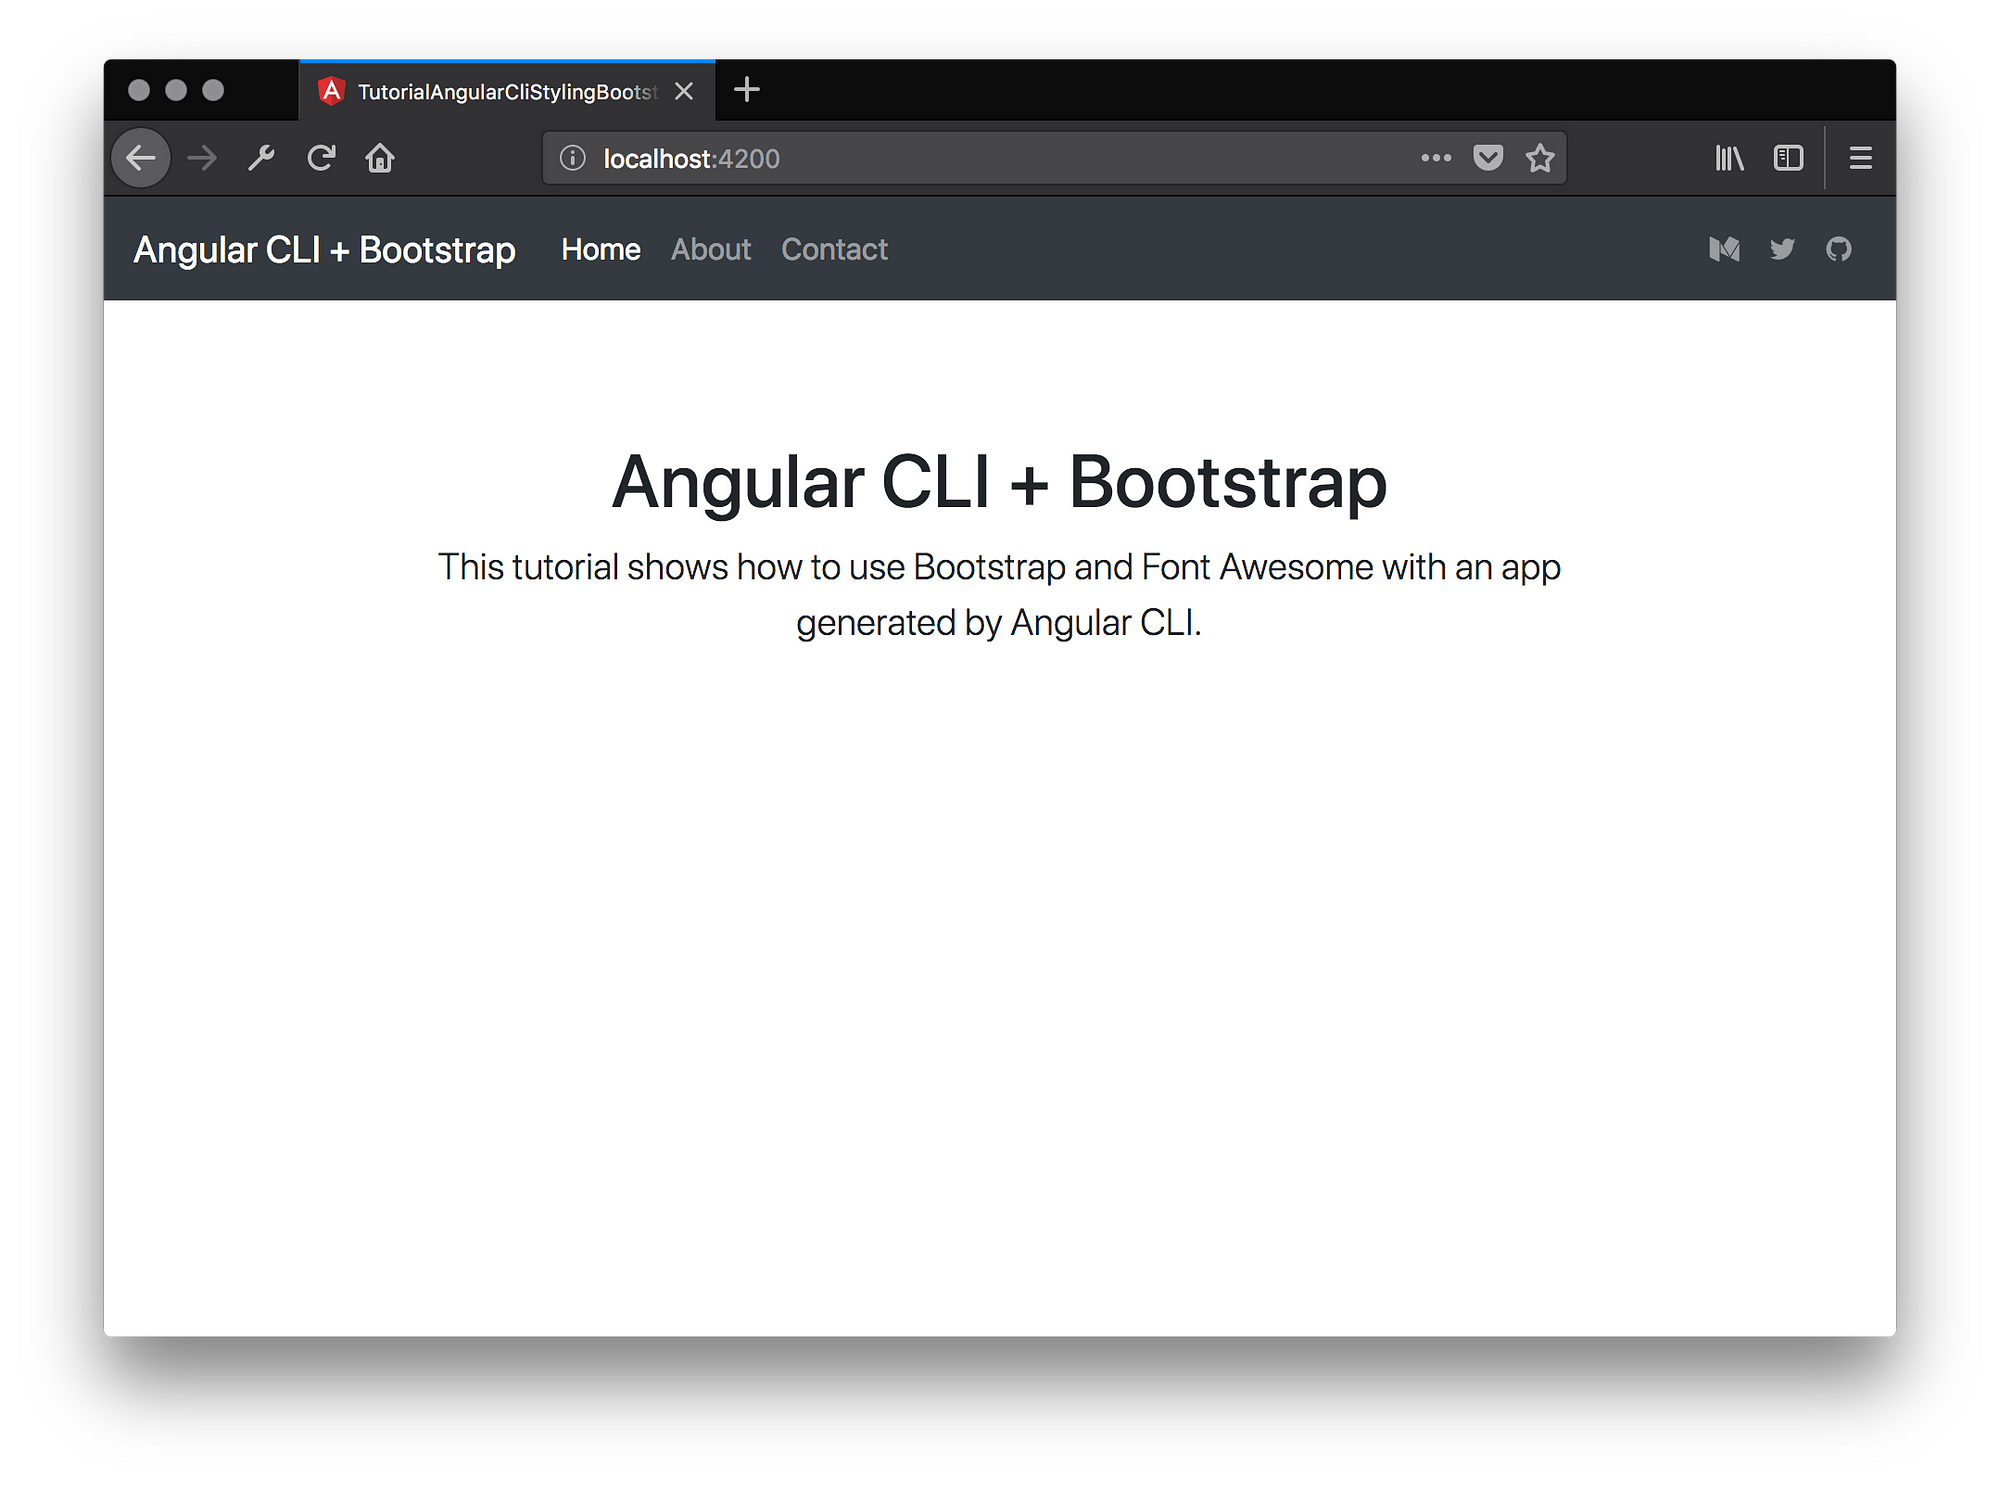
UI Component: footer
The final thing we will add to this application is a footer as shown in this example. I will go through these steps more quickly as it’s basically the same as adding the navigation component.
Generate the component:
$ ng g c footer
Edit src/app/app.component.html and add as last line, after the last </div>:
<app-footer></app-footer>
Edit src/app/footer/footer.component.html and change content to:
<nav class="navbar fixed-bottom navbar-expand navbar-light bg-light"> <div class="navbar-text m-auto"> Made with <i class="fa fa-heart" aria-hidden="true" style="color: red;"></i>️ by beeman </div></nav>
When you now refresh your app you should have a style similar to this:

Done!
I hope you enjoyed this tutorial and learned a thing or two. There is obviously much more to add, but this should get you up to speed.
Download the complete project here: https://github.com/beeman/tutorial-angular-cli-styling-bootstrap
If you have any questions or issues getting this to work feel free to hit me up in the comments or on Twitter!
Enjoy!
Updates
- 2017–11–30: Updated tutorial and example app for latest version of Angular CLI and Bootstrap Beta 2
- 2017–05–25: Updated tutorial and example repo for the latest version of Angular CLI