How to Build A Task Notification Bot for Slack with Python (Part 4) — Hosting and Testing
Photo of servers by imgix on Unsplash
We have gotten to the final stage of the tutorial series. The part 1 was used to structure our app and setup some necessary helper methods. In the part 2, we built the webhook of our application. The part 3 was used to implement our slash command. In this last part of the tutorial, we will host our application and setup our slash command on slack application dashboard.
Deploy application to Heroku
To test our application from Slack, we need to use a live url. This means we need to host it on the internet. To achieve this, let’s deploy our bot to Heroku . For most web application developers, deploying their apps to Heroku would be a familiar process, but for newbies, I will be providing a step by step process to deploy our slack bot.
- Create an Heroku account and install the Heroku Toolbelt CLI. After installing the CLI, run the
heroku logincommand to authorize your machine with your heroku account credentials your created. - Install Git, and initialize a git repository in your
projectdirectory by runninggit init. - Add a file named
Procfilein the root of yourprojectfolder. We will add the following snippets in the file. It will be used by heroku to start our application running on awebserver(gunicorn) and webhook running on a herokuworker.
web: gunicorn ranti:appworker: python worker.py - Add a
.gitignorefile and add the text.env, to keep the content of our.envfile local and not accessible by the public when we push to git. - Add all these files we have created to git using
git add .and commit the changes with a message usinggit commit -m "any message of your choice describing the task we just completed". - From the root of the
projectdirectory, create a new heroku app using theheroku create [appName]command provided by the Heroku Toolbet. e.g.heroku create ranti-bot.ranti-botis the name of our application, and it must be unique across heroku. - Since our application uses some values in our
.envfile and we ignored it from git (i.e. it won’t be pushed to our online repository), we need to setup our environment variables on heroku.
Login to the heroku dashboard, using the account credentials you created earlier. Select the app and goto the settings tab. In theConfig Varssection, click on Reveal Config Vars, then add all the key-value pairs in the.envfile as seen in the image below.

Screenshot of the Heroku Config Vars on the settings page in our Heroku app dashboard
- Push our code to heroku by running the
git push heroku mastercommand from ourprojectdirectory in the terminal. This will also deploy our application and build it on heroku. The final output of the command will show our heroku app URL and git repository.
Creating ranti-bot... done
[**https://ranti-bot.herokuapp.com/**](https://ranti-bot.herokuapp.com/) | [_https://git.heroku.com/ranti-bot.git_](https://git.heroku.com/ranti-bot.git)
Now we have successfully deployed our app to Heroku. Let’s setup our slash command on Slack.
Setup Slash Command on Slack
I will highlight the steps I took in setting up a slash command as described on the Slack API documentation.
On the application’s settings page, select the Ranti Bot App we created in part one from the list of apps and then click the Slash Commands menu in the Add feature and functionality tab on the page.

“add feature and functionality” tab on the slack application settings page.
We will be presented with a Create New Command Button. Click on it and provide the information required on the form as seen below to define our new slash command — /ranti. The request URL is the Heroku app URL we were provided with above and our app route — https://ranti-bot.herokuapp.com/ranti-bot .

slash commands setup page.
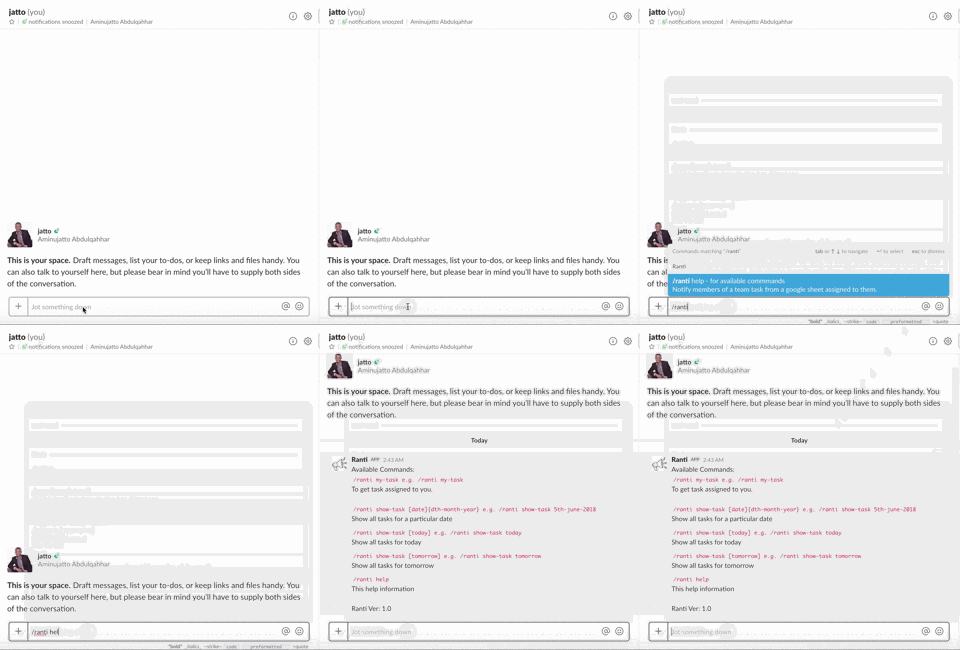
Now, click on the save button and hurray, we have successfully setup our slash command on Slack. Our application is now live and functional. Head over to Slack and test out the app using the /ranti help command.

Screencast of the slash command in action
Wrapping up
We have now built a simple fully functional Slack bot. This has shown you how to use the Slack API to build bots and slash commands for our bot. It also shows you how to integrate other web APIs such as the Google Spreadsheet API which we used to store the data we interacted with. I have also introduced you to some concepts in python programming language.
There is a lot more to learn about python and building Slack bots. The following is a list of some other helpful resources:
- How to Build Your First Slack Bot with Python
- Creating a Slack Command Bot from Scratch with Node.js & Distribute It
- Build a first simple Slack Bot with Python
- Slack Slash Command Tutorial
- Google Spreadsheets and Python
- A Slack bot for telling contact details of any member. Picks up the details from a Google Spreadsheet
- How to Deploy Your Slack Bots to Heroku
- Deploying a Python Flask app on Heroku
Do you have any Questions? You can reach me on Twitter @jattorize. I’m also on GitHub with the username jattoabdul.
See something wrong in this post? Fork this tutorial’s source on GitHub and submit a pull request.
Originally posted on The Andela Way .
