
React native: Running DEV and PROD apps simultaneously on same device, and automating the builds
NOTE: ATM this tutorial only supports android environment.
When developing a mobile app, you'd want to have both dev and prod versions installed on your device, and be able to distinguish between them easily at a glance, like so:
Asumptions
- You have a working react-native project with a production version of the app installed on your device
Step 1: install the dev version on the app
Do a global find and replace in your project: com.appname -> com.appnameDev
These files should be changed:
ROOT/android/app/BUCK# two changes hereROOT/android/app/buid.gradleROOT/android/app/src/main/AndroidManifest.xmlROOT/android/app/src/main/java/com/memorynback/MainActivity.javaROOT/android/app/src/main/java/com/memorynback/MainApplication.java
Install on device:
$ cd ROOT/android && ./gradlew assembleRelease && cd ..
$ react-native run-android --configuration=release
You should now see the two apps side by side:
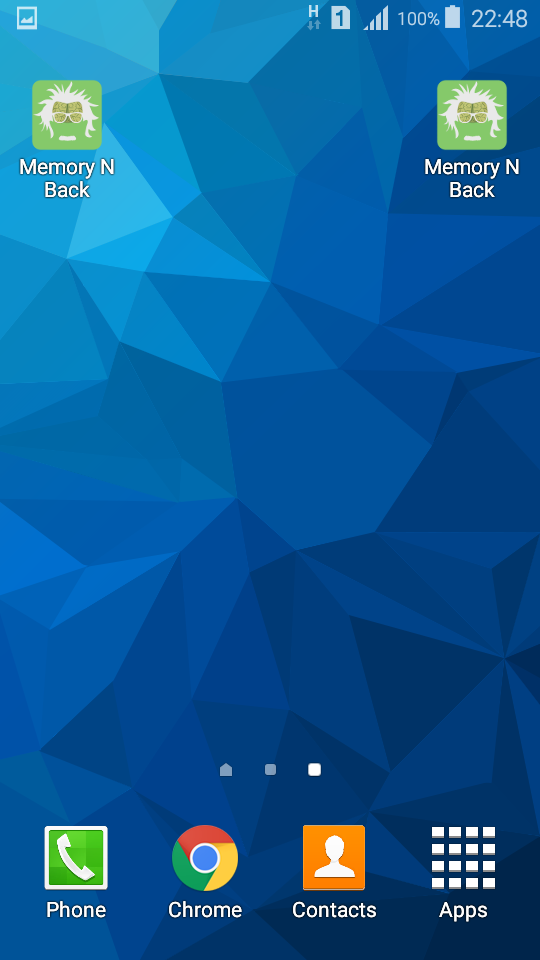
But ... we have no way to distinguish between the two.
Let's fix that.
Step 2: setting different title for dev app
open ROOT/android/app/src/main/res/values/strings.xml and change:
<string name="app_name">Memory N Back</string>
to
<string name="app_name">Memory N Back (DEV)</string>
Install on device again.

Ahhh ... progress!
We could still do better by changing the icon though. Let's do that now:
Step 3: setting different icon for dev app
If you are running linux, you can use the following commands to auto generate icon versions for your dev app:
$ sudo apt-get install imagemagick php5-imagick
$ convert android/app/src/main/res/mipmap-mdpi/ic_launcher.png -shave 6x6 -bordercolor '#EF4142' -border 6 android/app/src/main/res/mipmap-mdpi/ic_launcher_dev.png
$ convert android/app/src/main/res/mipmap-hdpi/ic_launcher.png -shave 8x8 -bordercolor '#EF4142' -border 8 android/app/src/main/res/mipmap-hdpi/ic_launcher_dev.png
$ convert android/app/src/main/res/mipmap-xhdpi/ic_launcher.png -shave 10x10 -bordercolor '#EF4142' -border 10 android/app/src/main/res/mipmap-xhdpi/ic_launcher_dev.png
$ convert android/app/src/main/res/mipmap-xxhdpi/ic_launcher.png -shave 12x12 -bordercolor '#EF4142' -border 12 android/app/src/main/res/mipmap-xxhdpi/ic_launcher_dev.png
Or just install the npm package ( authored by a really awesome guy btw;) ) to do that automagically for you:
$ npm install --save-dev react-native-build-utils
$ npm run react-native-build-utils icons
On windows you can use photoshop or an image editing tool of your choice for the job.
You should now have ic_launcher_dev.png in all the icon folders:
- ROOT/android/app/src/main/res/mipmap-mdpi/ic_launcher_dev.png
- ROOT/android/app/src/main/res/mipmap-hdpi/ic_launcher_dev.png
- ROOT/android/app/src/main/res/mipmap-xhdpi/ic_launcher_dev.png
- ROOT/android/app/src/main/res/mipmap-xxhdpi/ic_launcher_dev.png
Now that we got our dev icons, let's tell our app to use them instead of the production ones. Open ROOT/android/app/src/main/AndroidManifest.xml and change:
android:icon="@mipmap/ic_launcher"
to
android:icon="@mipmap/ic_launcher_dev"
You probably know what's next ...
Install on device.
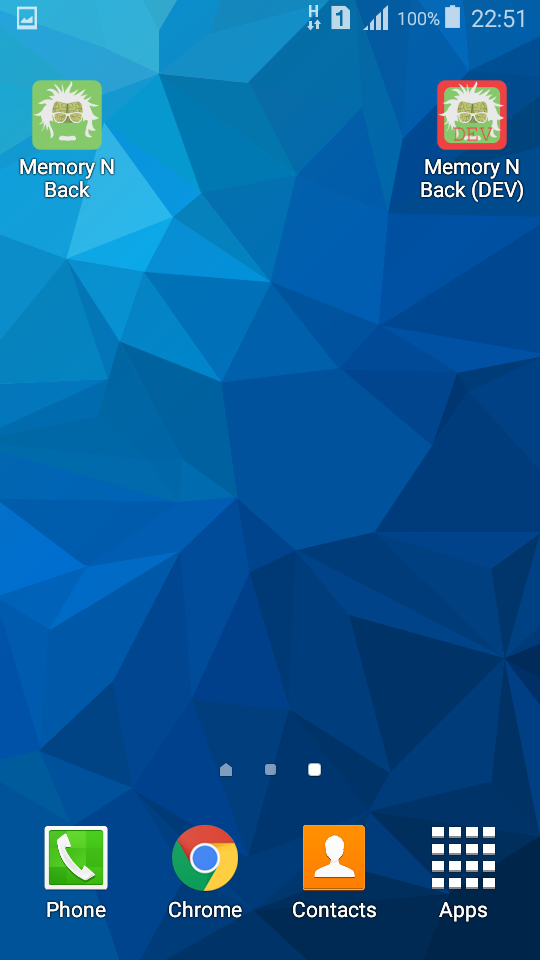
Now you should see the following:
Success!
We now have two apps running side by side, and can easily distinguish between them.
So your current configuration is what you should use for development. When it's time to release a new apk, or test production version, you need to reverse all the changes we've just made.
If that sounds like a lot of work, it's just because it is, that's why I've authored a package to automate the process.
Step 4: automation!
$ npm install --save-dev react-native-build-utils
It will handle all of those things for you.
Full details in the repo, but in short:
$ npm run react-native-build-utils icons # generates dev icons based on prod items
$ npm run react-native-build-utils install --prod # install prod version on your device
$ npm run react-native-build-utils apk # generates apk
$ npm run react-native-build-utils configGradle # configures app for dev
$ npm run react-native-build-utils configGradle --prod # configures app for prod
Don't forget to star the repo for a dose of good karma 
I hope you found this package and tutorial useful!
Let me know what you think in the comments, and if you have any questions.
PS. This is my first one so go easy on me 
Thanks! Very detailed for a newbie like me! Keep it coming! :)
Will do, glad you enjoyed it!