Building an iOS Geolocation Travel App with React Native
I. Introduction
From travelers planning their trips to regular commuters who want to keep track of all the places they go to, keeping track of where people have been to, where they are, and where they want to go are features users look for in a light-weight, user-friendly travel app.
An app that manages and keeps track of favorite places and routes is something you can build using React Native!
II. Background
A. React Native
React Native is a framework for building mobile apps using React and JavaScript. It has support for building mobile apps for the iOS and Android platforms. The framework is open-sourced by Facebook on March 2015. It is built on the premise:
Learn once, Write anywhere: Build mobile apps with React.
React Native has a set of inbuilt React components. For example, there are components such as TabBar, Navigator, Switch, DatePicker, and MapView. These components get translated to native iOS or Android components. The layout of the components is controlled by an implementation of Flexbox (CSS). Styles specified by props on the React Native component are translated to styles on the native UIKit component. In this way, React Native wraps the UIKit on iOS just as React wraps the DOM on web.
B. React
React allows building UI components. UI components are composed of layout, style, and JavaScript. For web applications, the layout is translated to HTML and style is translated to CSS.
III. Create the app
In this tutorial, we will build a sample location-based travel app using React Native. The tutorial assumes that you have some knowledge of working with React and JavaScript.
Our sample app allows the user to view favorite places on a map in the neighborhood. There are two tabs in the app: Places tab and Add Place tab. The Places tab shows the favorite places in a MapView component. The Add Place tab adds a place to the Map. When clicking on one of the favorite places on the map, the user is taken to Maps with driving directions.
We will build the sample app for the iOS platform.
A. Getting Started
The Getting Started page has detailed instructions on how to install React Native on your system. For a Mac, install Node and Watchman.
brew install node
brew install watchman
React Native is a node package that is installed via npm.
sudo npm install -g react-native-cli
To create our Places project, use the init command from react-native.
react-native init Places
To run the app in iOS simulator, use the run-ios command from react-native within the project folder.
cd Places
react-native run-ios
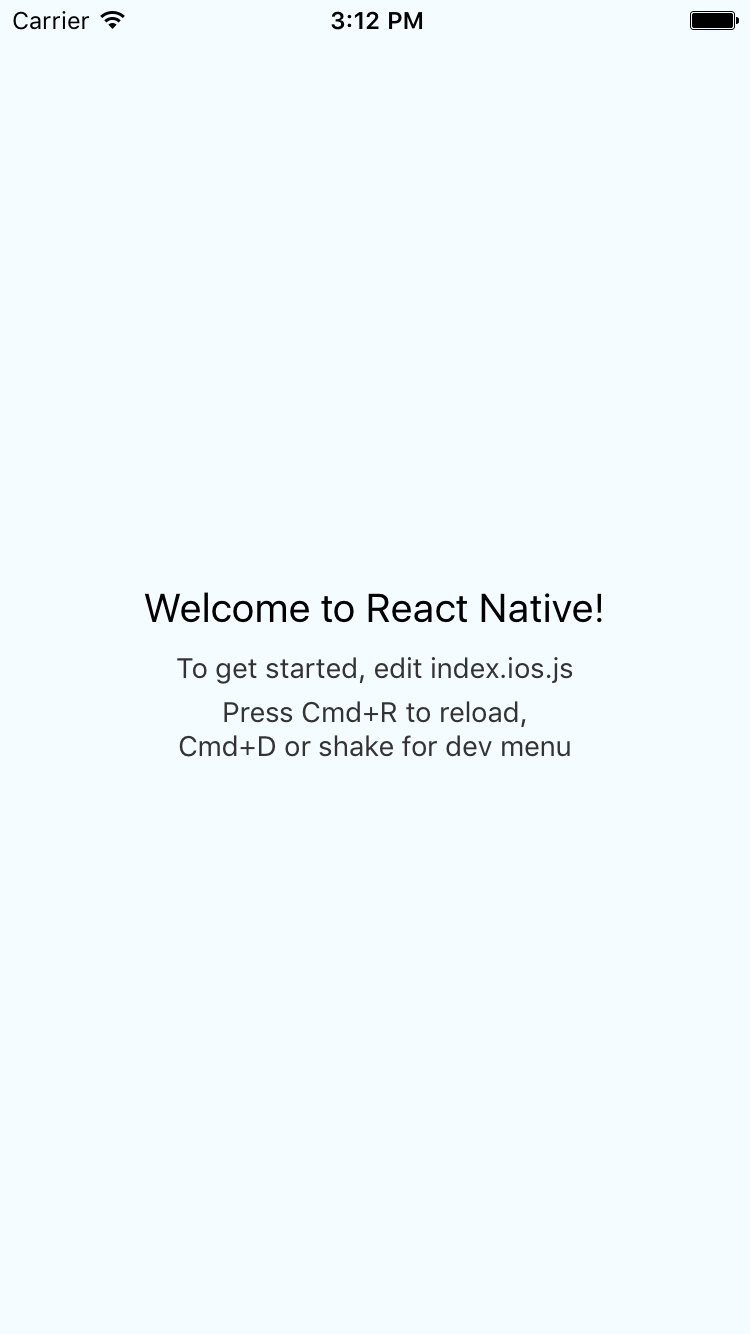
The iOS simulator is started and our project is built. A new terminal window opens up that listens on port 8081 and provides the script bundle. When an app is deployed to the AppStore, the script bundle is either embedded within the app or provided by a service such as AppHub. The built app is installed in the simulator and opened. The screenshot of the initial project is shown below.
B. Tabbed navigation
The entry-point for the iOS app is index.ios.js file. Any modification to the file will reflect in the iOS simulator when the app is reloaded. To reload an app in the simulator, use Command-R or the Shake Gesture from the simulator menu.
TabBarIOS is a React Native component. Using the component provides tabs at the bottom of the view. Along with the TabBarIOS, we will import the Textand Stylesheetcomponent.
import {
  AppRegistry,
  Text,
  TabBarIOS,
  StyleSheet
} from 'react-native';
TabBarIOS component contains items of TabBarIOS.Item. Each item is a tab with a title and an icon. The item also has a selected property. When the tab is selected, it is tinted. The icon can be a system icon. When a system icon is used, the title is provided by the system icon. We will create tabbed navigation with two tabs as follows.
<TabBarIOS>
  <TabBarIOS.Item
    systemIcon="favorites"
    selected={true}
  >
    <View>
      <Text>Favorite Places</Text>
    </View>
  </TabBarIOS.Item>
  <TabBarIOS.Item
    systemIcon="more"
  >
    <View>
      <Text>Add Place</Text>
    </View>
  </TabBarIOS.Item>
</TabBarIOS>
Within our tabs, we place the child component. The text component is displayed in the view when a tab is selected. The Text component is displayed in the top left corner of the view. We will style the component using the StyleSheet component.
const styles = StyleSheet.create({
  text: {
    textAlign: 'center',
    color: '#333333',
    marginTop: 50,
  },
  view: {
    backgroundColor: '#fed',
    flex: 1
  }
});
The text style defined above gives the text some color, aligns the text to the center, and moves the text 50 pixels from the top of the view. The view is styled with the background color. The style of flex: 1 makes a Flexbox which fills the entire screen. Styles are attached to the component just as for any other React component.
<View style={styles.view}>
  <Text style={styles.text}>Favorite Places</Text>
<View>
For the second tab, we will use a custom icon and a title. Image files are typically stored in an assets folder. The icon size is of 32 x 32. The image for pin.png is:
<TabBarIOS.Item
  title="Place"
  icon={require('./assets/pin.png')}
>
</TabBarIOS.Item>
When the user clicks on a tab, we want to highlight the tab. Highlighting the tab is done by changing the selected prop of the corresponding tab to true. To accomplish this, we define the selectedTab state. The selectedTab is initially set to zero which corresponds to the first tab.
constructor() {
  super();
  this.state = {
    selectedTab: 0
  };
}
To change the selectedTab, we handle the onPress event of the TabBarIOS.Item.
handleTabPress(tab) {
  this.setState({ selectedTab: tab })
}
Finally, we use the selectedTab state to update the selected prop of the Tab. The complete JSX is shown for clarity.
<TabBarIOS>
  <TabBarIOS.Item
    systemIcon="favorites"
    selected={this.state.selectedTab === 0}
    onPress={this.handleTabPress.bind(this, 0)}
  >
    <View style={styles.view}>
      <Text style={styles.text}>Favorite Places</Text>
    </View>
  </TabBarIOS.Item>
  <TabBarIOS.Item
    title="Place"
    icon={require('./assets/pin.png')}
    selected={this.state.selectedTab === 1}
    onPress={this.handleTabPress.bind(this, 1)}
  >
    <View style={styles.view}>
      <Text style={styles.text}>Add Place</Text>
    </View>
  </TabBarIOS.Item>
</TabBarIOS>
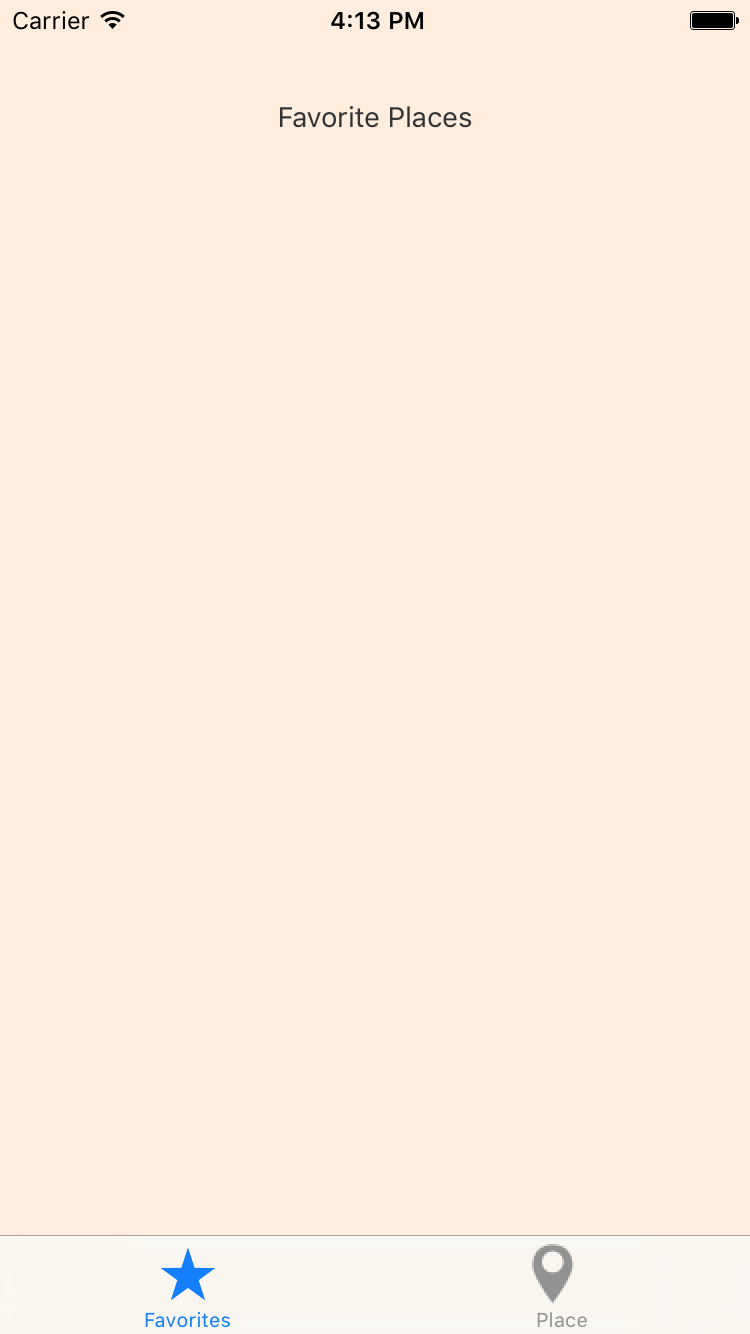
The screenshot of the iOS simulator after adding tabs is shown below.
C. Map of favorite destinations
In this section, we will create a map and populate it with our favorite destinations. These destinations are the frequently visited places in the neighborhood.
Create a new PlaceMap component in a file named place_map.js. The PlaceMap component will use the MapView component of React Native. The MapView component is designed only for iOS platform. The initial code for PlaceMap component is shown below.
import React, { Component } from 'react';
import {
  MapView,
  View,
  StyleSheet
} from 'react-native';

export default class PlaceMap extends Component {
  render() {
    return (
      <MapView
        style={styles.map}
      />
    );
  }
}

const styles = StyleSheet.create({
  map: {
    flex: 1
  }
});
The MapView component is allowed to flex and occupy the entire screen. The MapView component should be provided with the initial region. The region is set via props. The region has five properties: latitude, longitude, latitudeDelta (zoom), longitudeDelta, and title.
<MapView
  style={styles.map}
  region={{
    latitude: 38.8977,
    longitude: -77.0365,
    latitudeDelta: 0.2,
    longitudeDelta: 0.2,
    title: "White House"
  }}
/>
The Map is anchored with White House at the center. To view the map, the PlaceMap component should be placed within the first tab as follows.
<TabBarIOS.Item
  systemIcon="favorites"
  selected={this.state.selectedTab === 0}
  onPress={this.handleTabPress.bind(this, 0)}
>
  <PlaceMap />
</TabBarIOS.Item>
Our favorite destinations are stored as annotations on the map. Annotation has a title, latitude and longitude. We will define the annotations on the state of the main component Places.
constructor() {
  super();
  this.state = {
    selectedTab: 0,
    annotations: [
      {
        title: 'Smithsonian Museum',
        latitude: 38.8980,
        longitude: -77.0230
      },
      {
        title: 'UMCP',
        latitude: 38.9869,
        longitude: -76.9426
      },
      {
        title: 'Arlington',
        latitude: 38.8783,
        longitude: -77.0687
      }
    ]
  };
}
The annotations are supplied to the PlaceMap via props.
<PlaceMap annotations={this.state.annotations} />
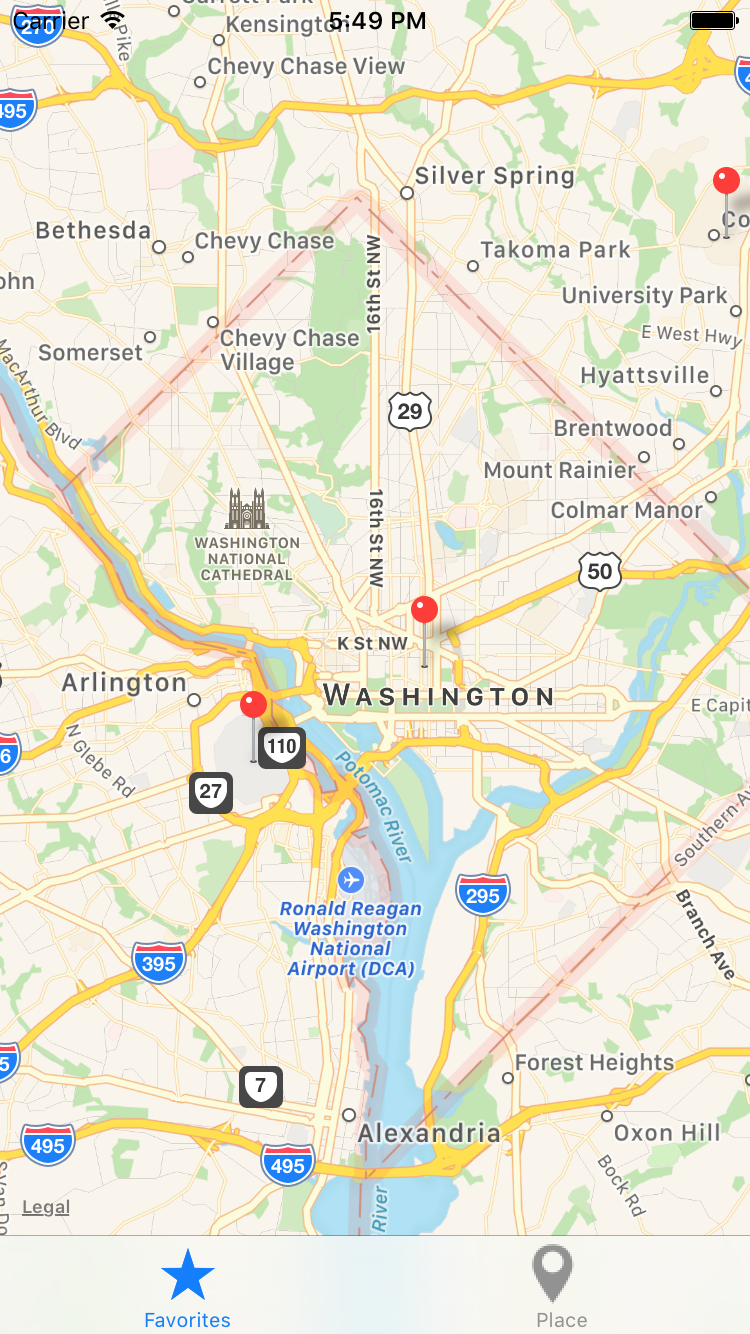
The annotations are further passed on to the MapView component. The MapView component displays the annotations as markers on the map. Clicking on one of the markers will show the title.
<MapView
  style={styles.map}
  region={this.region}
  annotations={this.props.annotations}
/>
The screenshot of the simulator after adding the MapView component is shown below.
D. Form for adding places
Users interact with an app using various input components:
- The
TextInputcomponent accepts text input. - The
TouchableHighlightcomponent responds to user touches and works like a button. - Other components for accepting user input are
Picker,SliderandSwitchcomponent.
In this section, we will add a form with three TextInput components and a TouchableHighlight component. The TextInput components correspond to Title, Latitude and Longitude of a place. The initial code for the AddPlace component is shown below.
import React, { Component } from 'react';
import {
  Text,
  TextInput,
  TouchableHighlight,
  View,
  StyleSheet
} from 'react-native';

export default class AddPlace extends Component {
  render() {
    return (
      <View style={styles.view}>
        <Text style={styles.text}>Title</Text>
        <TextInput
          style={styles.textInput}
        ></TextInput>
        <Text style={styles.text}>Latitude</Text>
        <TextInput
          keyboardType="numbers-and-punctuation"
          style={styles.textInput}
        ></TextInput>
        <Text style={styles.text}>Longitude</Text>
        <TextInput
          keyboardType="numbers-and-punctuation"
          style={styles.textInput}
        ></TextInput>
        <TouchableHighlight style={styles.button}>
          <Text style={styles.buttonText}>Add Place</Text>
        </TouchableHighlight>
      </View>
    );
  }
}

const styles = StyleSheet.create({
  view: {
    paddingTop: 50,
    paddingLeft: 30,
    paddingRight: 30,
    backgroundColor: '#fed',
    flex: 1
  },
  text: {
    color: '#333333',
    marginBottom: 5
  },
  textInput: {
    height: 40,
    borderColor: 'gray',
    borderWidth: 1,
    marginBottom: 5
  },
  button: {
    backgroundColor: '#ff7f50',
    padding: 12,
    borderRadius: 6
  },
  buttonText: {
    color: '#fff',
    fontSize: 18,
    fontWeight: 'bold',
    textAlign: 'center'
  }
});
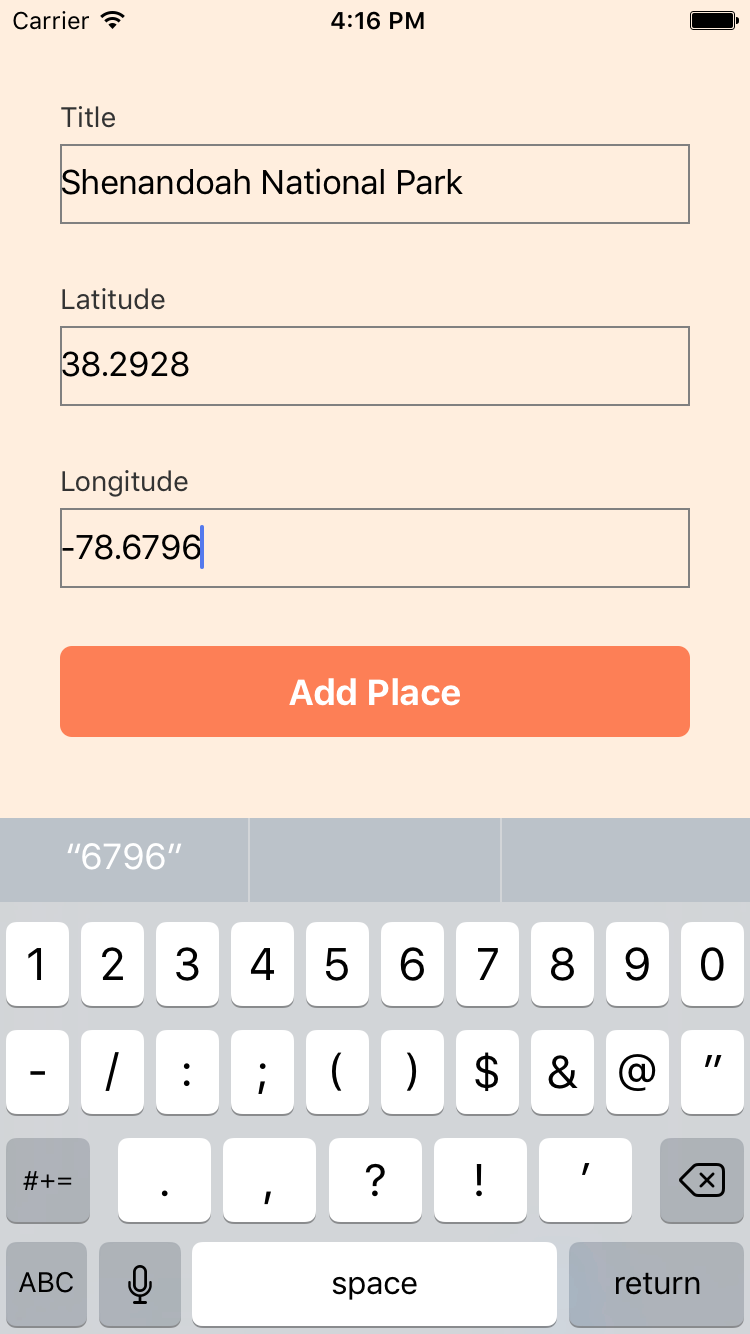
Handling the keyboard is a bit of a challenge. If you look closely, latitude and longitude have numeric input. The keyboardType of the component can be set to numeric to enable numeric input. But, numeric input does not allow negative numbers. Both latitude and longitude can be negative. To allow negative numbers, the keyboardType should be set to numbers-and-punctuation.
When the button in the AddPlace component is pressed, the place should be added to the map. We will go back to the AddPlace component to add that functionality. The three TextInput components are mandatory for the user to fill out. If there is no text, an error message should appear. The text value and error message should be stored in the state. Initialize the state in the constructor.
constructor() {
  super();
  this.state = {
    title: '',
    latitude: '',
    longitude: '',
    titleError: '',
    latitudeError: '',
    longitudeError: ''
  };
}
The TextInput component should be a controlled component. The value is derived from the state. The onChangeText event is handled to set the corresponding state.
<TextInput
  style={styles.textInput}
  value={this.state.title}
  onChangeText={(title) => this.setState({ title })}
>
</TextInput>
The onPress event of the TouchableHighlight component should be handled. The event handler checks if all the fields are filled out. It displays the error messages, if any. If there are no error messages, the location is added to the map.
handleAddPlace() {
  const { title, latitude, longitude } = this.state;
  let titleError = '';
  let latitudeError = '';
  let longitudeError = '';
  if (!title) {
    titleError = 'Name is required.';
  }
  if (!latitude) {
    latitudeError = 'Latitude is required.';
  }
  if (!longitude) {
    longitudeError = 'Longitude is required.';
  }

  this.setState({
    titleError,
    latitudeError,
    longitudeError
  });

  const isError = titleError || latitudeError || longitudeError;
  if (!isError) {
    this.props.onAddPlace({
      title,
      latitude: parseFloat(latitude),
      longitude: parseFloat(longitude)
    });

    AlertIOS.alert(
      'Place added',
      'Your place is added to the map. Click on the Favorites tab to view.'
    );
  }

  dismissKeyboard();
}
The AlertIOS component is part of React Native. It is used to display a modal dialog after the action is completed. We also dismiss the keyboard using the dismissKeyboard utility.
import dismissKeyboard from 'dismissKeyboard';
dismissKeyboard();
The error messages are displayed in a custom Error component. Error component is a functional component that accepts a message via props and displays it.
const Error = (props) => {
  return (
    <Text style={styles.error}>{props.message}</Text>
  );
}
The Error component is placed below the TextInput component and is rendered only when there is an error.
<Text style={styles.text}>Title</Text>
<TextInput
  style={styles.textInput}
  value={this.state.title}
  onChangeText={(title) => this.setState({ title })}
></TextInput>
<Error message={this.state.titleError} />
The AddPlace component should be placed within the second tab of the Places component. The onAddPlace prop is used to pass the location to the parent component.
<TabBarIOS.Item
  title="Place"
  icon={require('./assets/pin.png')}
  selected={this.state.selectedTab === 1}
  onPress={this.handleTabPress.bind(this, 1)}
>
  <AddPlace onAddPlace={this.handleAddPlace.bind(this)}  />
</TabBarIOS.Item>
The handleAddPlace method of the Places component adds the location to the annotations state. The state is immutable. The annotations array is copied over to a new array. The new array adds the location as another annotation. The state is updated with the new array.
handleAddPlace(annotation) {
  const annotations = this.state.annotations.slice();
  annotations.push(annotation);
  this.setState({ annotations });
}
The screenshot of the iOS simulator for adding a place is shown below.
E. Integration with Maps app
We want to integrate our app with the Map app for driving directions. To do this, we add a button to each annotation. On clicking on the button, the user is taken to the Map app for traffic navigation. We will start with making a few changes to the PlaceMap component. The render method of the component is modified as below.
render() {
  const { annotations } = this.props;
  annotations.forEach(annotation => {
    annotation.rightCalloutView = (
      <TouchableHighlight
        style={styles.button}
        onPress={this.handleNavigation.bind(this, annotation.latitude, annotation.longitude)}
      >
        <Text style={styles.buttonText}>Navigation</Text>
      </TouchableHighlight>
    );
    })
  return (
    <View style={styles.view}>
      <MapView
        style={styles.map}
        region={this.region}
        annotations={annotations}
      />
    </View>
  );
  }
}
Each annotation has a leftCalloutView, rightCalloutView, and detailCalloutView. These views display a custom component on the annotation. We will add a TouchableHighlight component to the rightCalloutView. The onPress event handler will open the Maps app for traffic navigation.
handleNavigation(la, lo) {
  const rla = this.region.latitude;
  const rlo = this.region.longitude;
  const url = `http://maps.apple.com/?saddr=${rla},${rlo}&daddr=${la},${lo}&dirflg=d`;
  return Linking.openURL(url);
}
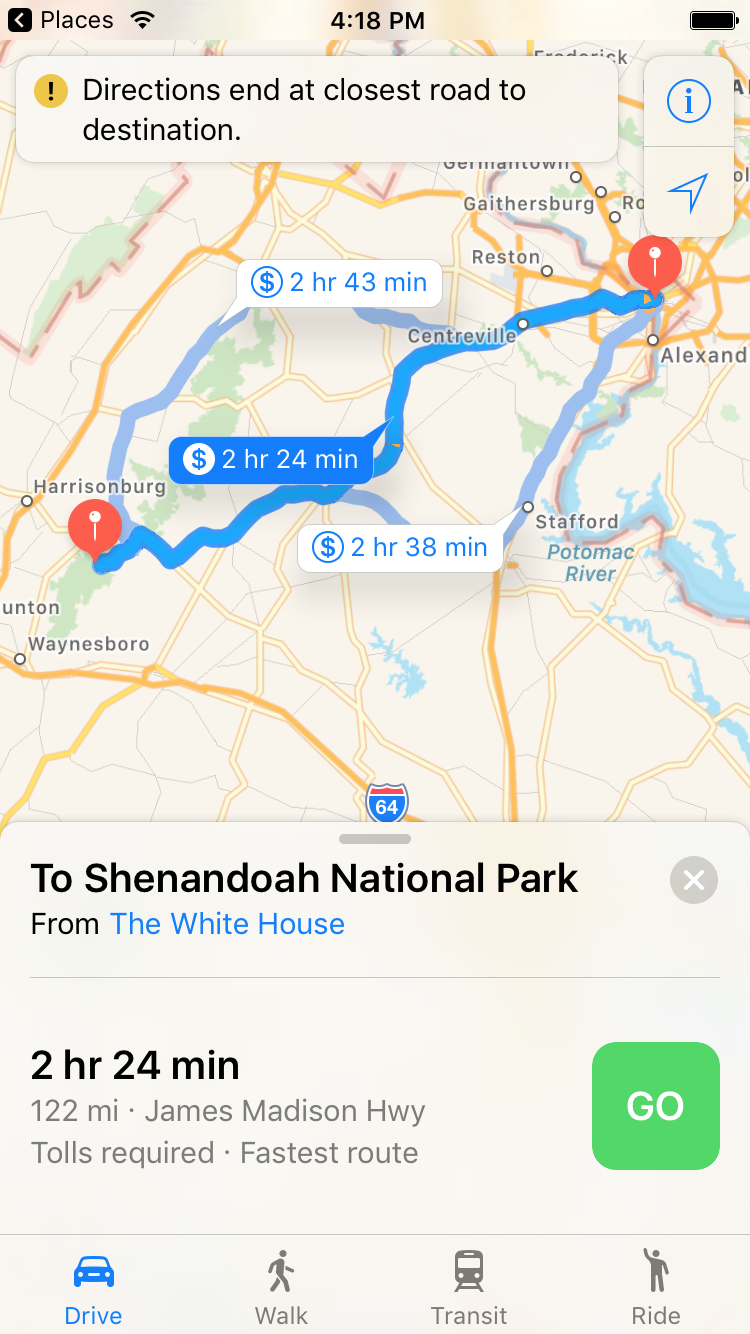
The linking module is used to handle incoming deep links and open external deep links. Deep links allow opening another app in the mobile device with some action. The deep link for the Maps app is http://maps.apple.com. The query parameters passed to the Maps app are used to generate driving directions. The saddr parameter provides the start address which is optional. If the start address is omitted, driving directions are generated from the user's current location. The daddr parameter provides the destination address. The dirflg=d parameter generates driving directions for cars.
The screenshot for the iOS simulator after the Maps app is opened is shown below.
F. Wrapping up
We built a geolocation travel app for the iOS platform in this tutorial. We created the initial project using react-native init command. We set tabbed navigation for our app. The first tab opens a MapView component with favorite places pinned to the map. The second tab allows the user to add more places to the map. Finally, we integrated our app to the Maps app for traffic navigation using callouts on the annotation.
The tutorial has an accompanying GitHub project.

Thanks you!
Please help…i am trying to export the PlaceMap component to the Places component…im not sure how the syntax works…pls reply…
The source code is available in the accompanying git repo. https://github.com/vijayst/react-native-places/blob/master/Places/index.ios.js.
import PlaceMap from ‘./place_map’; should import the PlaceMap component where place_map is the name of the module / file where the component is implemented.
Okay, thanks for replying so fast…also, do you have to export Places to place_map.js so that you can set:
You skipped a lot of steps in this tutorial, probably making a lot of assumptions about the reader’s skill level. Just wanted to point out that the entire add_place.js component part of this tutorial skips a lot (adding the error messages and ontextchange to each text input, adding the handleAddPlace method to the touchablehighlight element and binding it, etc). May want to make this a little more comprehensive. Otherwise, great work! And thanks for putting this out there!