Beginner’s Guide to Using Git and GitHub

What is Git?
Git is a Version Control System (VCS) that keeps track of all the changes to your project files, allowing you to work with your team on the same code while saving you a lot of confusion that tends to happen when multiple people are editing the same files. Git stores every record of every change that you or someone else makes to the project, and this makes keeping track of your progress easy. If you need to look at your old code, or if you need to see what or who modified it – the record is always there.
What is GitHub?
GitHub acts as remote storage for your Git repositories and provides a really neat and simple way for people to collaborate and contribute to development projects. If you are looking for ways to contribute to open source, GitHub is the place to go. If you are new to development, you can use GitHub as a learning tool by analysing popular code repositories.
Let’s Get Started
If you haven’t installed Git yet, follow the instructions here. And remember, using Git does not require having internet connection, since all the files are stored locally.
First, let’s set your identity. Git uses that information for every commit.
git config --global user.name "Your Name"git config --global user.email mail@example.com
Create Repository
The repository is like a container of your project. It holds all the files and information about the project. Most of the git commands are not available outside of the initialized repository.
Note: the name is not important, and all the information about the repository is stored in the .git folder – so you can rename it at all times.
To create new repository, you type this command (new_project is the directory you want to create a repository at):
git init new_project
You can also take the following steps to create a git repository for your existing project:
cd my_current_projectgit init
Now that we have a fresh repository for our project, let’s make a project description file:
echo "To-do list web app, organize and share your to-do's" > README.mdgit add README.mdgit commit -m "Initial Project Commit"
Think of a git commit as saying “okay git, you can save this state of the project and If I will ever need to come back to look at it, I will let you know.” And try to get in the habit of committing changes regularly. Trust me, it will be your lifesaver.
Note: When you add new files to your project, git does not track them, you have to add them to the staging area first as we did above using git add.
Staging Area
The staging area stores information and lets you control precisely what will go into your next commit.
git status will show the current version control status about untracked files, and ones that have any possible committable changes.
Try using git status. If you followed what I did, you should get a “working directory clean” message from git. Let’s add some new files to our repo and try again.
touch index.php style.css script.jsgit status
git status will now show you a list of untracked files, which means if you were to make changes to these files, git will not track them. To test that, let’s modify one of the files.
echo "<html>" > index.phpgit diff
git diff shows the differences between your working directory and the staging area. But because we haven’t staged the files yet, the output is pretty obvious, and git doesn’t see any changes. Let’s change that by adding files to the staging area.
git add index.php script.js style.cssgit echo "<head></head></html>" >> index.phpgit diff
As you see now, git knows exactly what was modified in the file, and changes for these files will be tracked at all times. But note that each time you modify a file, it needs to be re-added to the staging area. Think of it as letting git know that you are done with that file, and once the next commit is issued, git can safely save the state of the file. However, if you are done with all of the files and you want to commit changes to all files at once, there’s an option to do it.
Extra Note: > redirects and overwrites, while >> redirects and appends.
git commit -m "Initial project files"
Now think which state of index.php we have committed, the one with HTML tags or the empty file? If it’s not clear for you, this should clear this out for you:
git commit -a -m "Initial project files + HTML Markup"
See the difference by using the option -a , where you indicate that all files should be committed.
Note: Be aware that option -a only applies for the files that are tracked by git. If you have untracked files, you still have to add them to the staging area before committing.
To review your previous commits, use git log, and it will display all the commits you have made so far. To go back to a certain state of the project, use the git checkout command and provide the commit identifier.
git loggit checkout 4ea35ab9d43a8d6521bace280ae24477f799f132
However, you actually don’t need to use the full length of identifier. Usually the first 5 characters are enough:
git checkout 4ea35
Once you check out, your project directory and its content will be exactly the same as it was once the commit was issued. To go back to your production branch, use:
git checkout master
Branching
Think of branching as creating a separate copy of a certain state of a project. Let’s say you are working on your website and you would like to add a new feature. To do that, just branch out your latest version and add the feature. Once you are happy with the result, you can go ahead and merge it.
git branch feature_xgit checkout feature_xecho "function(){...}" > script.jsgit commit -a -m "Function x done"
Note: You won’t see any changes in the master branch until you merge them.
To get a list of branches, use git branch.
To merge two branches together, go to the branch you want it to be merged with. In our case, let’s use master branch.
git checkout mastergit merge feature_x
All the changes and timelines are now merged. But sometimes you might encounter merge conflicts git doesn’t know how to resolve. Let’s create the merge conflict by editing the same line on both branches:
git checkout feature_xecho "body{background-color:red;}" > style.cssgit add style.cssgit commit -m "BG color change"git checkout masterecho "body{background-color:blue;}" > style.cssgit add style.cssgit commit -m "BG color change"git merge feature_x
The simplest way to resolve merge conflict is just edit the conflicted file. Upon opening the conflicted file, you will see that git made some changes to the file :
<<<<<<< HEAD
body{background-color:red;}
=======
body{background-color:blue;}
>>>>>>> feature_x
However, if you decide to fix it, git will accept it as a valid solution.
HEAD - latest commit in the current branch
==== - separator between the two versions
<<<< - start of the conflict
>>>> - end of the conflict
Once you have decided which color you want your background to be and removed the conflict:
git add style.cssgit commit -m ""
When we merge branches, git automatically generates a commit message, so once the issue is resolved it still knows that this file is a part of the merge process, so you can leave the -m option empty and git will generate a message for you.
Branching model
You don’t need to go to deep on this right now, but just know that it’s there. When you will start using git for you daily projects, be aware that you can use this successful branching model by Vincent Driessen. It offers a nice development/release structure and is quite easy to comprehend.

Original blog post: http://nvie.com/posts/a-succesful-git-branching-model
Remote Repository (GitHub)
We will be using GitHub as our remote repository, but it can be anywhere. You can share it on your local network or have a server for it. It is completely optional to have it, but if you are planning to share your project or collaborate with other people, it’s a good idea to have one. GitHub offers two different ways to host your repository: private or public. If you want to host it privately, there are paid subscriptions for that, but as long as you don’t need it, you can use GitHub for free.
Creating a New Repository
There are few ways to create a GitHub repository. You can do it directly at GitHub – on the top right corner, click on the plus sign and chose new repository. Alternatively, you can create a repository with a command-line using GitHub’s API and cURL. You can also download a desktop application for managing your repositories.
Directly at GitHub:

There are a few options you should look at when creating a new repository – privacy settings, license, and git ignore file.
If you are a true Open Source admirer – generally an MIT license should be good to go, but if you are still not sure and want to read more about it, go here. Also, you have an option for the .gitignore file to be added to your repository, and it does exactly what it sounds like it would do – it ignores files and does not track them. If you have some sort of personal configuration files for your text editor and they are not really part of the project, you might want to have that in your ignore file.

Command-Line:
The GitHub API uses default settings if a user doesn’t provide any parameters. If you want to change any of these, you can easily do that by adding extra parameters between brackets.
curl -u 'YOUR_GIT_HUB_ID' https://api.github.com/user/repos -d '{"name":"REPOSITORY_NAME",description":"DESCRIPTION"}'
Let’s say you want to make a repository private:
curl -u 'YOUR_GIT_HUB_ID' https://api.github.com/user/repos -d '{"name":"REPOSITORY_NAME","description":"DESCRIPTION","private":true}'
Here’s the complete list of attributes you can use when creating a new repo:
If you are planning to create a lot of repositories through the command line, I suggest making shell function, so you don’t have to type the whole thing out. I will cover that at the end of the tutorial.
Once you have a repository ready, let’s push our local project to GitHub.
git remote add origin https://github.com/YOUR_USERNAME/PROJECT_NAME.gitgit push -u origin master
And that’s it. All your files are now accessible via GitHub.
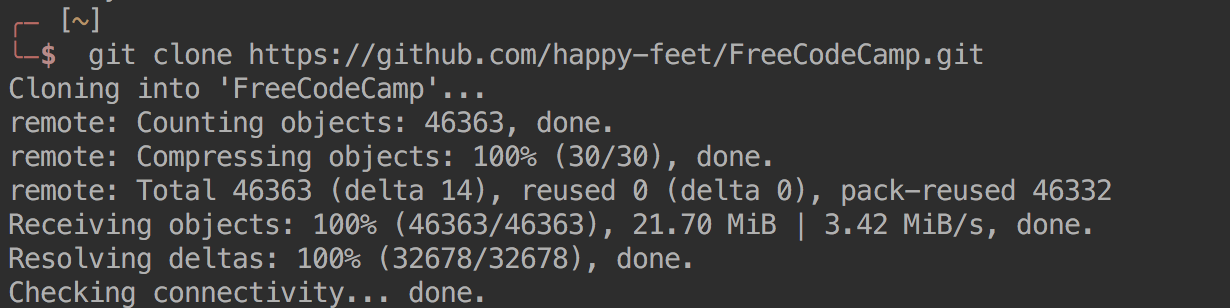
Now let’s say you want to work on your project, but you don’t have access to your project files. The only thing you need to do is to clone the repository and you are good to go:
git clone https://github.com/YOUR-USERNAME/YOUR-REPOSITORY
If you forgot the name of your repository, you can always find it on GitHub:

Once you are done for the day and all commits are ready to be pushed, use git push and that’s it! You have updated your repository.
git push -u origin master
Contributing
You can find a project you want to contribute to by using GitHub’s search feature. You can search for projects in your favourite language, or you can narrow down your search results by using search qualifiers. When you find a project you want to work on, you should familiarise yourself with the guidelines on getting involved. This can usually be found in the CONTRIBUTING.md file, and it’s a good idea to check the commit log too, as it helps you get familiar with the structure and the vocabulary of the commit messages for that project.

Here are the most important parts to know when you are about to contribute to the project:
- Fork – Makes your own copy of the project and allows you to freely work on it without affecting the original project. Fork a project if you are planning to contribute to it, or if you just want to use the project as a starting point for yours.
- Issues – Keeps track of bugs, enhancements and future feature suggestions. This section is generally used as a discussion board.
- Commits – This is where your git log goes, as it contains all of the commit messages
- New pull request – If you have solved an issue or added a feature and you want to offer your code to be part of the project.
- CONTRIBUTING.md – Specific guidelines for how one can contribute to the project.

Here’s the general flow you have to go through when you are contributing:
Step 1: Fork the project:

Step 2: Clone repository to your local machine


When you clone the repository, its remote location is set to your forked project. If some new changes are made to the original project and you try to pull them, git won’t see them. So to keep up with the original repository you need to set up upstream.


Now you have access to both repositories.
To sync a fork with original repository, use git fetch.

Step 3: Create a feature/fix branch
Once you have the project files ready, let’s make feature branch that has some logical meaning to it.
Command-Line:


At GitHub:

Step 4: Push back the good stuff
After you made your changes and made a specific commit to them, go ahead and push it back to GitHub.

Step 5: Create a pull request
Finally, choose your feature branch and compare it to your base branch. When you are ready, click the create pull request button.
Congrats! You have made your first pull request! Now just sit back and wait for someone to look at your code. If your pull request has been declined, don’t worry. That happens to everyone – just make any requested changes to your code, and open another pull request.

Step 6: Get a beer and be proud of yourself
Shell Function
If you are not sure what shell you are using, you can find it out by typing echo $SHELL in your terminal window. Then, based on what you see, you will need to add this function to your startup shell script file. If you are using bash, usually it’s found at ~/.bashrc, for zsh users ~/.zshrc. If you are using some other shell, please google the location of your startup file and note that you might need to modify the following function:
github-new() {

   repo_name=$1

   while [ "$repo_name" = "" ]
   do
      echo "Enter name of a new repository:"
      read repo_name
   done

   github_user="YOUR-USERNAME"

   while [ "$github_user" = "" ]
   do
      echo "Enter your GitHub username:"
      read github_user
   done

   curl -u "$github_user" https://api.github.com/user/repos -d'{"name":"'$repo_name'"}'

}
Save it, restart the terminal, and create repository with:
github-new NAME_OF_REPOSITORY
Conclusion
I haven’t covered everything there is to know, but it should be more than enough to get you started. If you followed through the whole article, you should now know how to use basic git commands and how to get your projects online. In addition, you now know how to make contributions to open source projects. I also encourage you to do so, as it’s a really powerful way to get yourself out there and receive feedback from experts. Most importantly, don’t get discouraged if you feel confused – it’s a lot of information for one day, and it’s natural that you don’t remember or completely comprehend some parts just keep practising and come back for the reference if you get stuck.
About the Author:
 Tomas Laurinavicius is a web, user interface and user experience designer who has been focusing on usable and visually aesthetic web and mobile app design for over 5 years.